Operator Manual

Every page, tab & feature

A complete reference to the HydraSocket console - a Chrome extension and native host for authorized network security testing. Each tool below has a step-by-step guide and a table of its controls.

39Tool pages
7Sections
586+Documented controls
⚠
Authorized testing only. HydraSocket reaches raw sockets and can send intrusive traffic. Use it solely against systems you own or have written permission to test, and record that authorization on the Engagement page.

Screenshots show the console before a host is connected, so output and results panels appear empty. Once the native host is running, those fill with live data.

The interface

The console is a left sidebar of tool pages beside a working area. Every page title carries a β€œ?” that opens its full guide; every field and button has a hover tooltip. These controls sit in the top bar and sidebar on every page.

ControlWhat it does
Sidebar SearchType to filter the page list in the sidebar by name.
Theme ToggleSwitch between light and dark appearance.
Workspace SaveSave the current workspace β€” open connections' settings, form values and layout β€” to restore later.
Workspace LoadRestore a previously saved workspace.
Sidebar CollapseCollapse or expand the sidebar to free up horizontal space.

Engagement

Plan and track an authorized test: scope, findings, automation and the at-a-glance dashboard.

πŸ“ŠDashboard

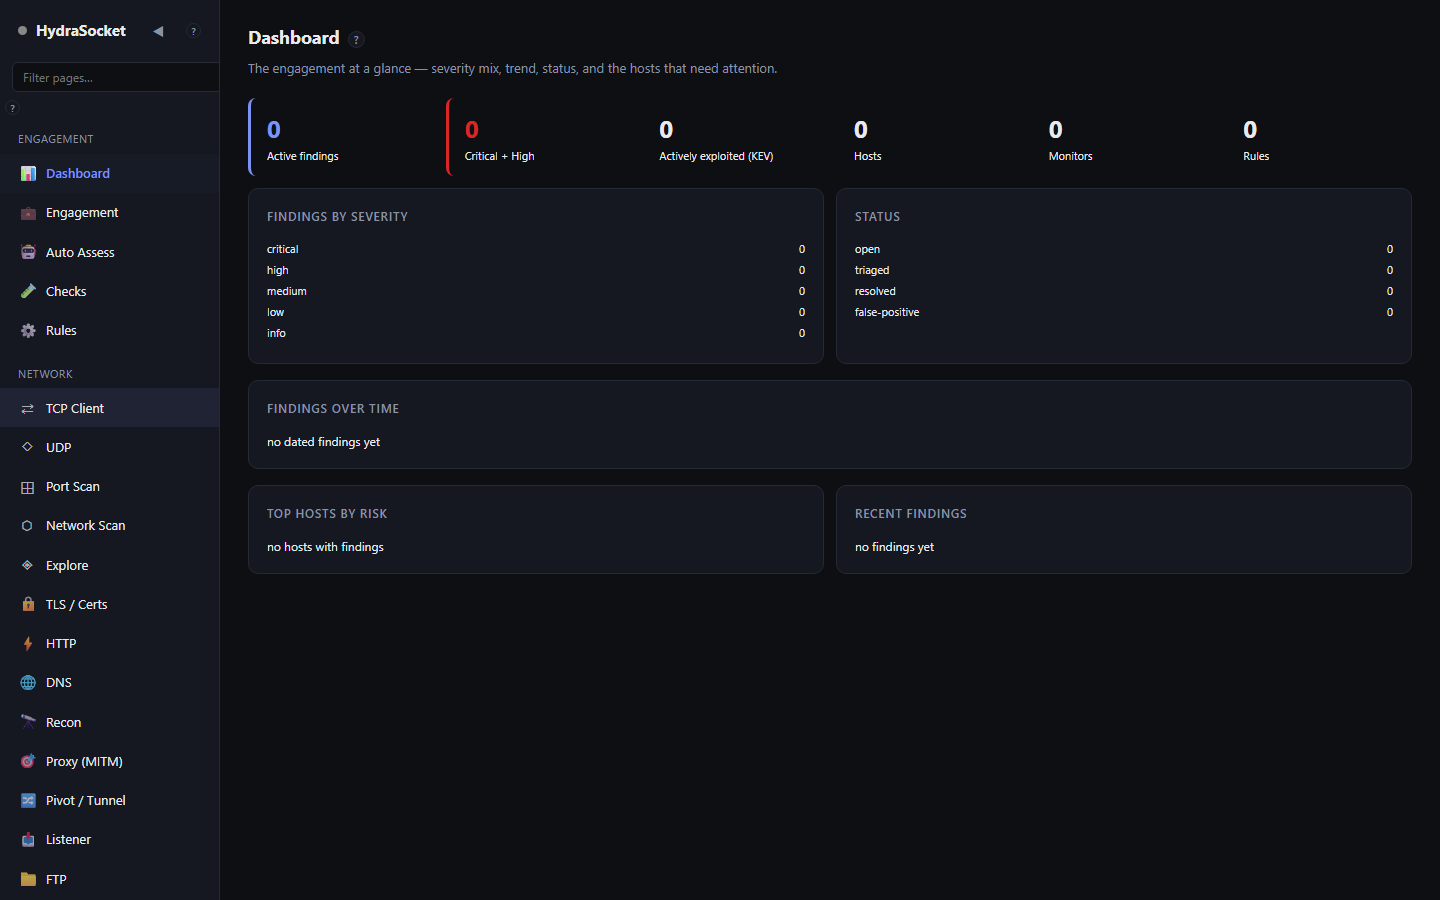
The engagement at a glance β€” severity mix, trend, status, and the hosts that need attention.

HydraSocket screen

The Dashboard is a read-only, at-a-glance summary of the engagement you are currently working in. It does not run anything itself β€” it reflects the findings and scans you have already gathered.

What each panel shows

  • Findings by severity β€” how many critical / high / medium / low / info findings exist right now.
  • Status β€” the split between open, confirmed, triaged and resolved findings.
  • Findings over time β€” a trend line as findings accumulate during the test.
  • Top hosts by risk β€” the hosts with the heaviest or most severe findings, so you know where to focus.
  • Recent findings β€” the latest discoveries as they land.

How to use

  1. Run scans and assessments elsewhere (Port Scan, Network Scan, Auto Assess, Checks, Injection, and so on).
  2. Come back here to see the overall shape of the engagement without digging through raw results.
  3. Use Top hosts by risk to pick your next target, then jump to Findings for detail.

The numbers follow the active engagement. Switch or start a new engagement on the Engagement page and the Dashboard repopulates from that engagement's data.

πŸ’ΌEngagement

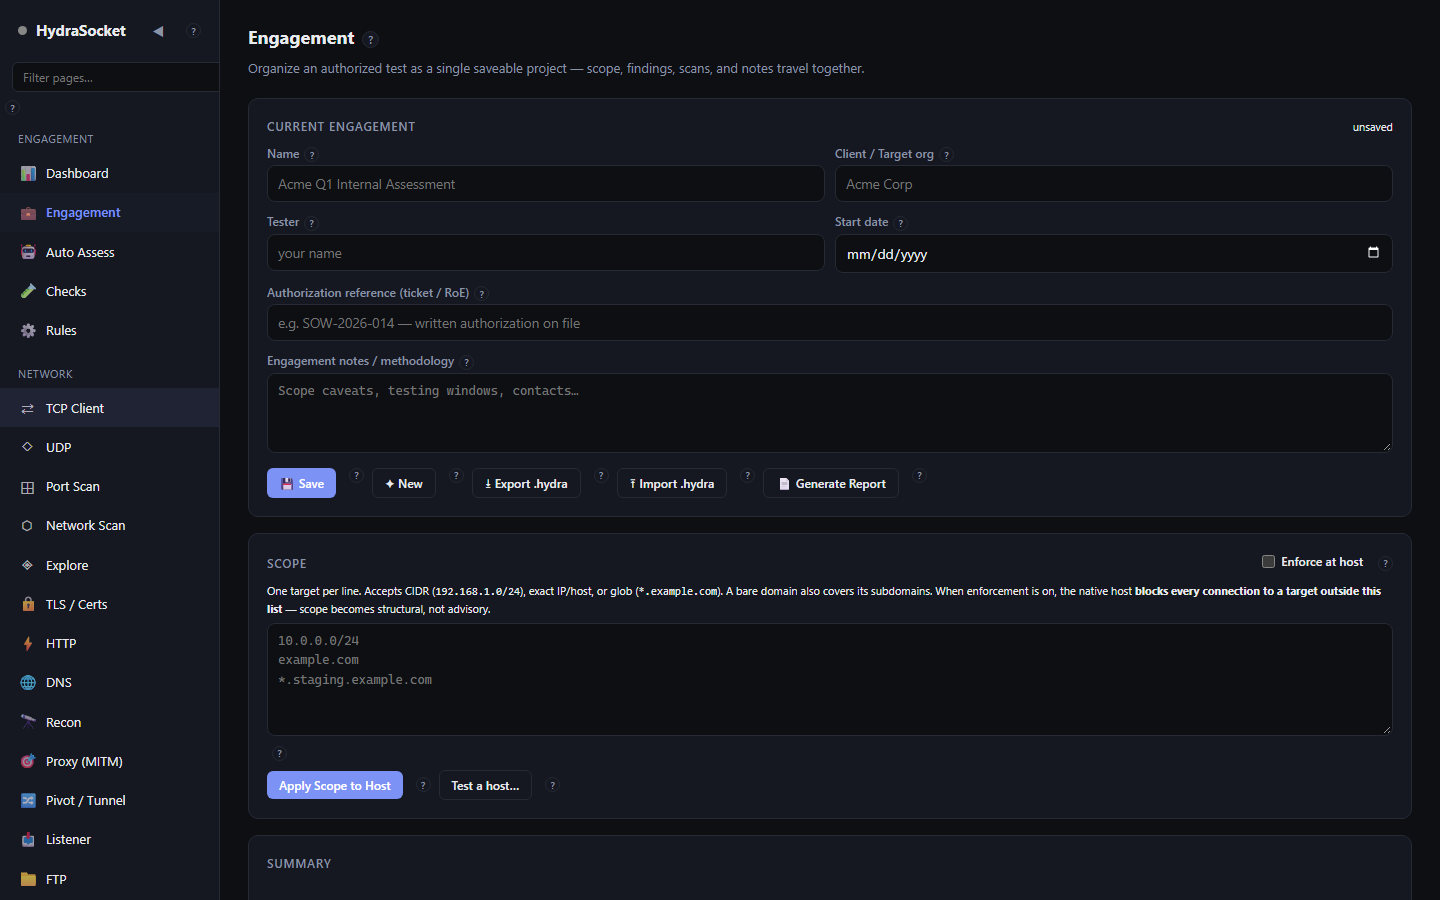
Organize an authorized test as a single saveable project β€” scope, findings, scans, and notes travel together.

HydraSocket screen

An Engagement is the container for one authorized test. It keeps scope, findings, scans and notes together so an assessment is a single, portable project you can save, reopen and hand off.

How to use

  1. Fill in Name, Client / target org, Tester and Start date so the engagement and its report are properly labelled.
  2. Record your Authorization reference β€” the statement of work, rules-of-engagement document or ticket that proves you are permitted to test. Keep the written authorization on file.
  3. Use Engagement notes for methodology, testing windows, contacts and scope caveats.
  4. Define Scope below: list in-scope targets, one per line, as IPs, CIDR ranges, hostnames or wildcards such as *.staging.example.com.
  5. Turn on Enforce scope and click Apply scope to host so the native host blocks operations against anything out of scope. Use Test a host to check whether a target is covered.
  6. Click Save as you go. Use Export .hydra to produce a single shareable file, and Import .hydra to reopen one.

Tips

  • Scope enforcement is a guardrail against testing the wrong thing β€” set it before you start scanning.
  • Generate Report turns the engagement's findings into a formatted deliverable.

Only test systems you are explicitly authorized to test. The authorization reference exists so that proof travels with the work.

Controls on this page 15
ControlWhat it does
NameA name for this engagement.
Client / Target orgThe client or target organization being tested.
TesterWho is performing the test.
Start dateEngagement start date.
Authorization reference (ticket / RoE)Reference to your written authorization (statement of work, rules of engagement, ticket). Keep proof of authorization on file.
Engagement notes / methodologyMethodology, scope caveats, testing windows and contacts.
πŸ’Ύ SaveSave the engagement.
✦ NewStart a fresh engagement.
β­³ Export .hydraExport the whole engagement as a .hydra file.
β­± Import .hydraImport an engagement from a .hydra file.
πŸ“„ Generate ReportGenerate a report for this engagement.
Enforce at hostEnforce the scope below β€” the host blocks operations against targets that aren't in scope.
10.0.0.0/24
example.com
*.staging.example.comIn-scope targets, one per line. Accepts IPs, CIDRs, hostnames and wildcards (e.g. *.staging.example.com).
Apply Scope to HostSend this scope to the host so it can enforce it.
Test a host…Check whether a given host falls inside the current scope.

πŸ€–Auto Assess

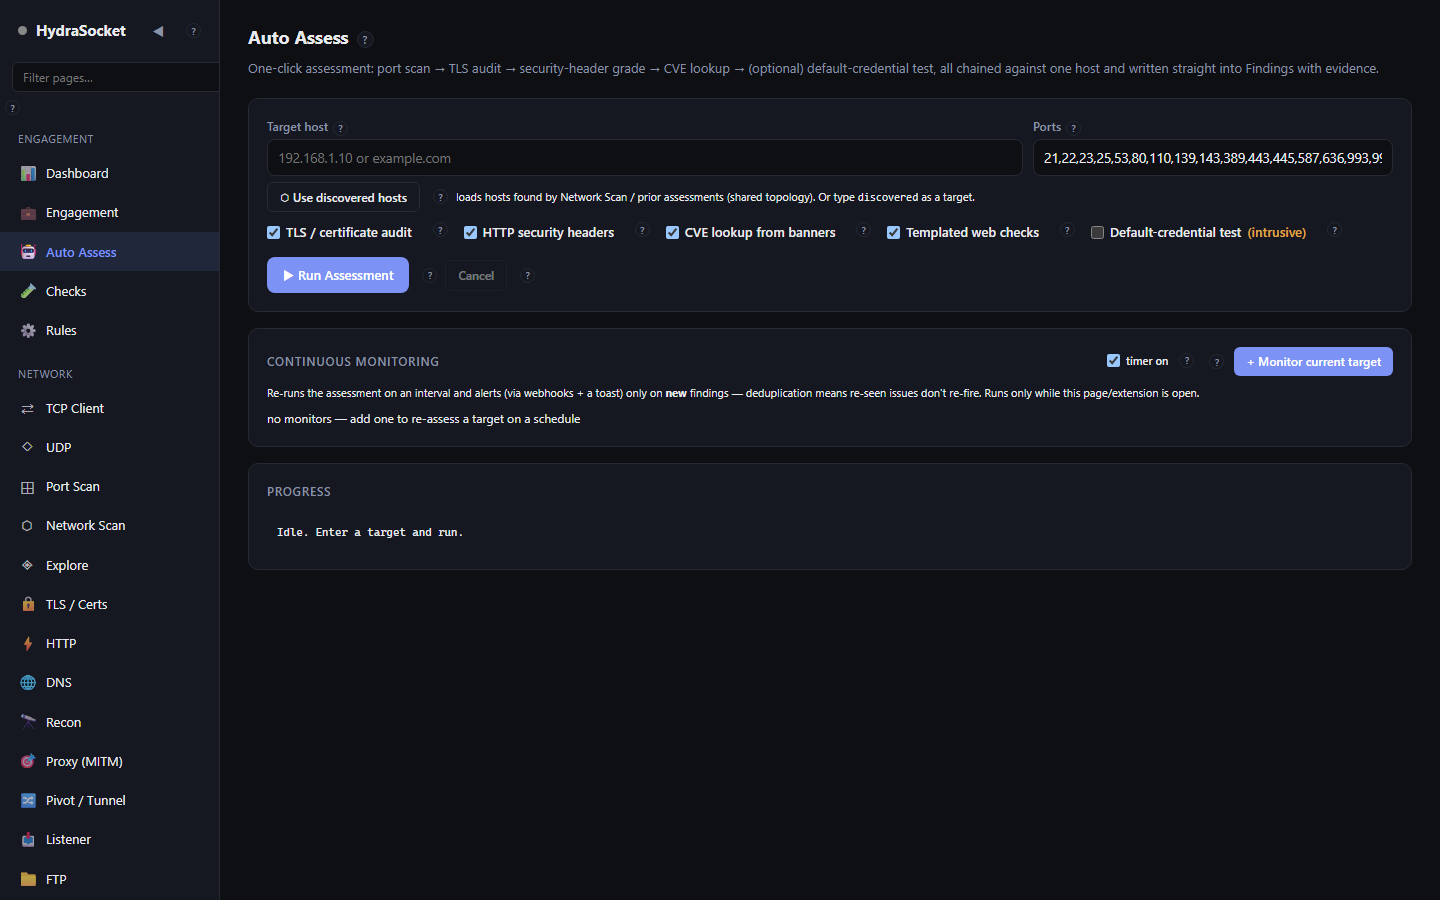
One-click assessment: port scan β†’ TLS audit β†’ security-header grade β†’ CVE lookup β†’ (optional) default-credential test, all chained against one host and written straight into Findings with evidence.

HydraSocket screen

Auto Assess chains several tools against a single host in one click: a port scan, then optional TLS audit, security-header grade, CVE lookup, templated checks and a default-credential test. Everything it finds is written straight into Findings with evidence.

How to use

  1. Enter a Target host, or click Use discovered hosts to pull one in from a Network Scan.
  2. Set the Ports to scan as the first step.
  3. Tick the stages you want: TLS, Headers, CVE, Checks and Creds. Each adds time but more coverage.
  4. Click Run Assessment. Watch the Progress panel as each stage completes.
  5. When done, use View Findings to review results, or Generate Report to export them.

Continuous monitoring

  • Monitor current target adds the host to a watch list; enable Continuous Monitoring to re-assess it on a schedule and surface changes over time.

The credential-test stage actively tries default logins. Only run it against systems you are authorized to test.

Controls on this page 14
ControlWhat it does
Target hostHost to run the chained assessment against.
PortsPorts to scan as the first step.
⬑ Use discovered hostsFill the target from hosts already discovered in a sweep.
TLS / certificate auditInclude the TLS/certificate audit step.
HTTP security headersInclude the security-header grade step.
CVE lookup from bannersInclude the CVE lookup step.
Templated web checksInclude the templated-checks step.
Default-credential test (intrusive)Include the default-credential test step.
β–Ά Run AssessmentRun the assessment chain and write results to Findings.
CancelStop the assessment.
View Findings β†’Jump to the Findings page.
πŸ“„ Generate ReportGenerate a report from the assessment.
timer onEnable continuous monitoring of the saved targets.
+ Monitor current targetAdd the current target to continuous monitoring.

πŸ§ͺChecks

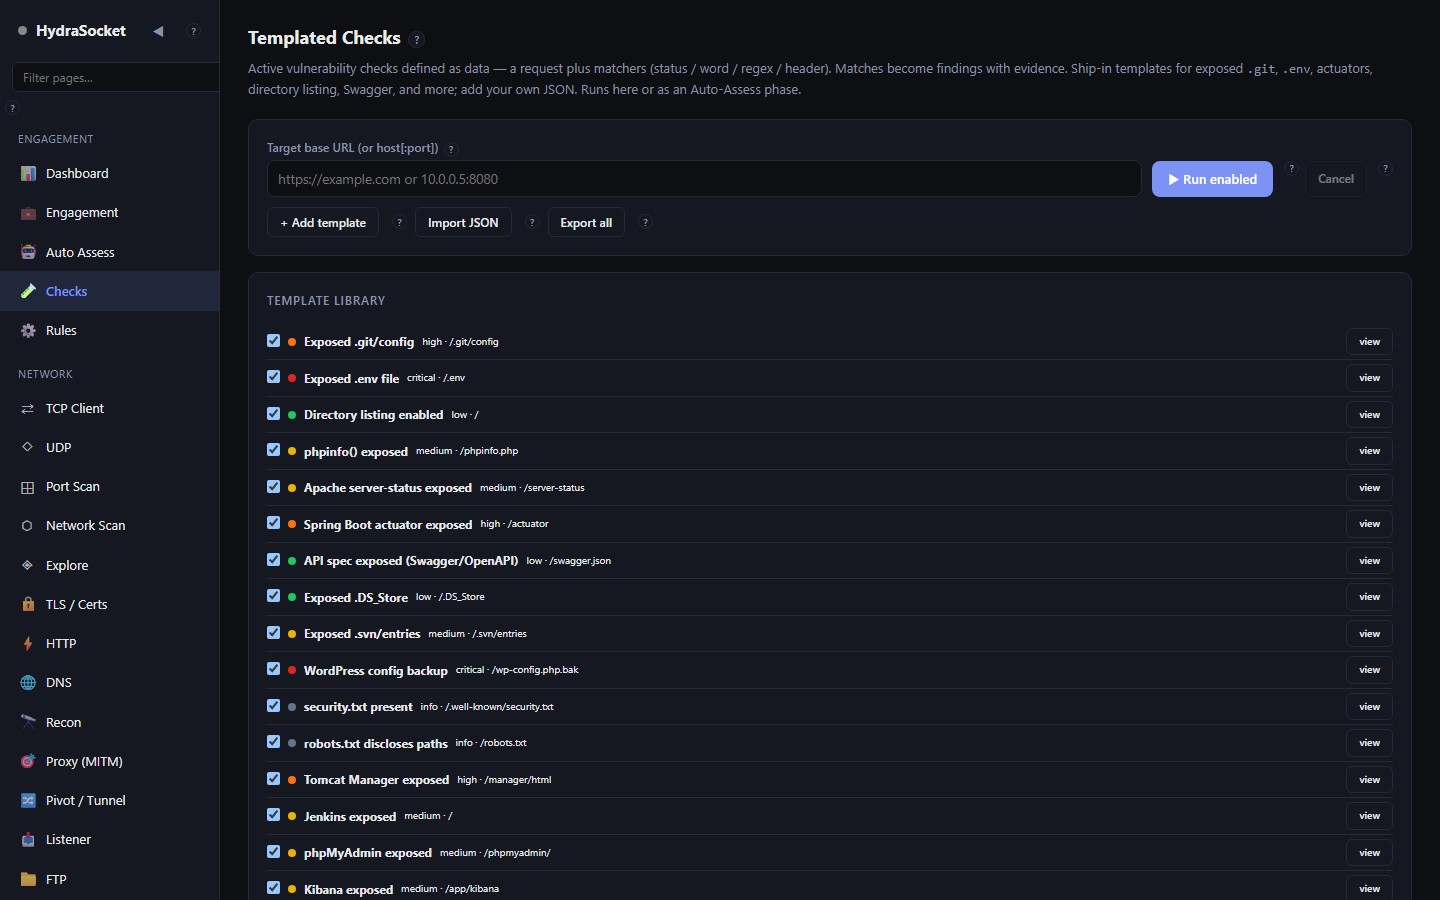
Active vulnerability checks defined as data β€” a request plus matchers (status / word / regex / header). Matches become findings with evidence. Ship-in templates for exposed .git, .env, actuators, directory listing, Swagger, and more; add your own JSON. Runs here or as an Auto-Assess phase.

HydraSocket screen

Templated Checks are active vulnerability checks defined as data rather than code: each template is a request plus one or more matchers (status code, word, regex or header). When a response matches, it becomes a finding with the matching evidence attached.

How to use

  1. Enter the Target base URL or host:port the checks should run against.
  2. Review the Template library and enable the checks you want to run.
  3. Click Run enabled. Matches appear in Results and flow into Findings.

Managing templates

  • Add template creates a new check β€” define the request and the matchers that decide a hit.
  • Import JSON / Export all move template sets between engagements or share them with teammates.

Checks send real requests to the target. Keep them in scope and expect them to appear in the target's logs.

Controls on this page 6
ControlWhat it does
Target base URL (or host[:port])Base URL or host[:port] the enabled checks run against.
β–Ά Run enabledRun every enabled check template against the target.
CancelStop the running checks.
+ Add templateCreate a new check template.
Import JSONImport check templates from JSON.
Export allExport all check templates.

βš™οΈRules

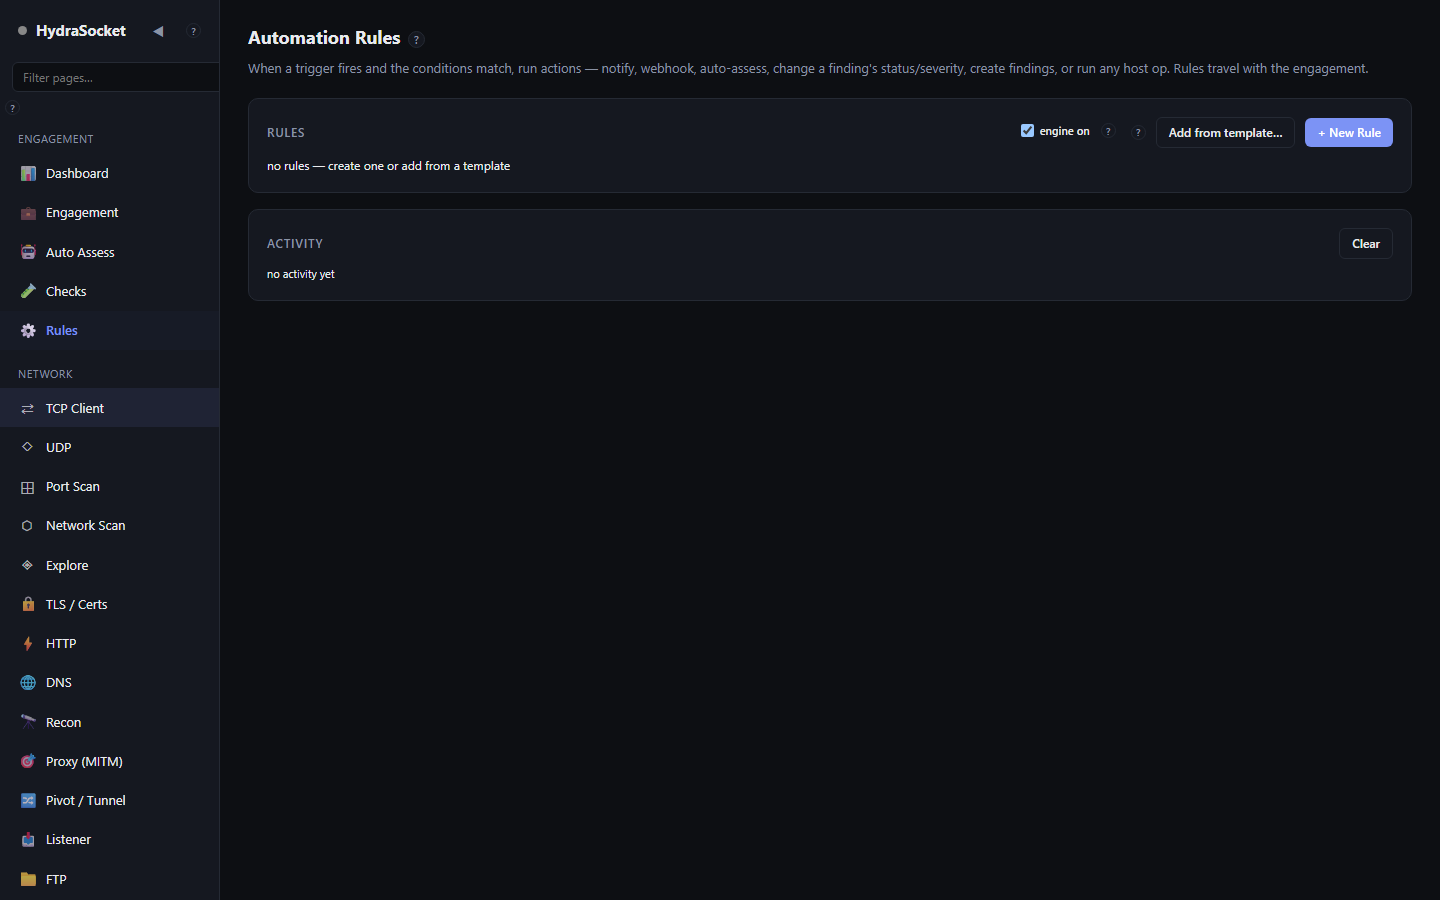
When a trigger fires and the conditions match, run actions β€” notify, webhook, auto-assess, change a finding's status/severity, create findings, or run any host op. Rules travel with the engagement.

HydraSocket screen

Automation Rules react to events during an engagement. When a trigger fires and the conditions match, the rule runs one or more actions. Rules are saved with the engagement and travel with it.

How to use

  1. Turn on the master switch at the top to enable the automation engine.
  2. Click New Rule (or Add from template for a ready-made one).
  3. Choose a Trigger β€” for example a new finding or a newly discovered host.
  4. Add conditions and set Match to all or any, to decide when the rule should fire.
  5. Add actions: notify, call a webhook, auto-assess, change a finding's status or severity, create findings, or run any host operation.
  6. Set a cooldown so the rule does not fire repeatedly, then Save. Use Test with sample event to dry-run it.

Tips

  • Start with a template, then adjust its conditions β€” it is faster than building from scratch.
  • The Activity panel logs every firing so you can see what automation has done.
Controls on this page 13
ControlWhat it does
engine onMaster switch for the automation engine.
Add from template…Add a rule from a ready-made template.
+ New RuleCreate a new rule.
NameA name for this rule.
enabledEnable or disable this single rule.
TriggerThe event that makes this rule fire (e.g. a new finding, a host discovered).
MatchWhether all or any of the conditions must match.
Cooldown / interval (sec)Minimum seconds between firings, to avoid repeat actions.
+ conditionAdd a condition the event must match.
+ actionAdd an action to run when the rule fires.
Save RuleSave the rule.
Test with sample eventFire the rule against a sample event to see what it would do.
CancelDiscard changes to the rule.

Network

The core network tools - raw sockets, scanning, the HTTP workbench, proxy, and protocol clients.

⇄TCP Client

Open a raw TCP connection and exchange data

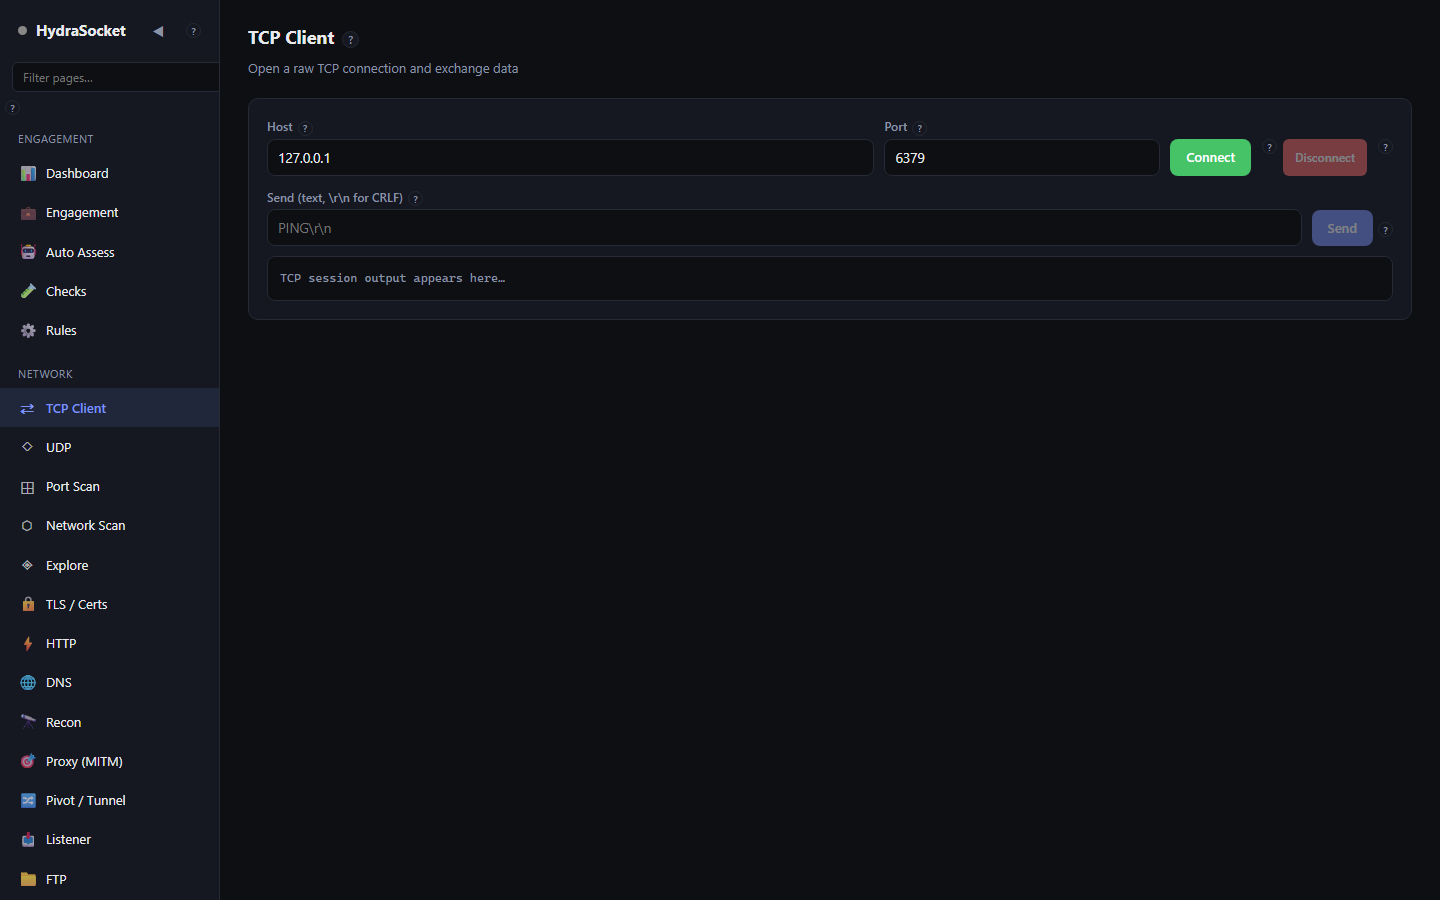
HydraSocket screen

The TCP Client opens one raw TCP connection and lets you exchange bytes directly β€” no protocol assumptions, no browser restrictions. It is the lowest-level building block for talking to a service by hand.

How to use

  1. Enter a Host and Port (for example 127.0.0.1 and 6379 for a local Redis).
  2. Click Connect. The output box shows the live session.
  3. Type into Send and click Send. Use \r\n where the protocol needs a CRLF line ending, for example PING\r\n.
  4. Click Disconnect when finished.

Good for

  • Poking text protocols by hand (Redis, SMTP, HTTP, line-based services).
  • Grabbing a banner, checking whether a port really speaks what you expect.
  • Reproducing an exact byte sequence a higher-level client would hide from you.
Controls on this page 6
ControlWhat it does
HostHostname or IP address to connect to. Defaults to 127.0.0.1 (this machine).
PortTCP port to connect to.
ConnectOpen the TCP connection to the host and port above.
DisconnectClose the open TCP connection.
Send (text, \r\n for CRLF)Bytes to send on the open connection. Type \r\n where you need a CRLF line ending (for example PING\r\n).
SendSend the text in the box over the open connection.

β—‡UDP

Bind a local UDP socket and send/receive datagrams

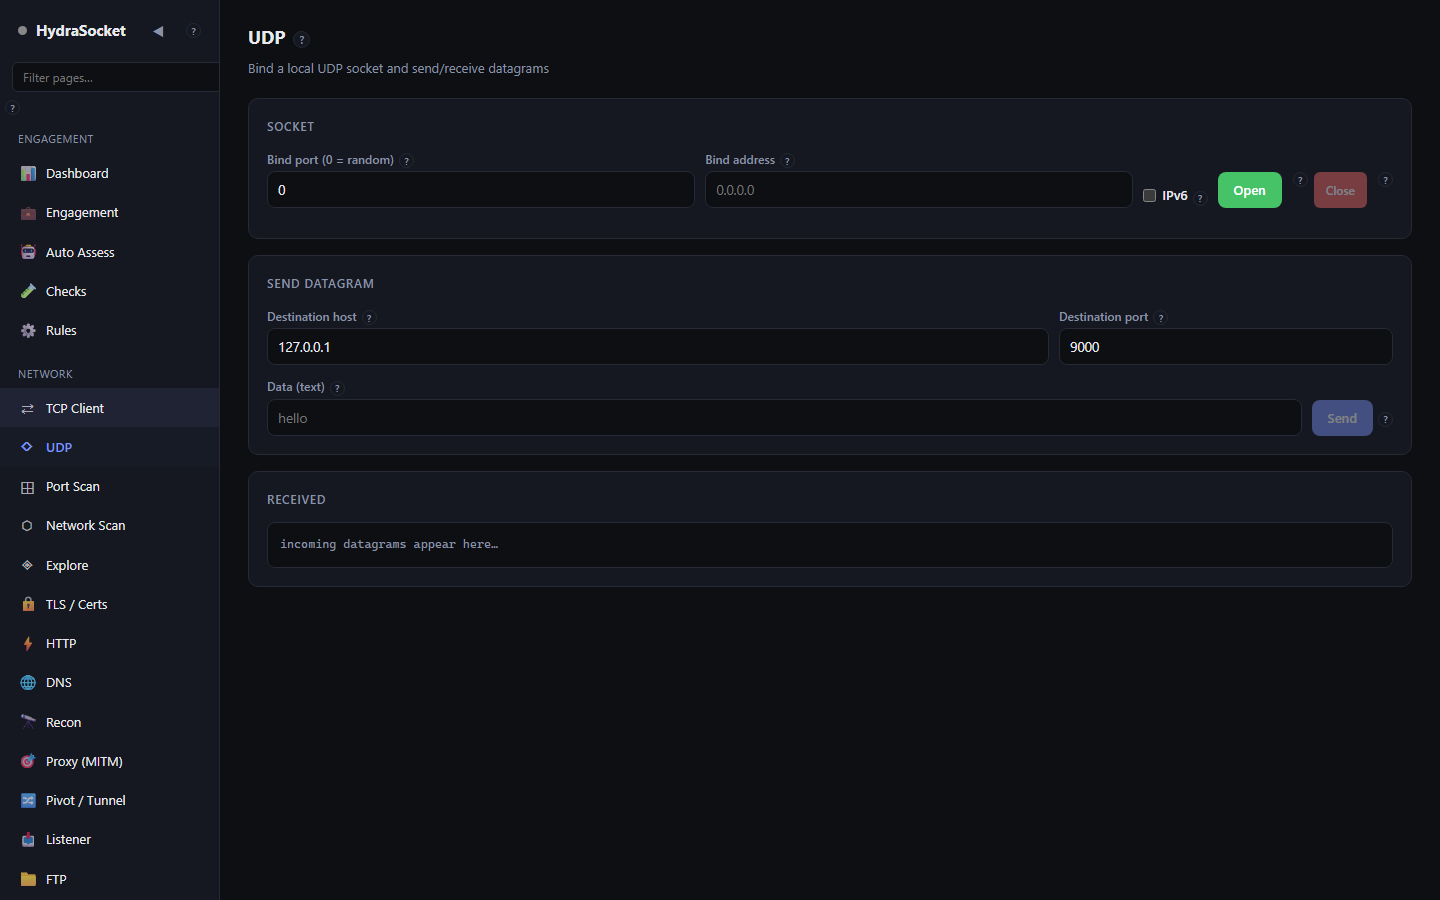
HydraSocket screen

The UDP page binds a local datagram socket so you can send packets to any destination and watch replies arrive. UDP is connectionless β€” there is no handshake, you simply send and listen.

How to use

  1. Under Socket, set a Bind port (use 0 to let the OS pick one) and a Bind address (0.0.0.0 for all interfaces). Tick IPv6 if needed, then click Open.
  2. Under Send datagram, enter the Destination host and port, type your Data, and click Send.
  3. Replies appear under Received. Click Close to release the socket.

Notes

  • Because UDP has no connection, a silent destination simply produces no reply β€” that is normal, not an error.
  • Keep the socket open to catch asynchronous or delayed responses.
Controls on this page 9
ControlWhat it does
Bind port (0 = random)Local port to bind the UDP socket to. Use 0 to let the OS pick a free port.
Bind addressLocal address to bind to. 0.0.0.0 binds all interfaces.
IPv6Bind an IPv6 socket instead of IPv4.
OpenOpen (bind) the local UDP socket.
CloseClose the UDP socket.
Destination hostDestination host to send datagrams to.
Destination portDestination port to send datagrams to.
Data (text)Datagram payload to send, as text.
SendSend one datagram to the destination above.

⊞Port Scan

Concurrent TCP-connect scan with banner grab and deep service probing

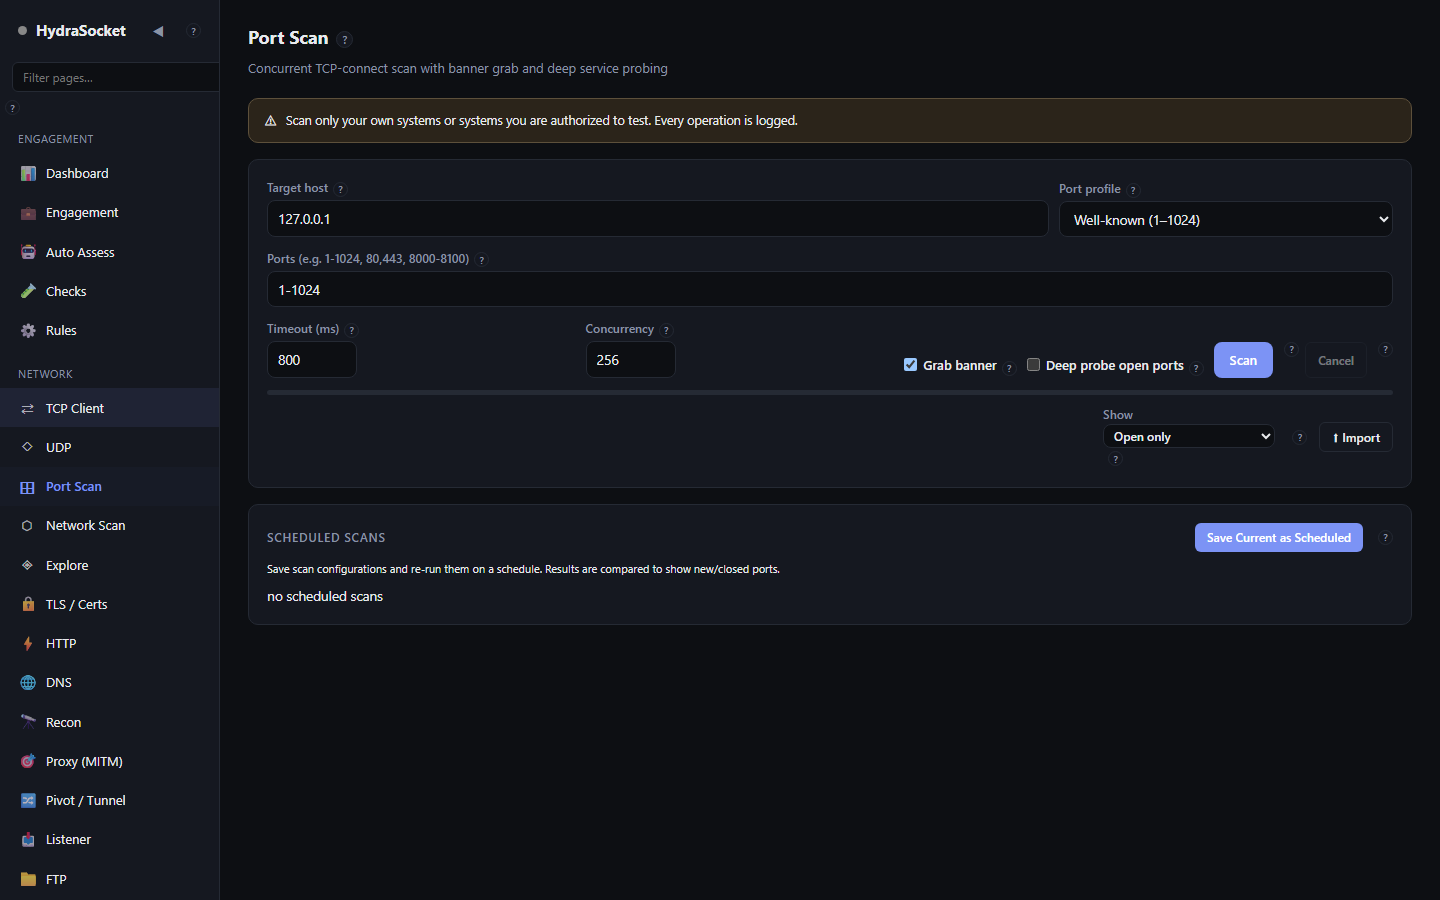
HydraSocket screen

Port Scan runs a concurrent TCP-connect scan against a single host: it opens connections to each port in parallel and reports which are open, with optional banner grabbing and deeper service probing.

How to use

  1. Enter a Target host.
  2. Pick a Port profile, or type a custom Ports range such as 1-1024, 80,443 or 8000-8100.
  3. Tune Timeout (how long to wait per port) and Concurrency (how many ports at once). Higher concurrency is faster but noisier.
  4. Optionally tick Banner to read the first bytes each open port sends, and Deep for fuller service/version probing.
  5. Click Scan. Use the show filter to narrow the results, and Cancel to stop early.

Tips

  • Start with a small, fast profile to find live ports, then re-scan those with Deep probing.
  • Save current as scheduled stores the settings to re-run later; Import loads results from a file.

A connect scan completes the TCP handshake and will appear in the target's logs. Scan only hosts you are authorized to scan.

Controls on this page 13
ControlWhat it does
Target hostSingle host to scan β€” hostname or IP.
Port profilePick a ready-made port set (e.g. top ports, web ports) instead of typing a range.
Ports (e.g. 1-1024, 80,443, 8000-8100)Ports to scan. Accepts ranges and lists: 1-1024, 80,443, 8000-8100.
Timeout (ms)How long to wait for each port to respond, in milliseconds, before marking it closed/filtered.
ConcurrencyHow many ports to probe at once. Higher is faster but noisier and heavier on the target.
Grab bannerAfter a port opens, read the first bytes it sends to grab a service banner.
Deep probe open portsRun deeper service probes on open ports to identify the service and version.
ScanStart the scan.
CancelStop the running scan.
Show Open only Open + Closed All statesFilter which results are shown (e.g. open only, all).
⬆ ImportImport scan results from a file.
ConcurrencyChoose a scan-results file to import.
Save Current as ScheduledSave the current scan settings as a scheduled scan to re-run later.

⬑Network Scan

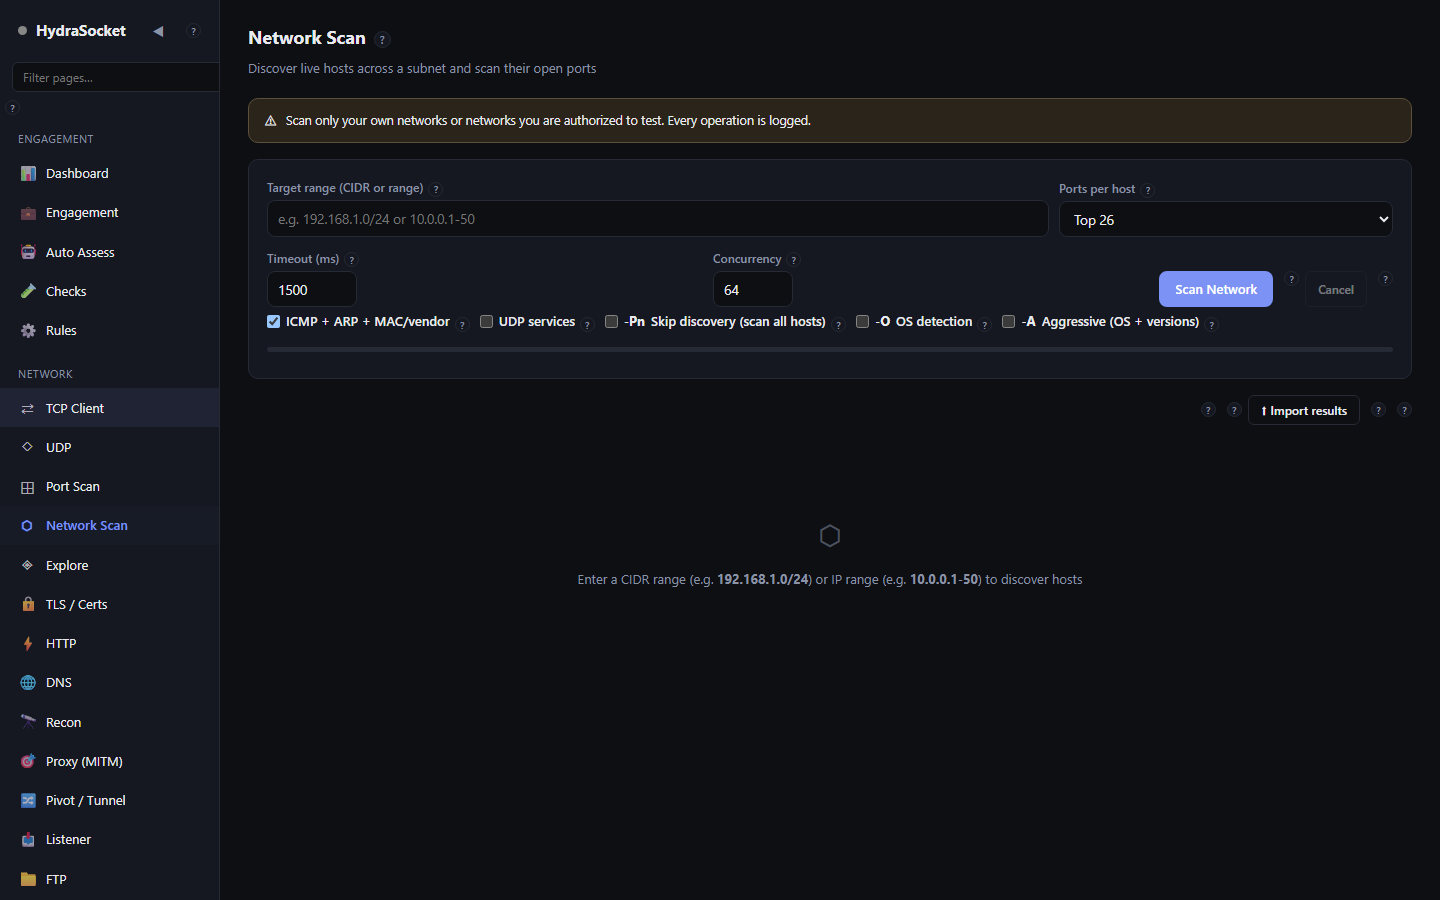
Discover live hosts across a subnet and scan their open ports

HydraSocket screen

Network Scan is a discovery sweep across a whole subnet or address range: it first finds which hosts are alive, then scans each live host's ports. It is how you map an unfamiliar network.

How to use

  1. Enter a Target range as CIDR (192.168.1.0/24) or a dash range (10.0.0.1-50).
  2. Choose Ports per host from the preset, or set it to custom and fill Custom ports.
  3. Set Timeout and Concurrency for the sweep.
  4. Pick discovery options: ICMP (ping), a UDP probe, -Pn to skip discovery and treat every address as alive, -O for OS fingerprinting, and -A for the aggressive full set.
  5. Click Scan Network. When it finishes you can Auto-Assess alive hosts to chain a full assessment against everything found.

Tips

  • -Pn is slower but finds hosts that block ping β€” useful on hardened networks.
  • Results can be saved and restored via the backup selector, and imported/exported to a file.

Sweeping a subnet touches many hosts at once. Confirm the entire range is in scope before you run it.

Controls on this page 17
ControlWhat it does
Target range (CIDR or range)Target range to sweep. CIDR (192.168.1.0/24) or a dash range (10.0.0.1-50).
Ports per hostPreset of ports to check on each live host.
Custom ports (e.g. 1-1024, 8000-8100, 445)Custom port list when the preset is set to custom. Accepts ranges and lists.
Timeout (ms)Per-port connect timeout in milliseconds.
ConcurrencyNumber of simultaneous probes across the sweep.
Scan NetworkStart the network sweep.
CancelStop the running sweep.
ICMP + ARP + MAC/vendorUse ICMP echo (ping) as one way to decide a host is alive.
UDP servicesInclude a UDP probe when checking if a host is alive.
-Pn Skip discovery (scan all hosts)Skip host-discovery and treat every address as alive (nmap -Pn style). Slower but finds hosts that block ping.
-O OS detectionAttempt basic OS fingerprinting on discovered hosts.
-A Aggressive (OS + versions)Aggressive mode β€” enable the fuller set of probes (discovery, OS, deeper service detection).
πŸ€– Auto-Assess alive hostsRun the chained Auto-Assess against every host found alive in this sweep.
ConcurrencyPick a previously saved copy of sweep results.
↩ RestoreLoad the selected saved results back into the view.
⬆ Import resultsImport sweep results from a file.
ConcurrencyChoose a results file to import.

β—ˆExplore

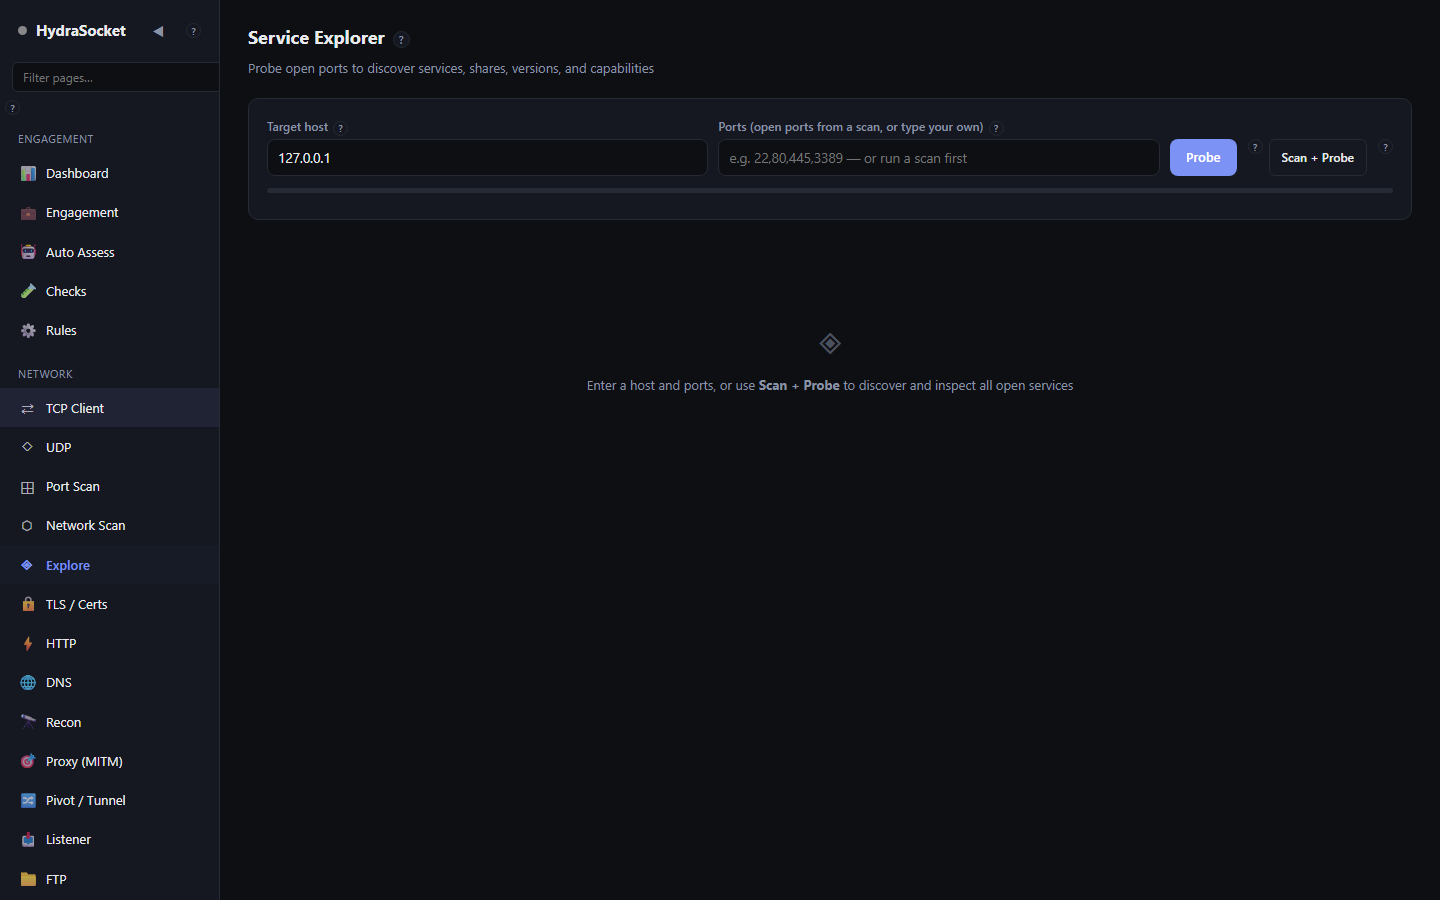
Probe open ports to discover services, shares, versions, and capabilities

HydraSocket screen

Service Explorer probes a host's open ports to work out what is actually running behind them β€” service names, versions, shares and capabilities β€” rather than just which ports are open.

How to use

  1. Enter a Target host.
  2. In Ports, paste the open ports from a Port Scan, or type your own (for example 22,80,445,3389).
  3. Click Probe to identify the services, or Scan + Probe to discover open ports first and then probe them in one step.

Tip

  • Run a quick Port Scan first, then feed those ports here β€” probing only the open ones is much faster than probing everything.
Controls on this page 4
ControlWhat it does
Target hostHost whose services you want to identify.
Ports (open ports from a scan, or type your own)Ports to probe. Paste open ports from a scan, or type your own (e.g. 22,80,445,3389).
ProbeProbe the listed ports for service details.
Scan + ProbeScan the host for open ports first, then probe them.

πŸ”’TLS / Certs

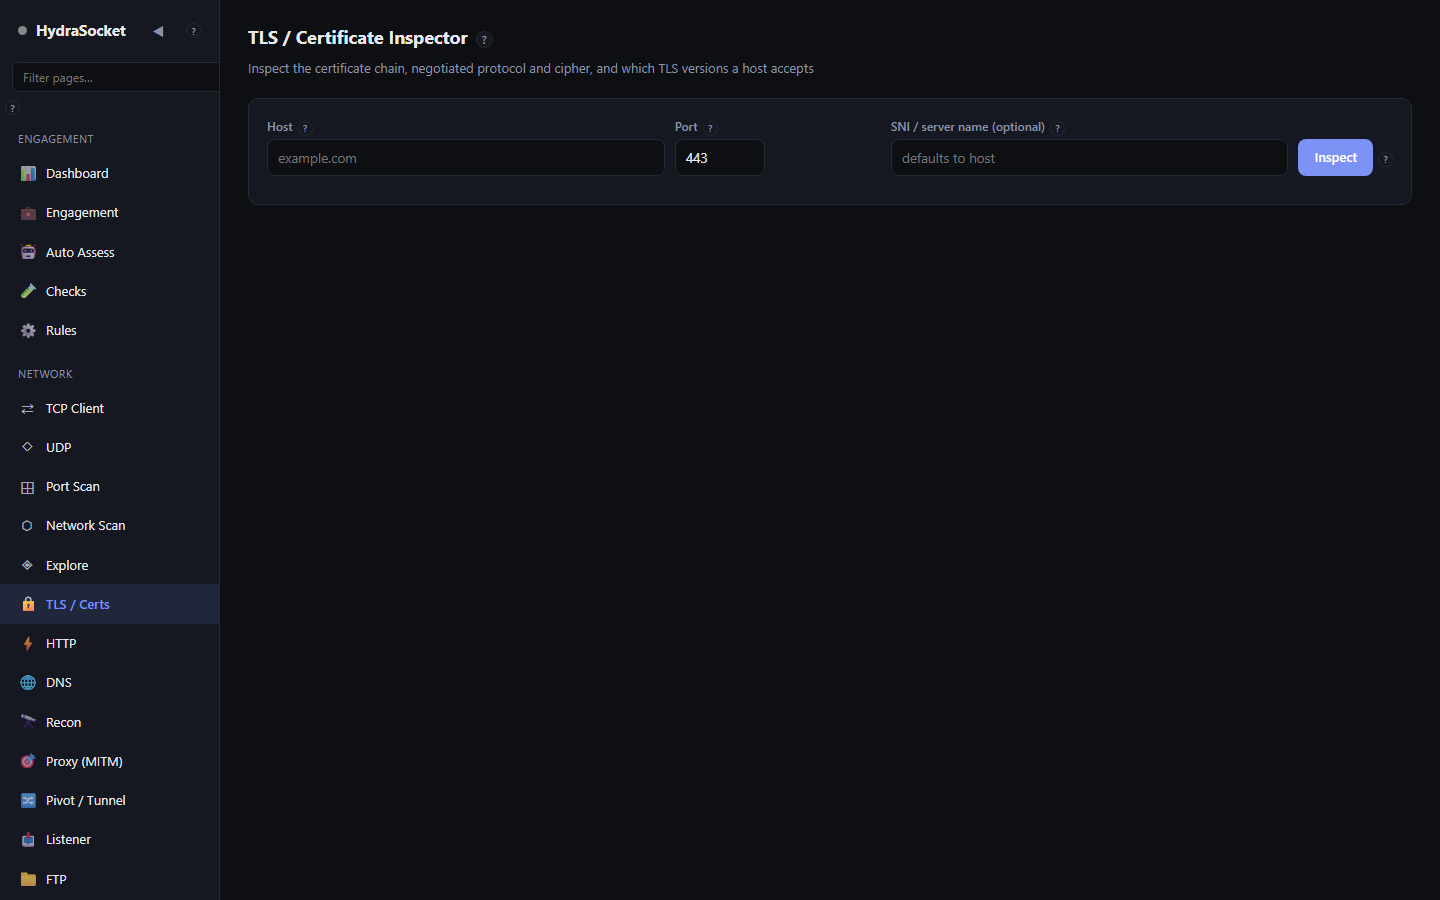
Inspect the certificate chain, negotiated protocol and cipher, and which TLS versions a host accepts

HydraSocket screen

The TLS / Certificate Inspector connects to a host and reports its full certificate chain, the negotiated protocol and cipher, and which TLS versions the host will accept. It flags expired, self-signed, weak-cipher and obsolete-protocol conditions.

How to use

  1. Enter a Host and Port (443 for HTTPS, or the service's TLS port).
  2. Optionally set SNI to inspect a specific virtual host; leave it blank to use the host name.
  3. Click Inspect. Read the Summary, the TLS versions accepted matrix and the Certificate chain.

How to read it

  • The version matrix enumerates TLS 1.0 through 1.3 by pinning each in turn.
  • TLS 1.0 / 1.1 shown as "not tested" usually means the inspector's own OpenSSL cannot speak those old versions β€” it is a client limitation, not proof the server refuses them.
  • Chain walking follows each certificate's issuer so you can spot an incomplete or misconfigured chain.
Controls on this page 4
ControlWhat it does
HostHost to inspect the TLS configuration of.
PortTLS port (443 for HTTPS, or the service's TLS port).
SNI / server name (optional)Server name to send in the TLS handshake (SNI). Leave blank to use the host. Set it to inspect a specific virtual host.
InspectConnect and inspect the certificate chain, negotiated protocol/cipher, and accepted TLS versions.

⚑HTTP

Arbitrary requests, fuzzing, chaining, comparison, auto-scan, WebSocket testing, encode/decode, cookie jar, auth helpers, and smuggling

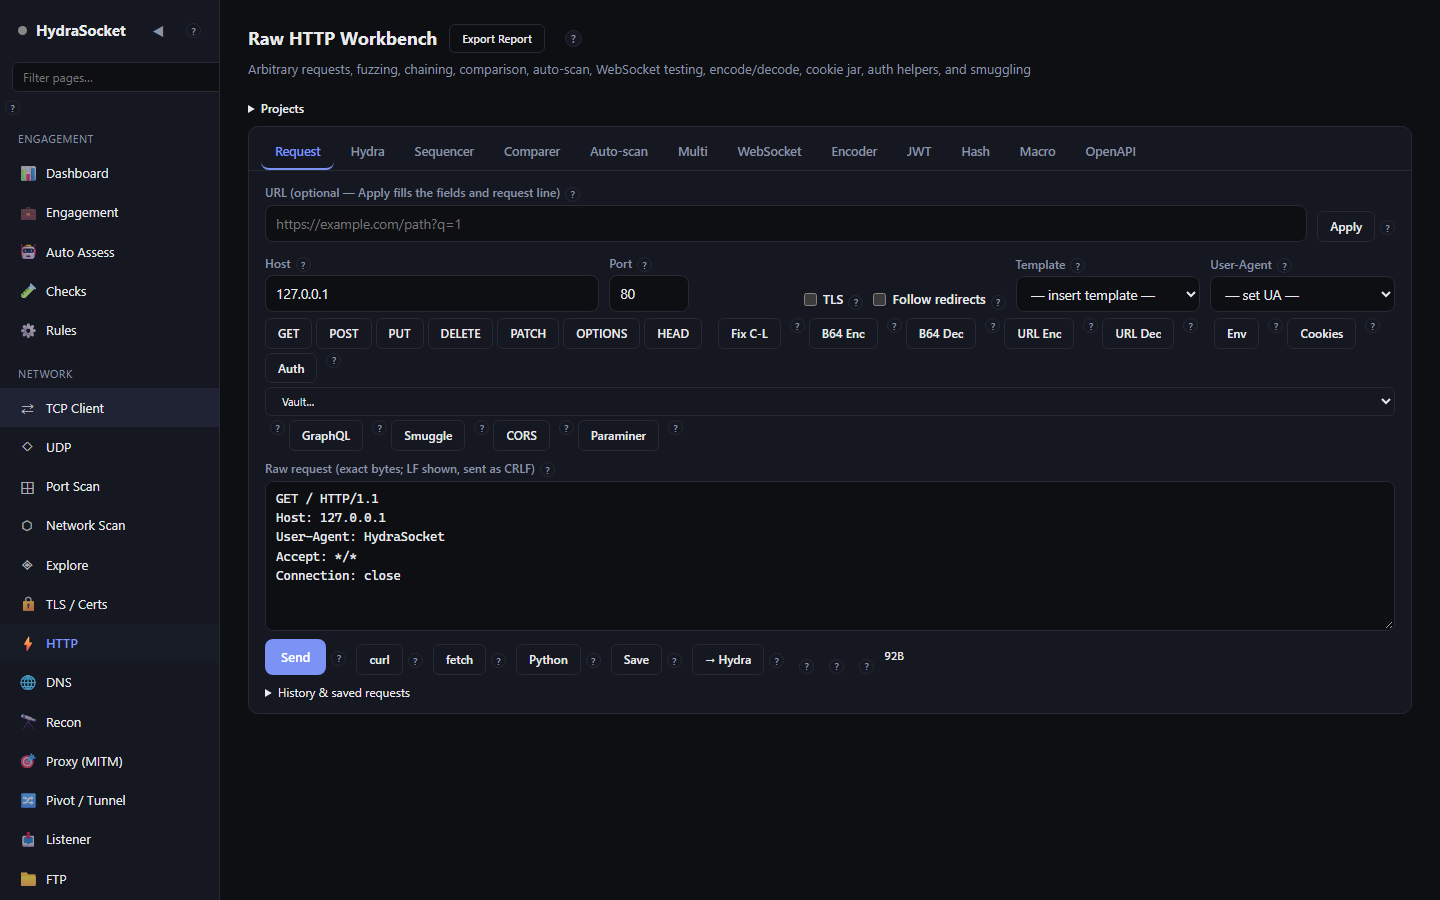
Request tab
Request tab

The Raw HTTP Workbench is the most capable page in HydraSocket. It sends the exact bytes you type over raw TCP or TLS, so you control the request line, every header and the body β€” including things a browser's fetch() refuses to send, such as a spoofed Host, conflicting length headers, or a malformed request line. The row of tabs across the top switches between a dozen related tools that all share the same request and response.

Projects & saving

Everything you do here belongs to a project β€” its saved requests, history and settings. Name the project and click Save Project, or move it between machines with Export / Import. This is separate from the engagement file and is meant for your request workbench specifically.

Request tab (the repeater)

This is where you craft and resend a single request and study the reply.

  1. Paste a full URL and click Apply to fill the Host, Port, TLS flag and request line, or set those fields by hand. Tick Follow redirects to chase 3xx hops and see the whole chain.
  2. Pick a starting point from Template and a User-Agent from the dropdown, or use a method button (GET, POST, PUT, DELETE, PATCH, OPTIONS, HEAD) to scaffold the request line.
  3. Edit the raw request in the editor. Line feeds are shown as LF but sent as CRLF, so the bytes on the wire are exactly what the protocol expects.
  4. Click Send. If you changed the body, click Fix C-L first to recompute Content-Length. Use the inline encode/decode buttons (B64 Enc/Dec, URL Enc/Dec) on a selection without leaving the editor.

Reading the response. Switch views with the tabs over the response pane: Pretty (formatted, JSON pretty-printed), Headers, Cookies, Security (flags missing or weak security headers), Raw and Hex. A timing bar breaks the request into DNS, connect, TLS and time-to-first-byte. Use the search box to find and highlight text in the body.

Pulling values out. JSON Path extracts a value by path (for example data.items[0].name, or . for the whole document). Extract rules capture text with a regex and a capture group (for example token=([a-zA-Z0-9]+)) and name it, so you can reuse it. Diff compares the current response against another.

Taking the request elsewhere. Copy it as a curl, fetch or Python snippet, Save it, send it to Hydra for fuzzing, or to the Comparer. The History list keeps every request you send β€” filter it, diff two entries, or clear it.

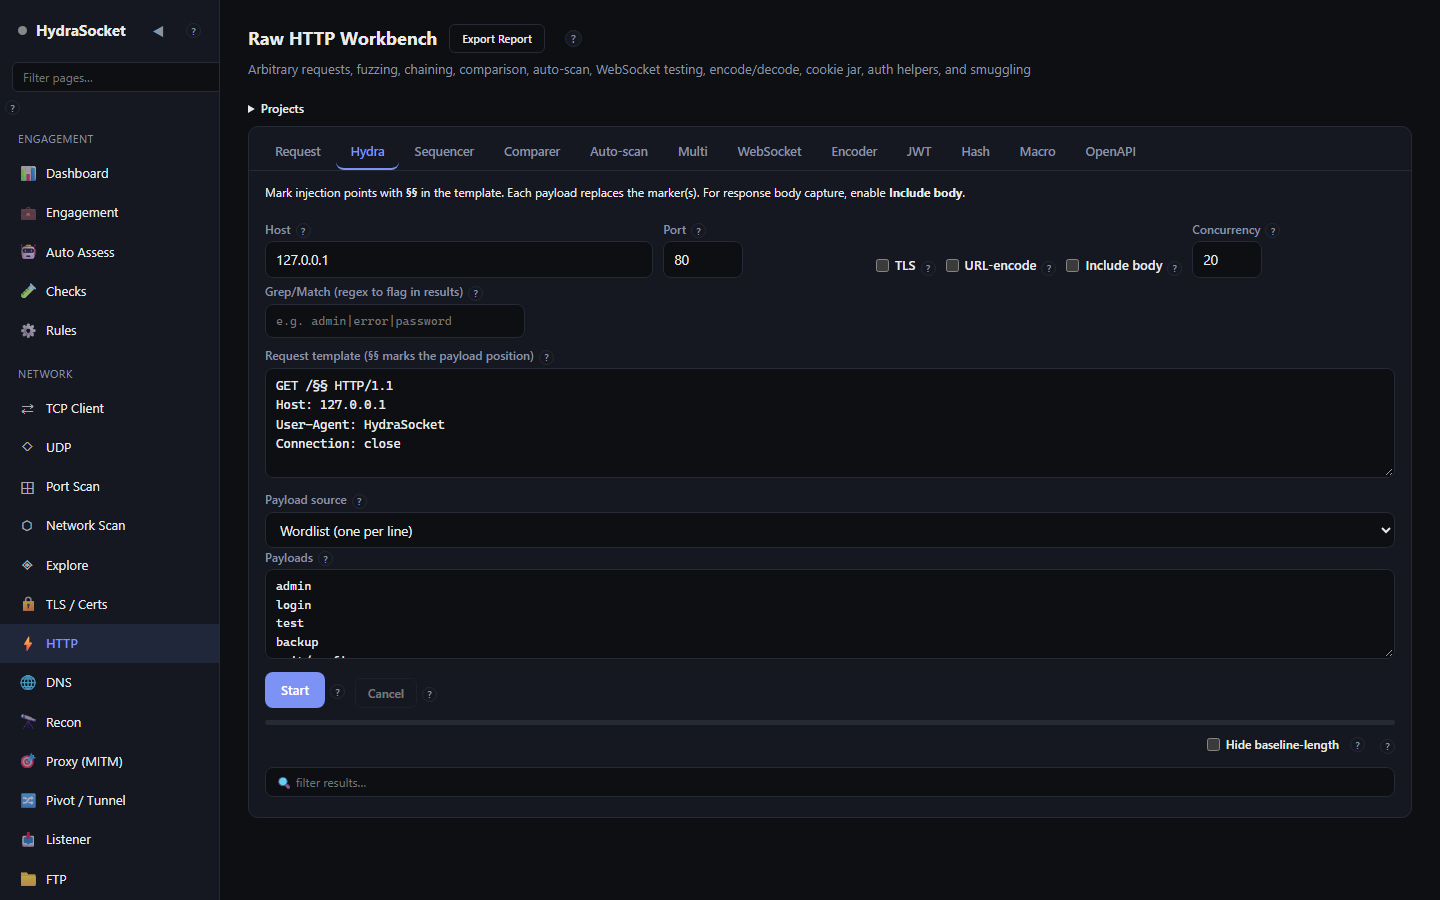
Hydra tab (payload fuzzer / intruder)

Hydra sends the same request many times with a changing payload, so you can brute-force a parameter, enumerate values, or spray a wordlist and spot the responses that stand out.

  1. Set the Host, Port and TLS, then write the request in the template and mark the insertion point with §§ (two section signs). Everything else stays fixed; only that marker is replaced each round.
  2. Choose a Payload source: a built-in list, a numeric range (From / To / Step), or your own payloads typed one per line. Tick URL-encode to encode each payload before it goes in.
  3. Set Concurrency for speed, and a Grep/Match regex (for example admin|error|password) to flag interesting responses.
  4. Click Start. Results show status, length and timing per payload. Tick Hide baseline to drop responses identical to the control request, so only anomalies remain, and use the filter box to narrow further. Open any row to resend it in the Request tab.

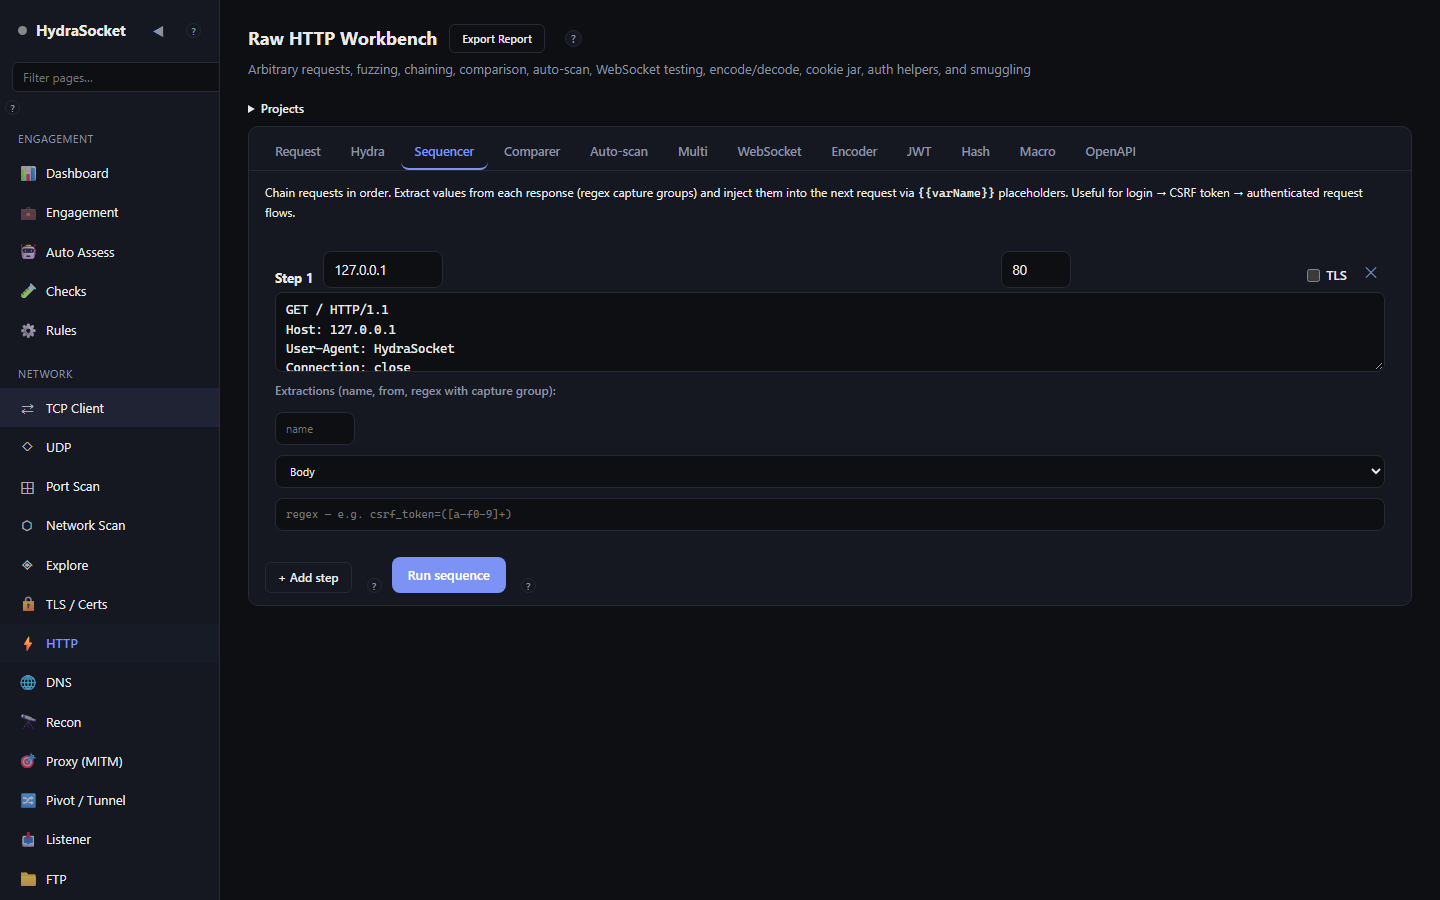
Sequencer tab (multi-step chains)

The Sequencer runs several requests in order and carries values from one step into the next β€” the way a real login-then-act flow works.

  1. Click Add step for each request and fill in its host, port, TLS and raw request.
  2. On a step, define Extractions: a name, which part of the response to read, and a regex with a capture group (for example csrf_token=([a-f0-9]+)). The captured value becomes a variable later steps can reference.
  3. Click Run sequence to execute the steps in order and see each response.

Typical use: step 1 fetches a page and extracts a CSRF token or session id, step 2 submits a form using it.

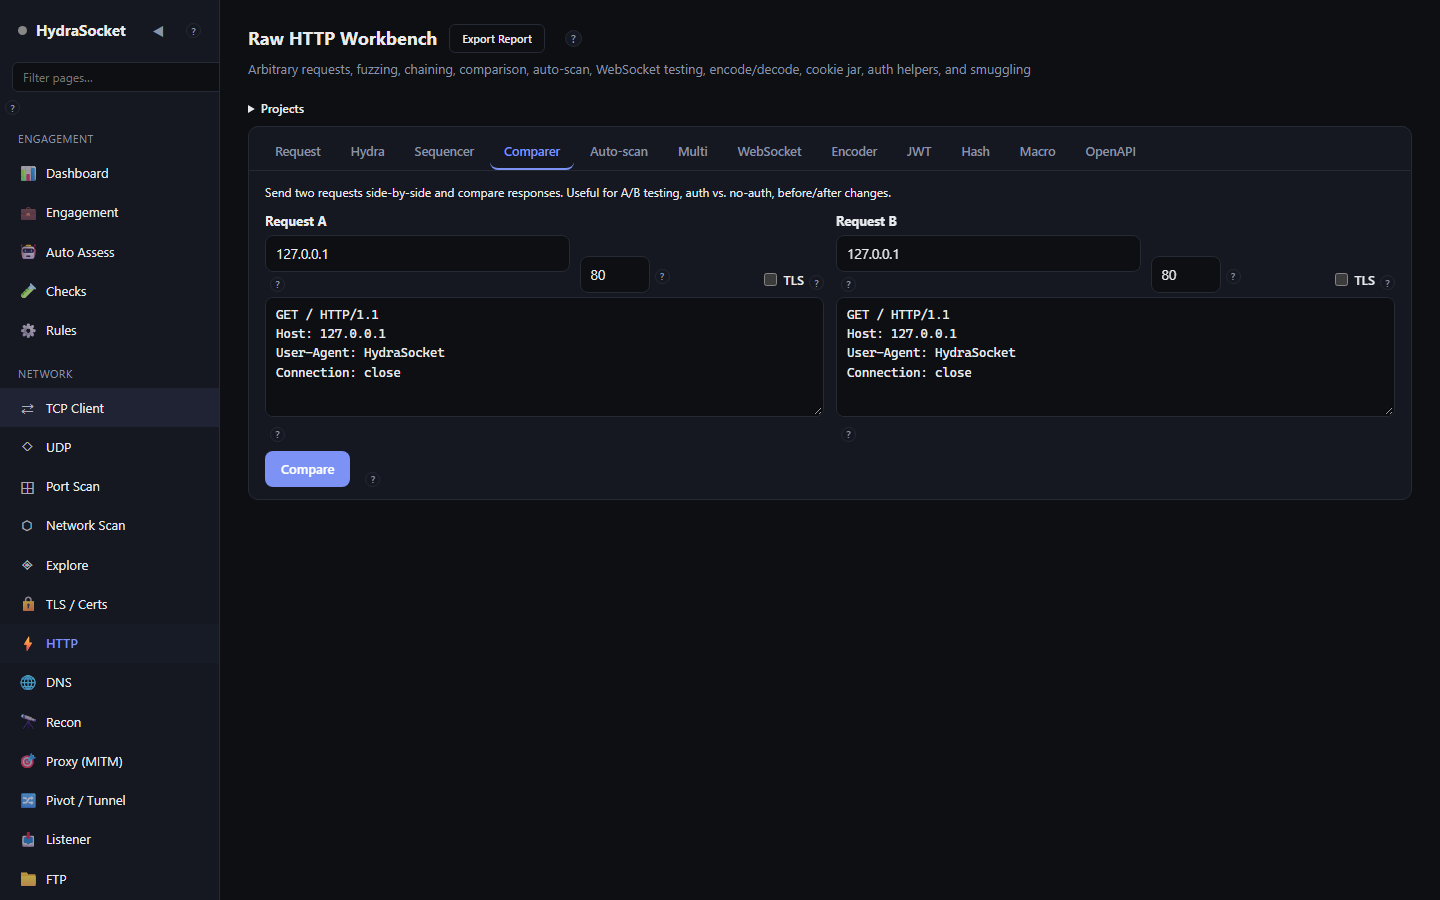
Comparer tab

Send two full requests, A and B (each with its own host/port/TLS), and click Compare to diff the responses side by side. Good for seeing exactly what changes when you flip one header, parameter or cookie.

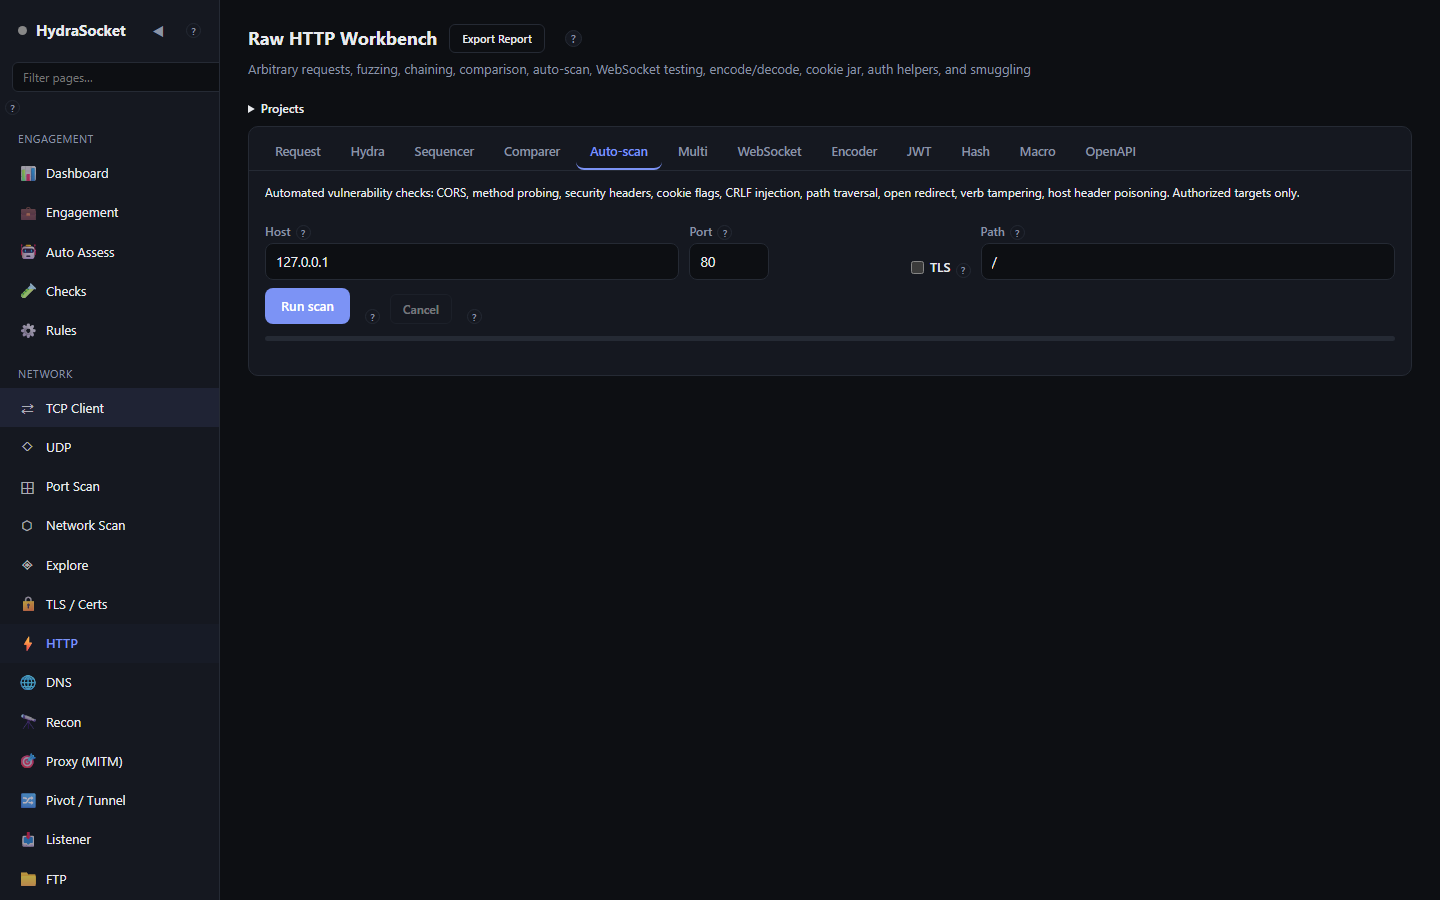
Auto-scan tab

Point it at a Host, Port, TLS flag and base Path and click Run scan for an automated pass over the endpoint. Findings flow into the Findings page. Use Cancel to stop a long run.

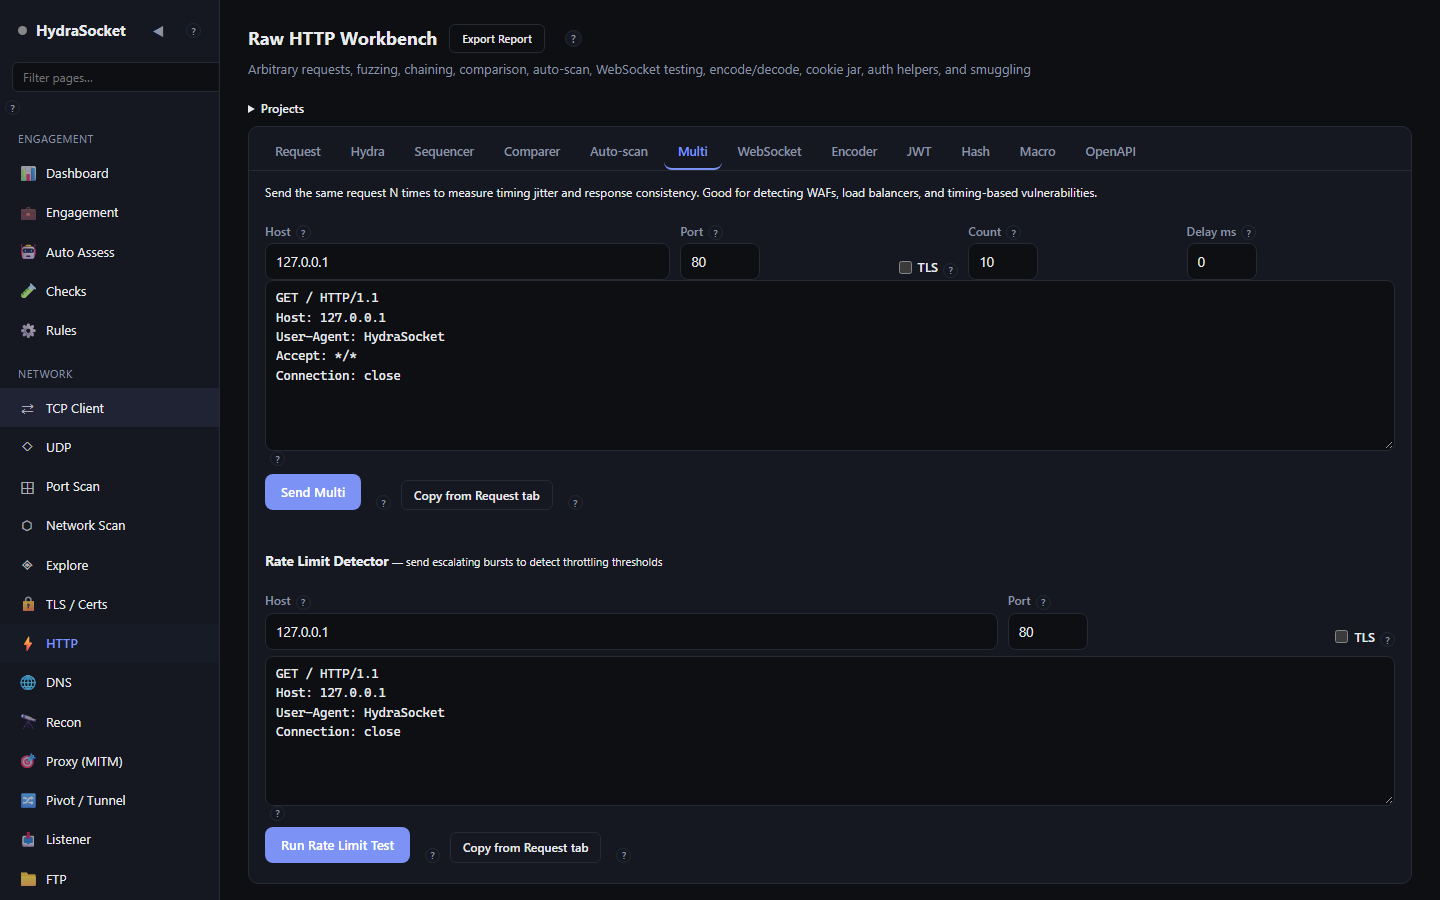
Multi tab (repeat & rate-limit)

Resend one request many times to test idempotency, race conditions or throttling.

  1. Set host/port/TLS, paste a request (or click Copy from Request tab), set a Count and a per-send Delay, and click Send Multi.
  2. The Rate Limit Test fires a burst at the target and reports how and when the server starts throttling or blocking.

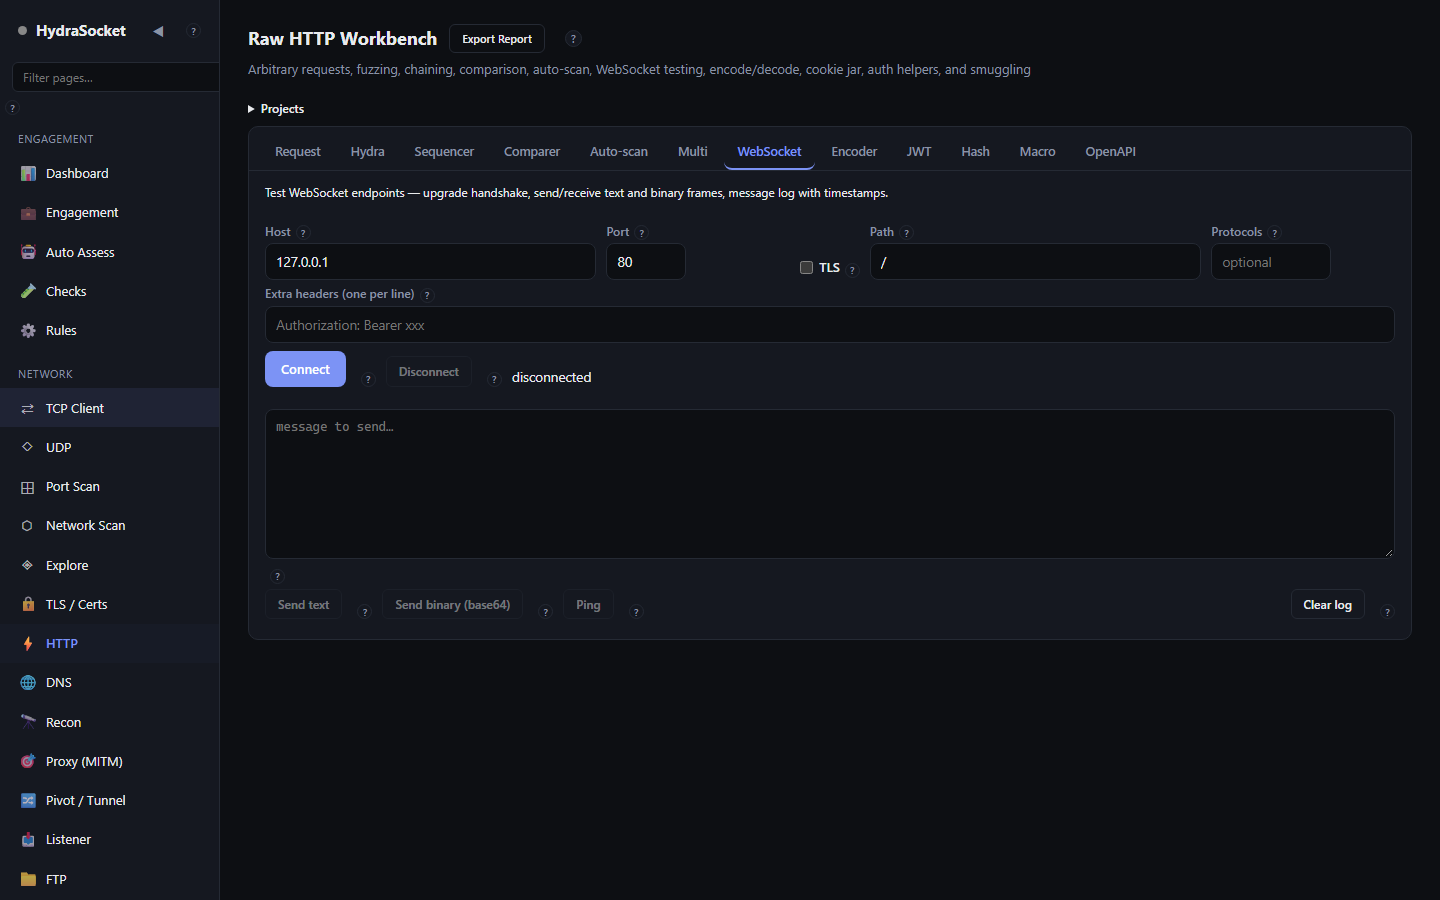
WebSocket tab

Open and drive a WebSocket connection by hand.

  1. Set Host, Port, TLS (for wss) and Path. Add subprotocols in Protocols and any handshake headers (such as an Authorization header) in Extra headers, one per line.
  2. Click Connect, then send frames: Send text, Send binary (your box content is base64-decoded first), or Ping. The log shows every frame in and out; Clear log empties it.

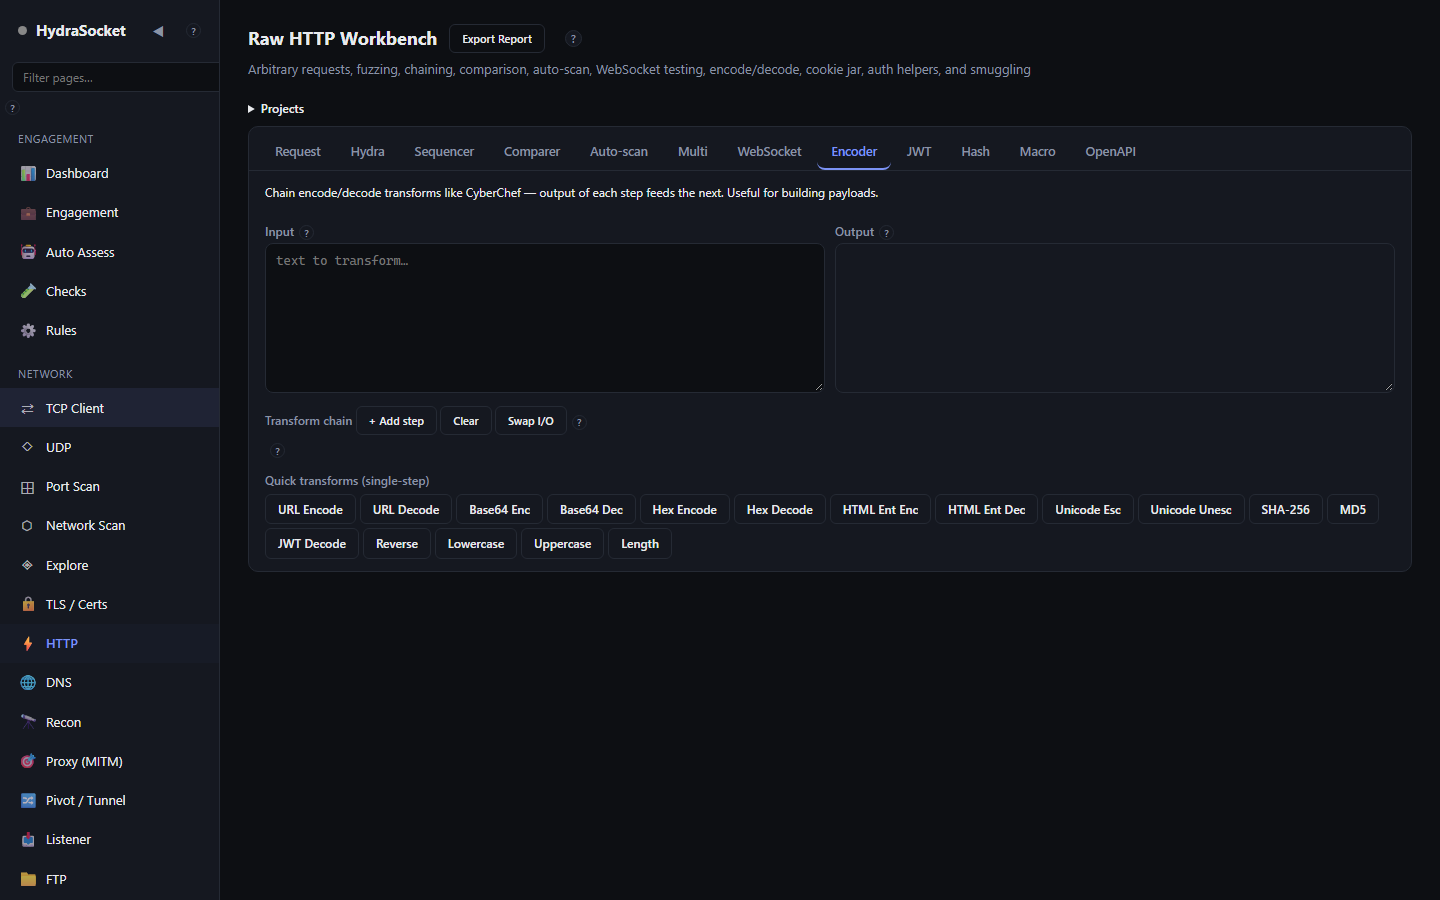
Encoder tab

A quick scratchpad for transforming data without leaving the workbench. Put text in Input, build a chain with Add step, and the result appears in Output. Swap I/O feeds the output back as input for layered encodings. (The full Encoder / Crypto Toolkit has its own page for heavier work.)

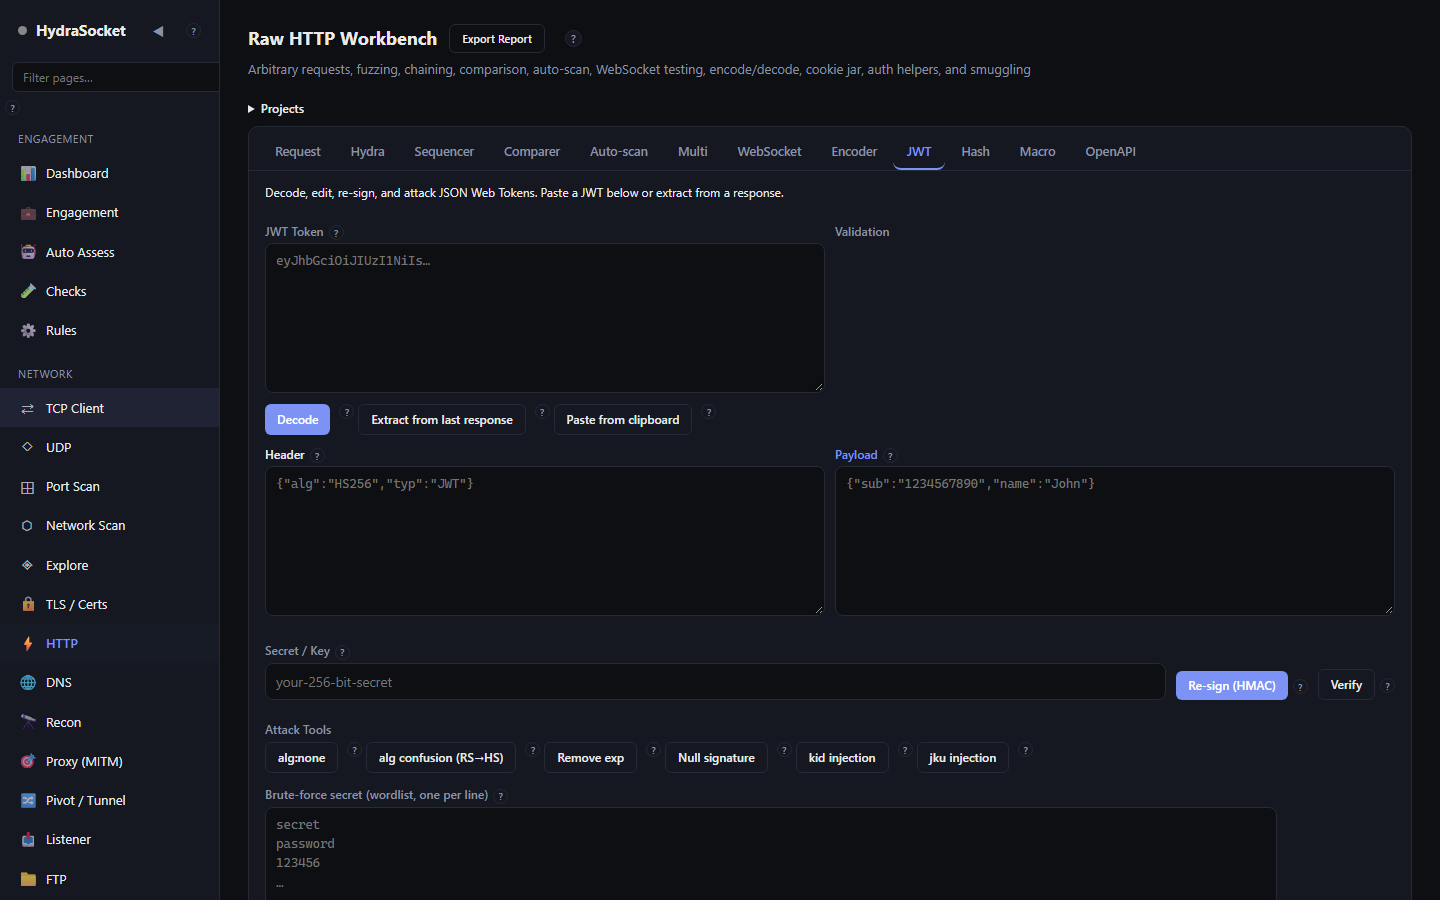
JWT tab

Inspect and manipulate JSON Web Tokens.

  1. Paste a token, or pull one with Extract from last response or Paste from clipboard, then Decode to see the header and payload.
  2. Edit the Header or Payload JSON, enter a Secret / Key, and Re-sign (HMAC) or Verify the signature.
  3. The Attack Tools produce test variants for servers that validate tokens incorrectly: alg:none (unsigned), alg confusion (RS→HS), Remove exp (no expiry), Null signature, and kid / jku header injection.
  4. Brute-force a weak HMAC secret by supplying a wordlist, one candidate per line.

Hash tab

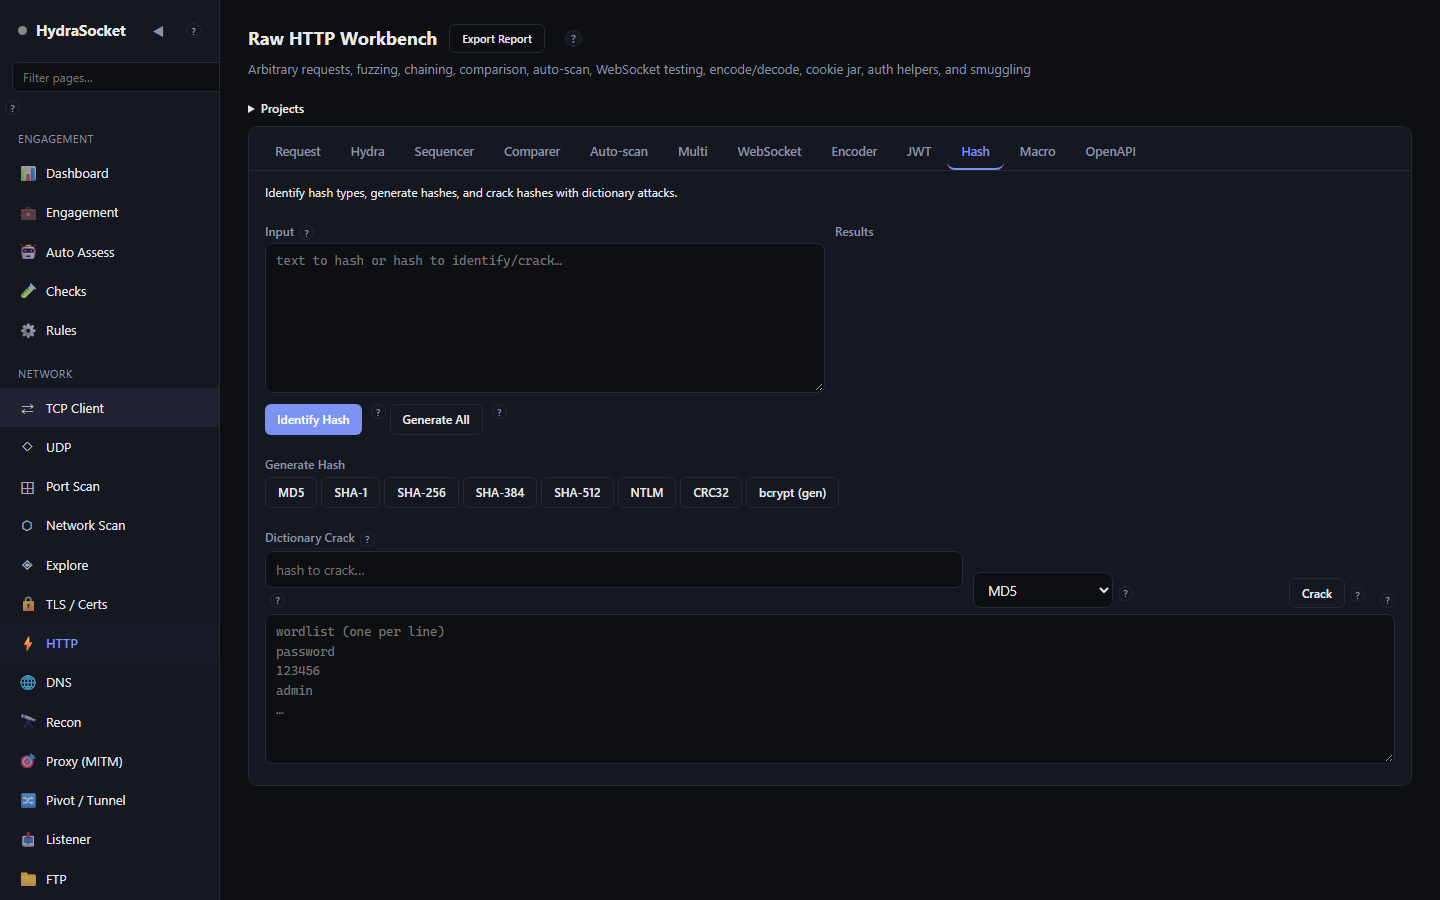
Identify Hash guesses a hash's type from its format, and Generate All hashes your input in every algorithm. The Dictionary Crack section tries each line of a wordlist against a target hash of a chosen type.

Macro tab

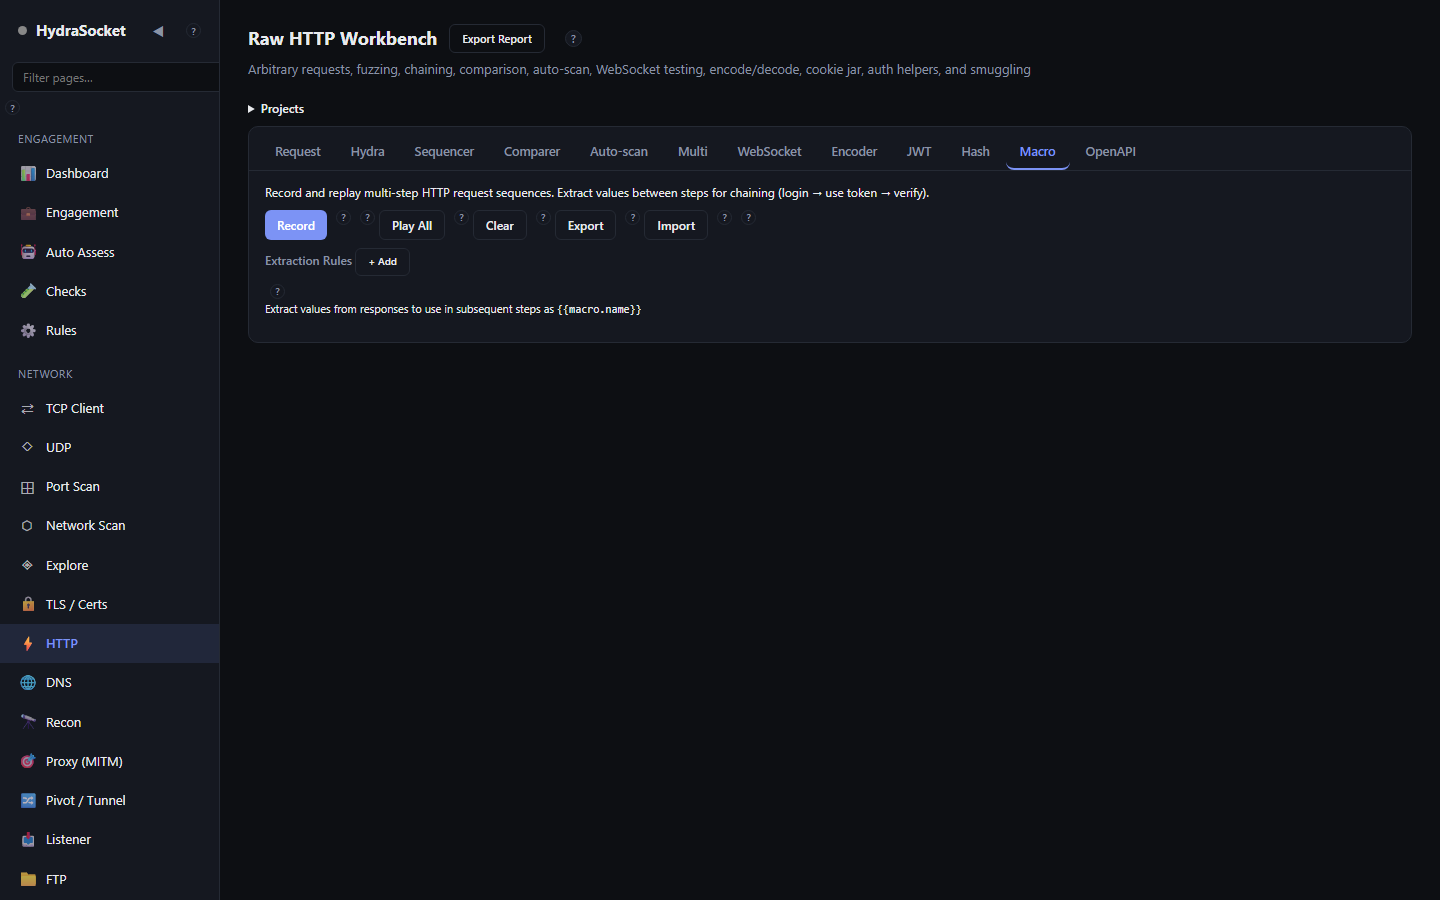
Record a run of requests and replay them as one unit β€” handy for re-establishing a session before a test. Record, send your requests, Stop Recording, then Play All. Add Extraction Rules so a value from one step feeds the next. Macros Export and Import to a file.

OpenAPI tab

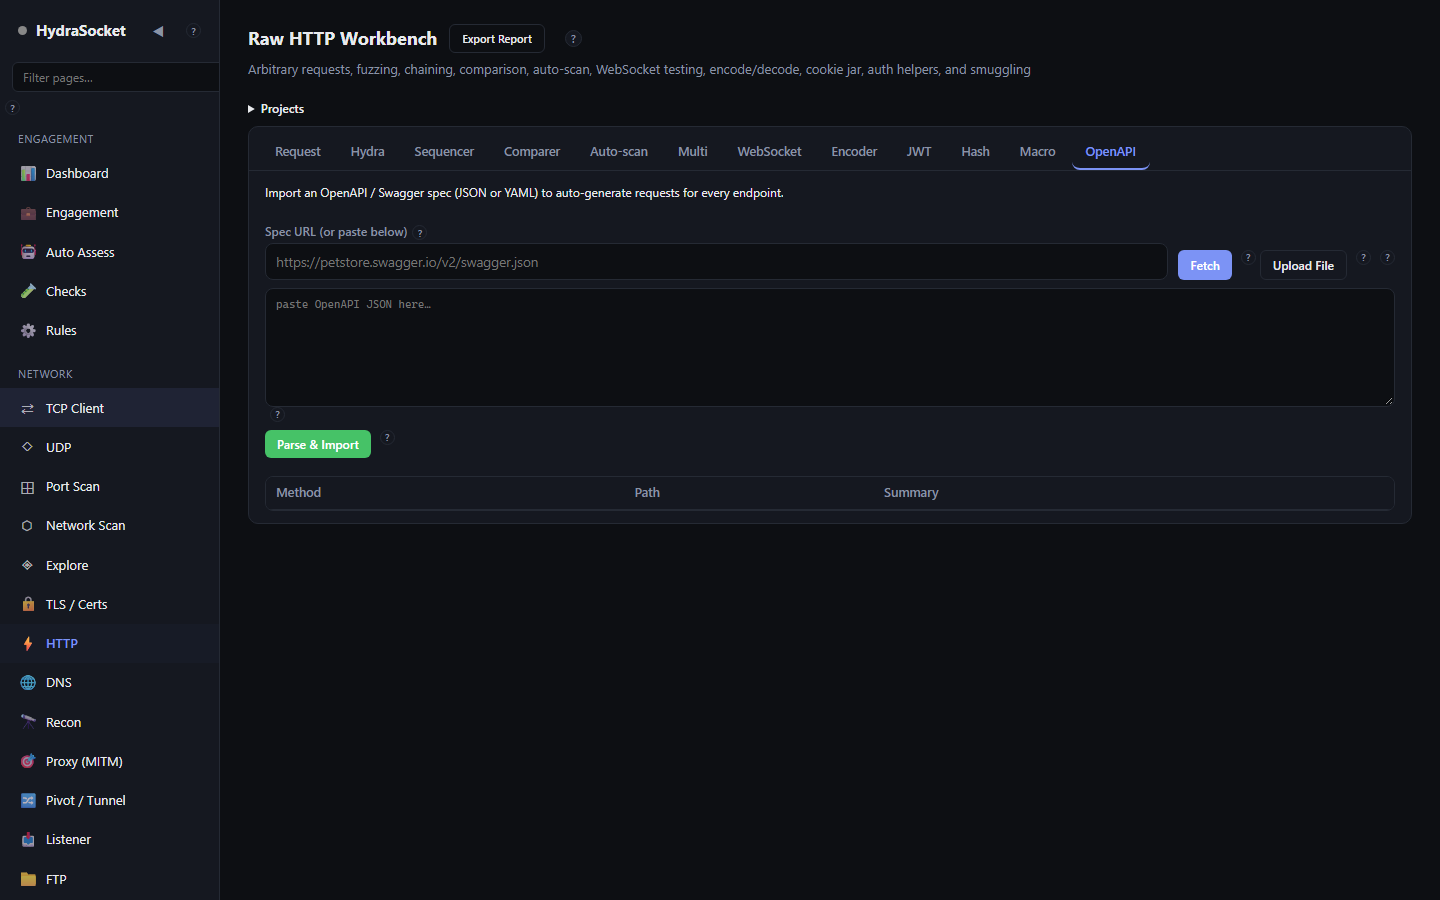
Turn an API spec into ready-made requests. Fetch a spec by URL, Upload a file, or paste the JSON, then Parse & Import to load every endpoint as a request you can send and fuzz.

Toolbar helpers (shared across tabs)

  • Env β€” define variables you can reference inside requests, so one change updates every request that uses it.
  • Cookies β€” a cookie jar that can auto-inject matching cookies into outgoing requests.
  • Auth β€” build an Authorization header for Basic, Bearer, API-key, Digest or AWS SigV4 and insert it. Vault fills credentials from the shared store on the Config page.
  • GraphQL β€” helpers for crafting GraphQL requests (the GraphQL Explorer page covers introspection).
  • Smuggle β€” insert a request-smuggling template (conflicting Content-Length / Transfer-Encoding) to see how a server resolves an ambiguous request length.
  • CORS β€” probe the target's cross-origin policy with preflight and request-header tests.
  • Paraminer β€” discover hidden parameters an endpoint silently accepts.

This page can send malformed, ambiguous and high-volume requests on purpose. Several tools (smuggling, fuzzing, rate-limit bursts) are intrusive and will show up in the target's logs. Use it only against systems you are explicitly authorized to test.

Every tab

Hydra tab
Hydra tab
Sequencer tab
Sequencer tab
Comparer tab
Comparer tab
Auto-scan tab
Auto-scan tab
Multi tab
Multi tab
WebSocket tab
WebSocket tab
Encoder tab
Encoder tab
JWT tab
JWT tab
Hash tab
Hash tab
Macro tab
Macro tab
OpenAPI tab
OpenAPI tab
Controls on this page 173
ControlWhat it does
project name…Name for the saved HTTP project (requests, history, settings).
Save ProjectSave the current HTTP project.
ImportImport an HTTP project from a file.
ExportExport the current HTTP project to a file.
Http Project File InputChoose an HTTP project file to import.
URL (optional β€” Apply fills the fields and request line)Paste a URL here and Apply to fill the host, port, TLS and request line below.
ApplyParse the URL and fill the request fields from it.
HostTarget host the request is sent to.
PortTarget port.
TLSSend the request over TLS (HTTPS).
Follow redirectsFollow redirects and show the full hop chain.
TemplateInsert a ready-made request template into the editor.
User-AgentSet the User-Agent header from a list of common values.
Fix C-LRecalculate and fix the Content-Length header to match the body.
B64 EncBase64-encode the current selection.
B64 DecBase64-decode the current selection.
URL EncURL-encode the current selection.
URL DecURL-decode the current selection.
EnvManage environment variables you can reference in requests.
CookiesOpen the cookie jar β€” view, edit and auto-inject cookies.
AuthBuild an Authorization header (Basic, Bearer, API key, Digest, AWS SigV4) and insert it.
User-AgentInsert a stored credential from the shared auth vault.
GraphQLOpen GraphQL helpers for the current request.
SmuggleInsert a request-smuggling test template (conflicting Content-Length / Transfer-Encoding) to check how the server resolves ambiguous request length.
CORSProbe the target's CORS policy with cross-origin preflight and request headers.
ParaminerDiscover hidden request parameters the endpoint accepts.
Raw request (exact bytes; LF shown, sent as CRLF)The exact request bytes to send. Line feeds are shown here and sent as CRLF. This bypasses the normal fetch() restrictions, so you control every byte, including the request line and headers.
SendSend the request as written.
curlCopy the request as a curl command.
fetchCopy the request as JavaScript fetch() code.
PythonCopy the request as Python requests code.
SaveSave this request for reuse.
β†’ HydraSend this request to the Hydra tab for automated payload fuzzing.
Copy bodyCopy the response body.
Download bodyDownload the response body to a file.
β†’ ComparerSend this response to the Comparer tab.
filter history…Filter the request history.
Diff selectedDiff the two selected history entries.
Clear allClear all request history.
πŸ” search response…Search within the response body; matches are highlighted.
JSON path β€” e.g. data.items[0].name or just . for rootExtract a value from a JSON response by path, e.g. data.items[0].name, or . for the whole document.
QueryRun the JSON path against the response.
regex pattern β€” e.g. token=([a-zA-Z0-9]+)Regex with a capture group; the captured text is pulled from the response (e.g. token=([a-zA-Z0-9]+)).
nameA name for this extraction rule.
+ Add ruleAdd this extraction rule.
Run allRun all extraction rules against the last response.
HostTarget host for the fuzzing run.
PortTarget port.
TLSSend over TLS.
URL-encodeURL-encode each payload before inserting it.
Include bodyInclude the response body in results (uses more memory).
ConcurrencyHow many requests to send at once.
Grep/Match (regex to flag in results)Regex to flag in each response, so interesting results stand out (e.g. admin|error|password).
Request template (Β§Β§ marks the payload position)Request template. Mark the spot where each payload is inserted with Β§Β§ (two section signs).
Payload sourceWhere payloads come from: a built-in list, a number range, or your own list.
Built-inPick a built-in payload list.
FromStart of the numeric payload range.
ToEnd of the numeric payload range.
StepIncrement between numeric payloads.
PayloadsYour payload list, one per line.
StartStart the fuzzing run.
CancelStop the fuzzing run.
Hide baseline-lengthHide results that match the baseline response, so only differing responses remain.
πŸ” filter results…Filter the results table.
+ Add stepAdd a request step to the sequence.
Run sequenceRun the request sequence in order, carrying extracted values between steps.
HostHost for request A.
Extractions (name, from, regex with capture group):Port for request A.
TLSSend request A over TLS.
Extractions (name, from, regex with capture group):Raw request A.
HostHost for request B.
Extractions (name, from, regex with capture group):Port for request B.
TLSSend request B over TLS.
Extractions (name, from, regex with capture group):Raw request B.
CompareSend both requests and compare the responses.
HostHost to auto-scan.
PortPort to auto-scan.
TLSUse TLS.
PathBase path to start the scan from.
Run scanStart the auto-scan.
CancelStop the auto-scan.
HostHost to send the repeated request to.
PortPort.
TLSUse TLS.
CountHow many times to send the request.
Delay msDelay between sends, in milliseconds.
Delay msRaw request to repeat.
Send MultiSend the request the configured number of times.
Copy from Request tabCopy the request from the Request tab into this box.
HostHost to test rate limiting on.
PortPort.
TLSUse TLS.
PortRaw request to repeat rapidly.
Run Rate Limit TestSend a burst of requests and report how the server rate-limits.
Copy from Request tabCopy the request from the Request tab.
HostWebSocket server host.
PortWebSocket server port.
TLSUse wss:// (TLS).
PathWebSocket path (e.g. /ws).
ProtocolsOptional subprotocols to request (Sec-WebSocket-Protocol).
Extra headers (one per line)Extra handshake headers, one per line (e.g. an Authorization header).
ConnectOpen the WebSocket connection.
DisconnectClose the WebSocket connection.
message to send…Message to send over the open WebSocket.
Send textSend the box content as a text frame.
Send binary (base64)Send the box content, base64-decoded, as a binary frame.
PingSend a ping frame.
Clear logClear the WebSocket message log.
InputText to transform.
OutputTransformed result.
JWT TokenPaste a JWT (the three base64url parts separated by dots).
DecodeDecode the token's header and payload.
Extract from last responsePull a JWT out of the last HTTP response.
Paste from clipboardPaste a JWT from the clipboard.
HeaderThe token header (JSON). Editable before re-signing.
PayloadThe token payload/claims (JSON). Editable before re-signing.
Secret / KeySecret or key used to sign or verify the token.
Re-sign (HMAC)Re-sign the edited token with the secret using HMAC.
VerifyCheck the token's signature against the secret.
alg:noneProduce a variant with alg set to none, to test servers that fail to reject unsigned tokens.
alg confusion (RS→HS)Produce an RS→HS algorithm-confusion variant, to test servers that verify an RS256 token with the public key as an HMAC secret.
Remove expRemove the exp claim, to test servers that don't enforce expiry.
Null signatureProduce a variant with an empty signature.
kid injectionInject a payload into the kid header field, to test for injection in key lookup.
jku injectionSet a jku header pointing at a chosen key set, to test servers that fetch verification keys from a URL.
Brute-force secret (wordlist, one per line)Candidate secrets, one per line, to try against an HMAC-signed token.
Brute-forceTry each candidate secret until one verifies the token.
InputText to hash, or a hash to identify or crack.
Identify HashGuess the hash type from its format and length.
Generate AllCompute the input's hash in every supported algorithm.
Dictionary CrackThe hash you want to crack.
Dictionary CrackHash algorithm the target hash uses.
CrackTry each wordlist entry against the target hash.
StopStop cracking.
wordlist (one per line)
password
123456
admin
…Candidate plaintexts, one per line.
RecordStart recording the requests you send into a replayable macro.
Stop RecordingStop recording.
Play AllReplay all recorded steps in order.
ClearClear the recorded macro.
ExportExport the macro to a file.
ImportImport a macro from a file.
Dictionary CrackChoose a macro file to import.
Spec URL (or paste below)URL of an OpenAPI/Swagger spec to import endpoints from.
FetchFetch and parse the spec at the URL.
Upload FileUpload an OpenAPI/Swagger file instead of fetching.
Spec URL (or paste below)Choose an OpenAPI/Swagger file.
paste OpenAPI JSON here…Paste OpenAPI/Swagger JSON directly.
Parse & ImportParse the pasted spec and import its endpoints as requests.
+ AddAdd an environment variable.
βœ•Close the variables panel.
Auto-injectAutomatically attach jar cookies to matching outgoing requests.
Clear allRemove all cookies from the jar.
βœ•Close the cookie jar.
βœ•Close the auth helper.
TypeAuthentication scheme to build a header for.
UsernameUsername and password for HTTP Basic auth.
PasswordUsername and password for HTTP Basic auth.
TokenBearer token to put in the Authorization header.
Header nameThe header name and the key value for API-key auth.
KeyThe header name and the key value for API-key auth.
UsernameUsername and password for HTTP Digest auth.
PasswordUsername and password for HTTP Digest auth.
RealmRealm and server nonce for Digest auth.
NonceRealm and server nonce for Digest auth.
URIRequest URI and quality-of-protection for Digest auth.
QOPRequest URI and quality-of-protection for Digest auth.
Access KeyAccess key and secret key for AWS SigV4 signing.
Secret KeyAccess key and secret key for AWS SigV4 signing.
RegionRegion and service name for AWS SigV4 signing.
ServiceRegion and service name for AWS SigV4 signing.
Insert into requestBuild the Authorization header and insert it into the request.
Send in Request tabSend this result's request in the Request tab.
βœ•Close this result view.

🌐DNS

Query any record type, reverse-resolve, target a specific server, and attempt zone transfers (AXFR)

HydraSocket screen

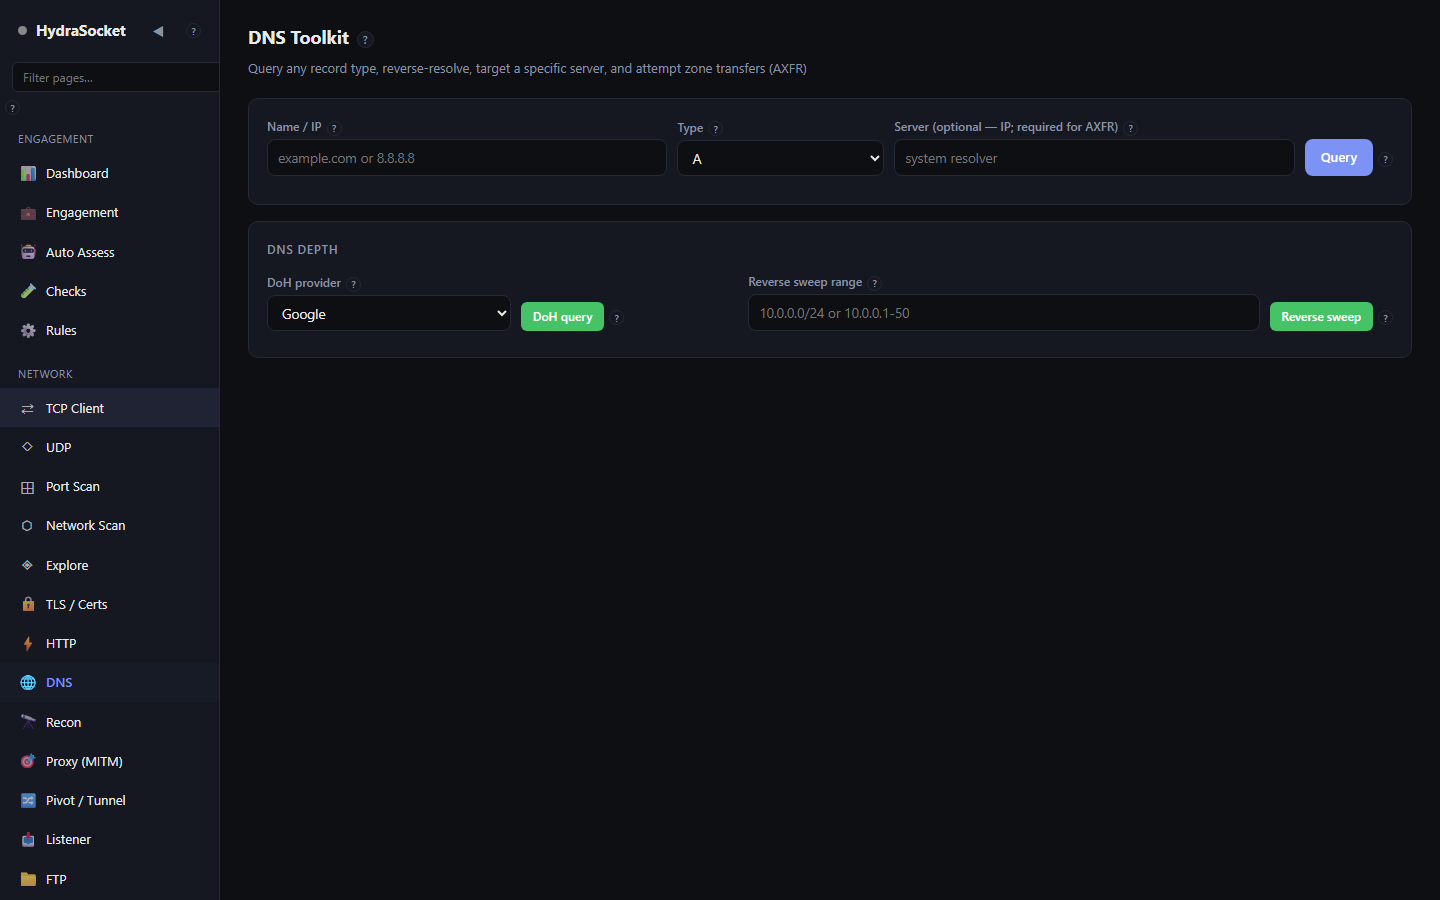
The DNS Toolkit queries any record type, reverse-resolves IP addresses, targets a specific resolver, queries over DNS-over-HTTPS, sweeps a range of PTR records, and can attempt a zone transfer (AXFR).

How to use

  1. Enter a Name / IP β€” a domain for forward lookups, an IP for a reverse lookup.
  2. Pick a record Type (A, AAAA, MX, TXT, NS, CNAME, SOA, and so on).
  3. Optionally set a Server (resolver IP) to query a specific server; this is required for a zone transfer.
  4. Click Query.

DNS depth

  • DoH query runs the lookup through a DNS-over-HTTPS provider β€” useful when local DNS is filtered.
  • Reverse sweep resolves PTR records for every address in a CIDR or dash range, to map names across a subnet.

A zone transfer (AXFR) pulls an entire zone and should only be attempted against servers you are authorized to query.

Controls on this page 8
ControlWhat it does
Name / IPName or IP to look up β€” a domain for forward records, an IP for a reverse lookup.
TypeDNS record type to query (A, AAAA, MX, TXT, NS, CNAME, SOA, etc.).
Server (optional β€” IP; required for AXFR)Resolver to query, by IP. Leave blank to use the system resolver. Required for a zone transfer (AXFR).
QueryRun the DNS query.
DoH providerDNS-over-HTTPS provider to query through.
DoH queryRun the query over DoH.
Reverse sweep rangeRange of IPs to reverse-resolve (PTR), as CIDR or a dash range.
Reverse sweepReverse-resolve every address in the range.

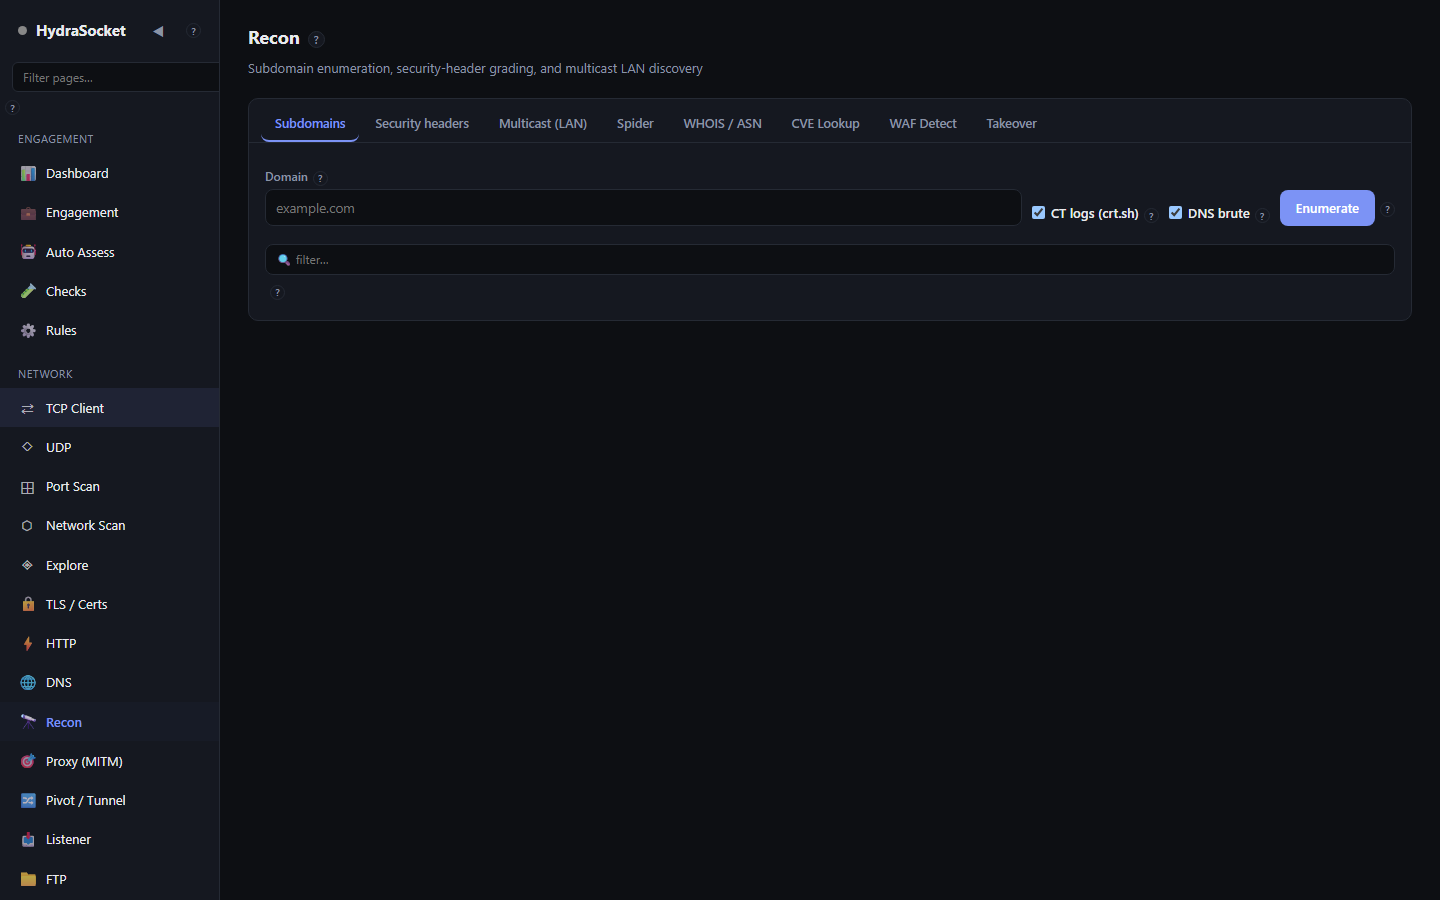
πŸ”­Recon

Subdomain enumeration, security-header grading, and multicast LAN discovery

Subdomains
Subdomains

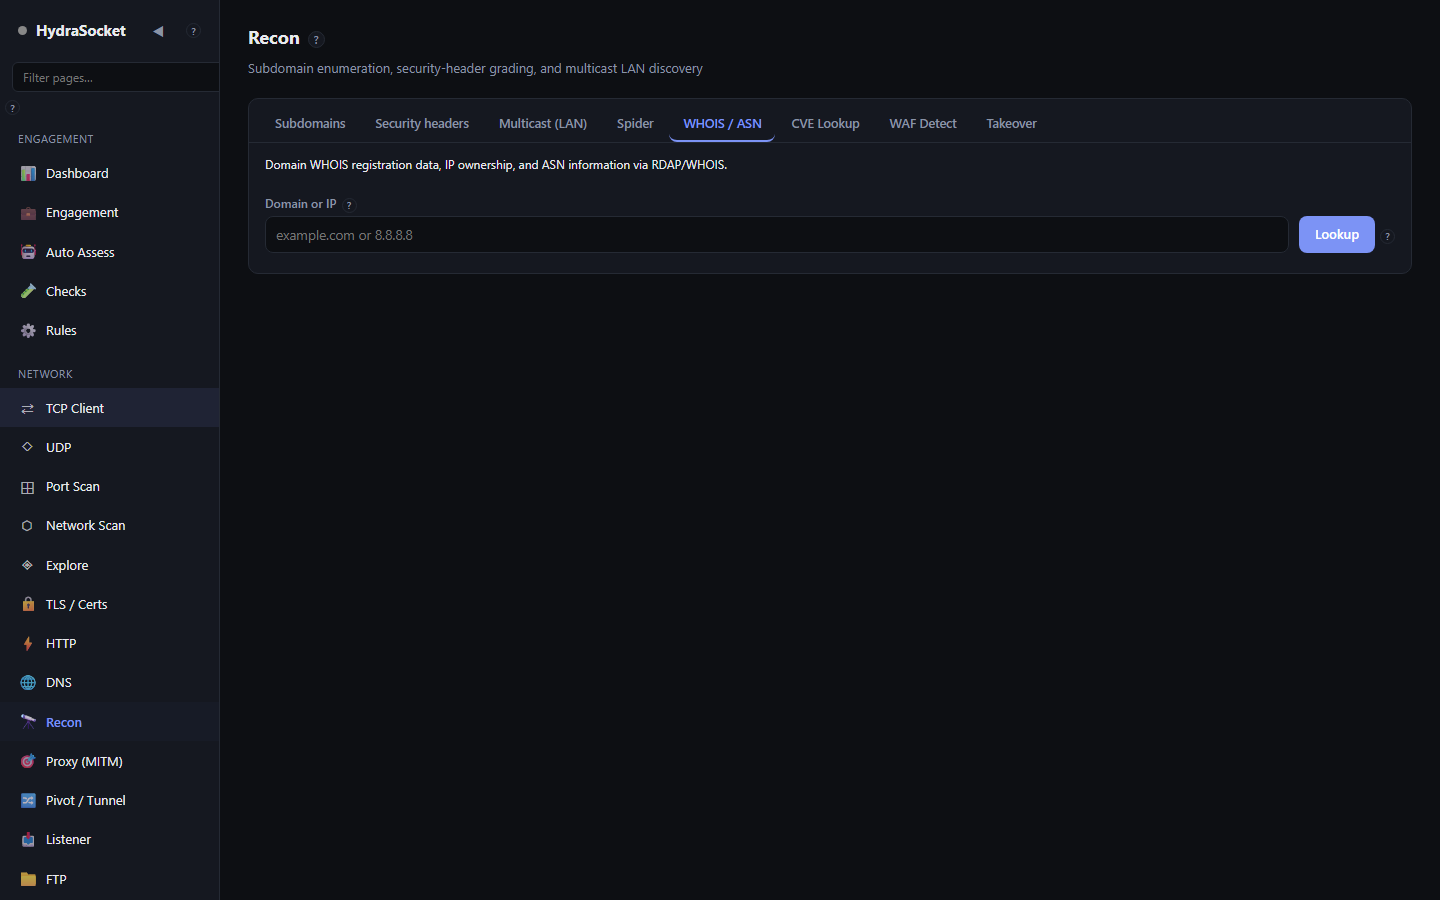
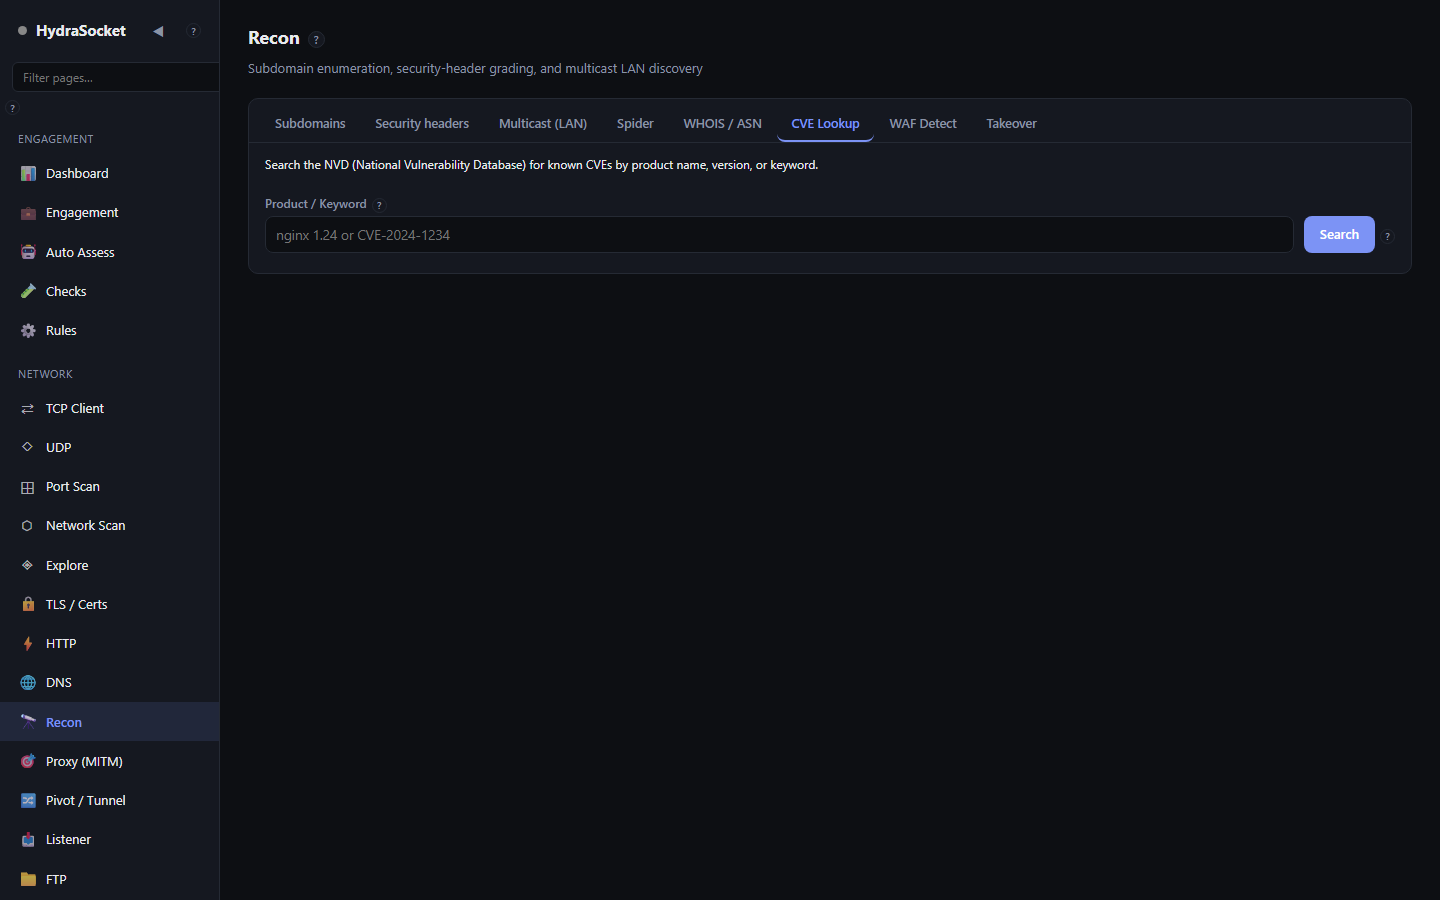
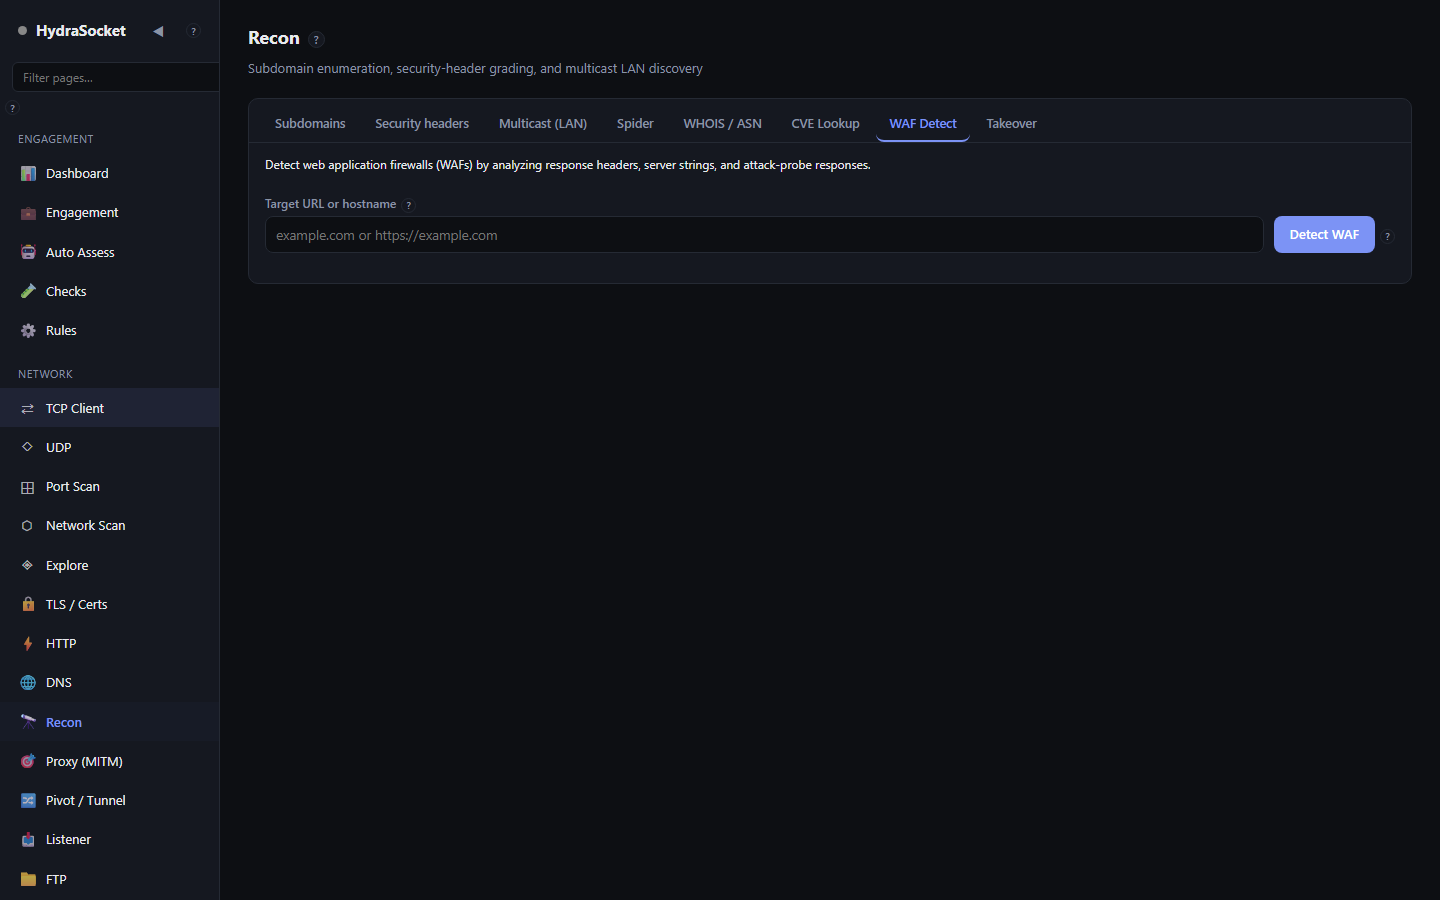
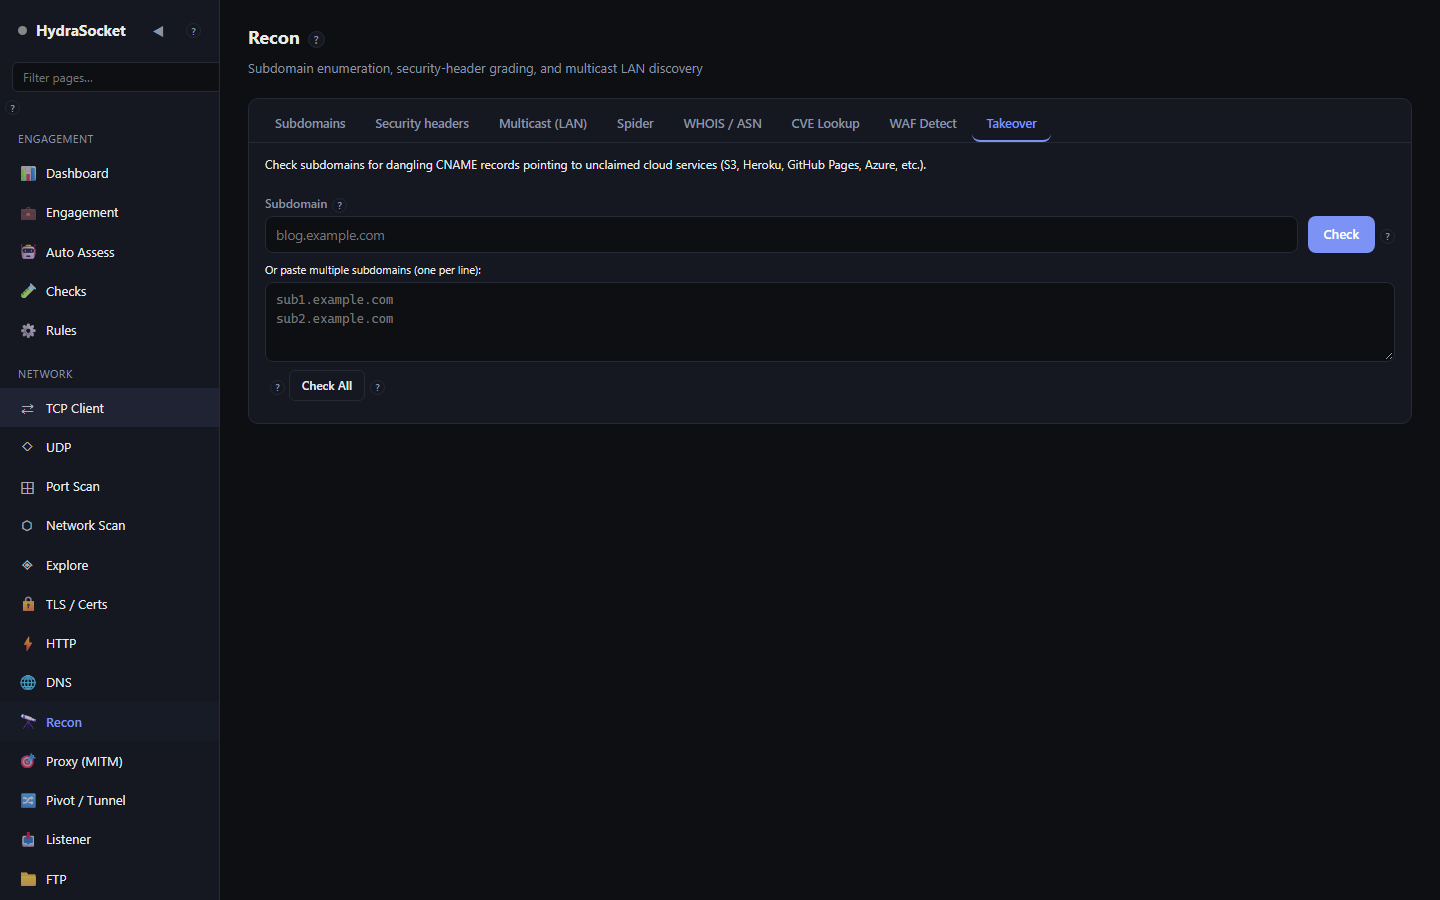
The Recon page gathers passive and light-touch intelligence about a target: subdomains, security-header grades, LAN multicast discovery, site structure, WHOIS/ASN data, known CVEs, WAF presence and dangling-subdomain takeover risks. Switch tools with the buttons across the top.

Tools

  • Subdomains β€” enter a domain, optionally include Certificate Transparency logs and a brute-force pass, and enumerate names.
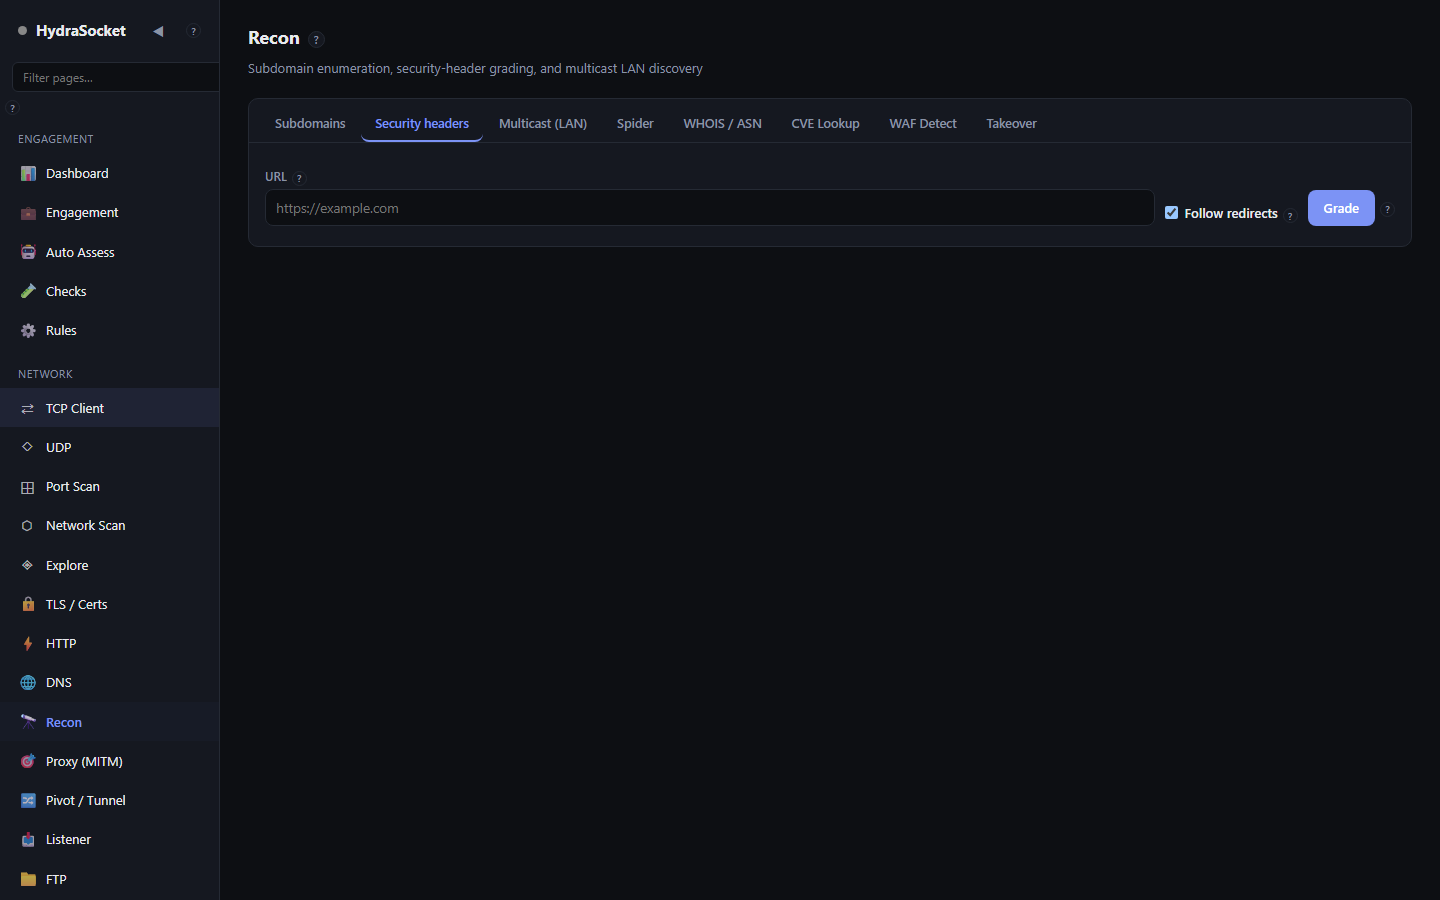
  • Security headers β€” fetch a URL and grade its security headers.
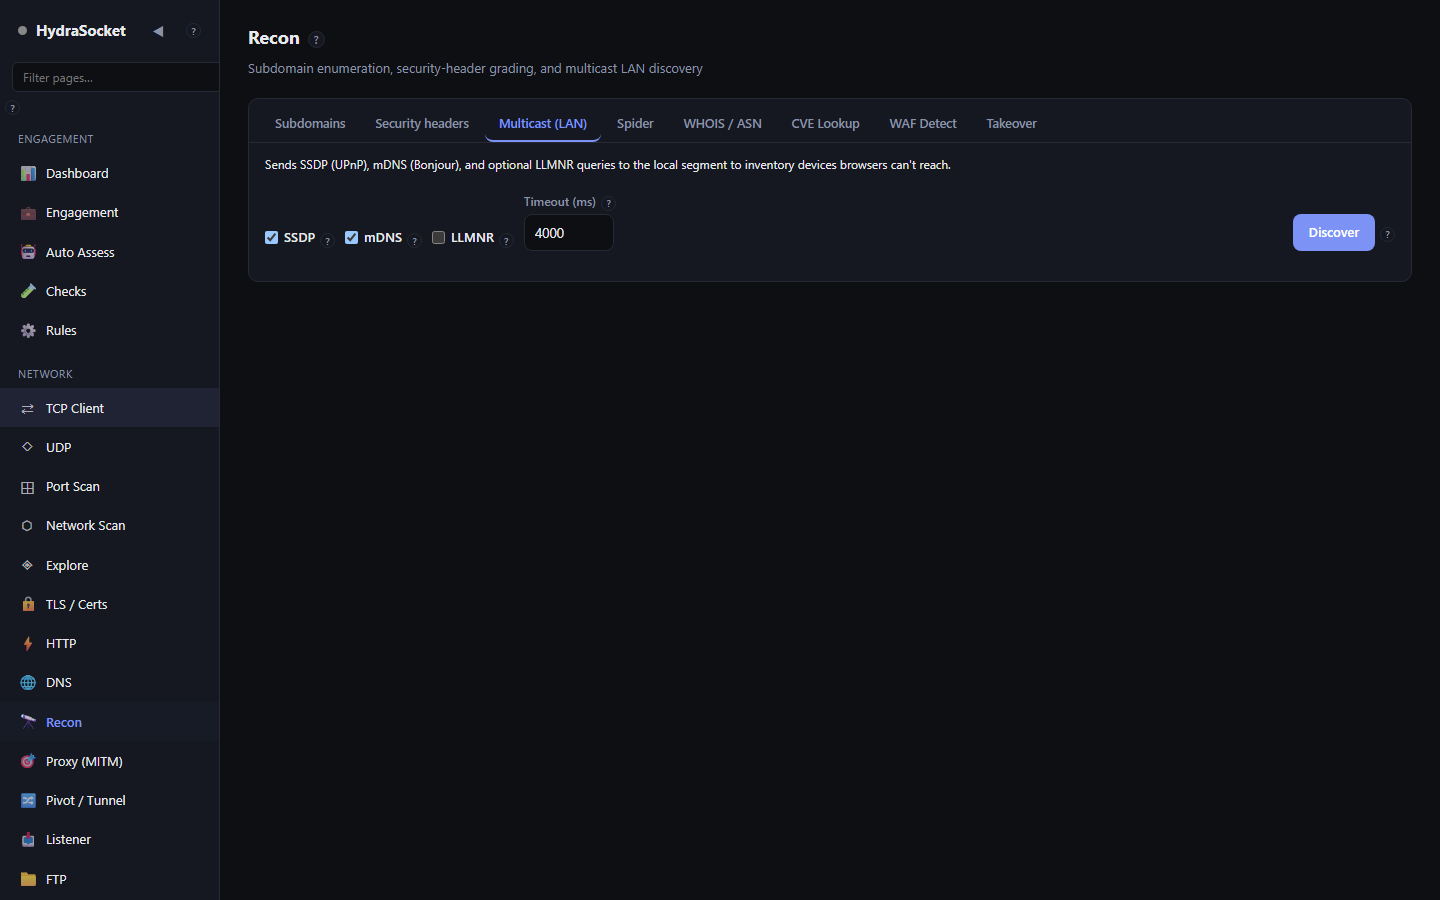
  • Multicast (LAN) β€” send SSDP/mDNS/LLMNR probes on the local network and list what answers.
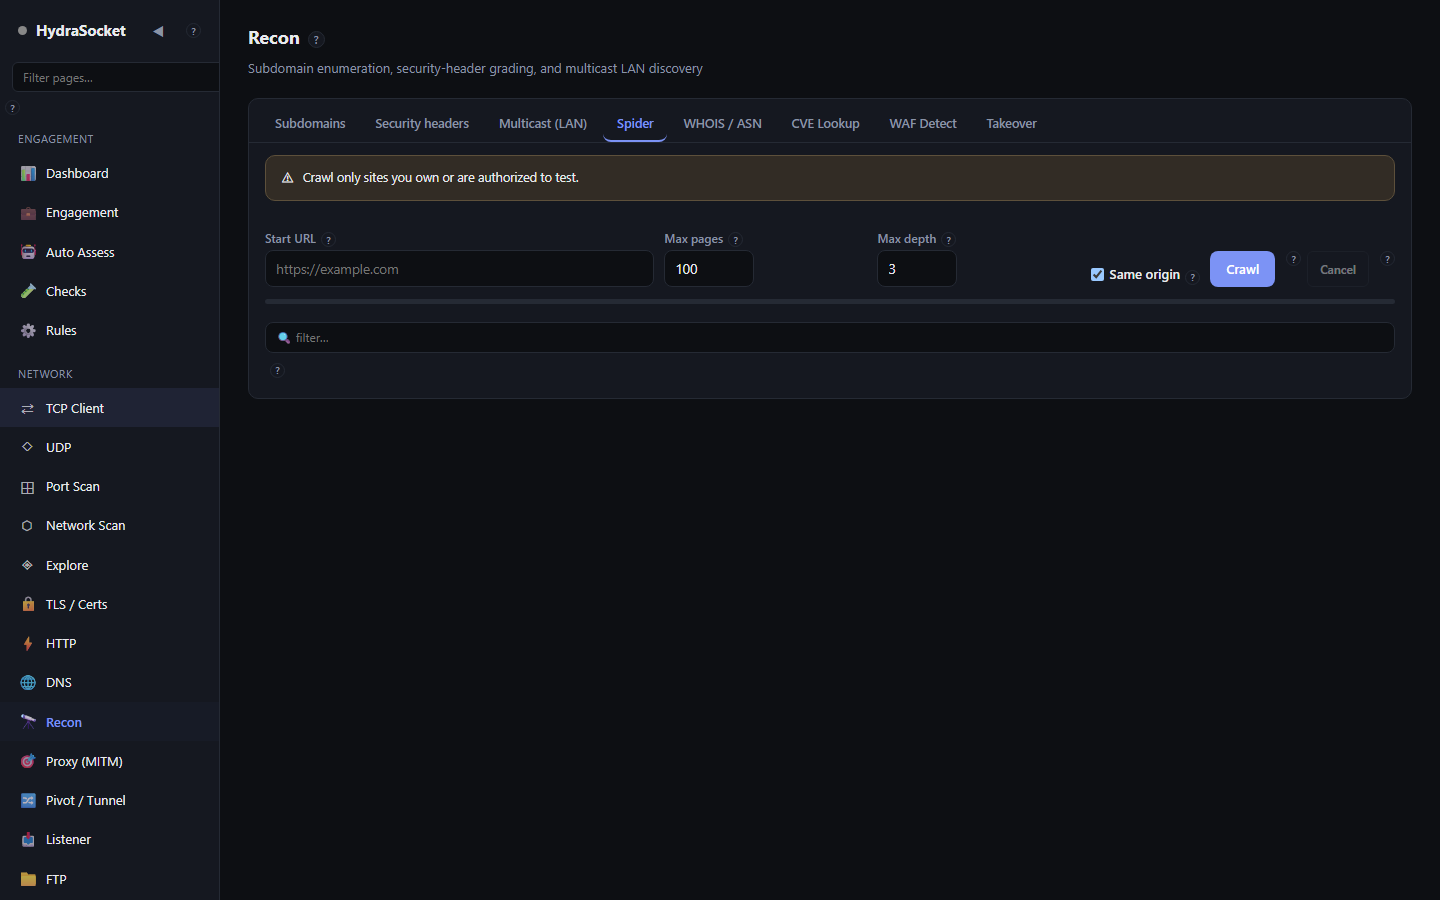
  • Spider β€” crawl a site from a start URL, bounded by max pages, depth and same-origin.
  • WHOIS / ASN β€” registration and network-ownership data for a domain or IP.
  • CVE Lookup β€” search known vulnerabilities by product/version or CVE id.
  • WAF Detect β€” fingerprint any web application firewall in front of a target.
  • Takeover β€” check one or many subdomains for takeover-able dangling records.

Tip

  • Certificate Transparency often reveals subdomains that brute force misses β€” enable both for the widest coverage.

Every tab

Security headers
Security headers
Multicast (LAN)
Multicast (LAN)
Spider
Spider
WHOIS / ASN
WHOIS / ASN
CVE Lookup
CVE Lookup
WAF Detect
WAF Detect
Takeover
Takeover
Controls on this page 30
ControlWhat it does
DomainDomain to enumerate subdomains for.
CT logs (crt.sh)Include results from Certificate Transparency logs.
DNS bruteAlso brute-force common subdomain names.
EnumerateEnumerate subdomains.
πŸ” filter…Filter the subdomain list.
URLURL whose security headers you want graded.
Follow redirectsFollow redirects before grading.
GradeFetch the URL and grade its security headers.
SSDPInclude SSDP (UPnP) in the multicast discovery.
mDNSInclude mDNS (Bonjour) in the discovery.
LLMNRInclude LLMNR in the discovery.
Timeout (ms)How long to listen for multicast replies, in milliseconds.
DiscoverSend multicast discovery probes on the local network and list what answers.
Start URLURL to start crawling from.
Max pagesStop after crawling this many pages.
Max depthHow many links deep to follow from the start URL.
Same originOnly follow links on the same origin as the start URL.
CrawlStart crawling.
CancelStop crawling.
πŸ” filter…Filter the crawled URLs.
Domain or IPDomain or IP to look up registration/ASN data for.
LookupRun the WHOIS / ASN lookup.
Product / KeywordProduct and version, or a CVE id, to search for.
SearchSearch for matching CVEs.
Target URL or hostnameURL or hostname to fingerprint for a web application firewall.
Detect WAFProbe the target and identify any WAF in front of it.
SubdomainA single subdomain to check for a dangling/takeover-able CNAME.
CheckCheck this subdomain for takeover conditions.
sub1.example.com
sub2.example.comA list of subdomains to check, one per line.
Check AllCheck every subdomain in the list.

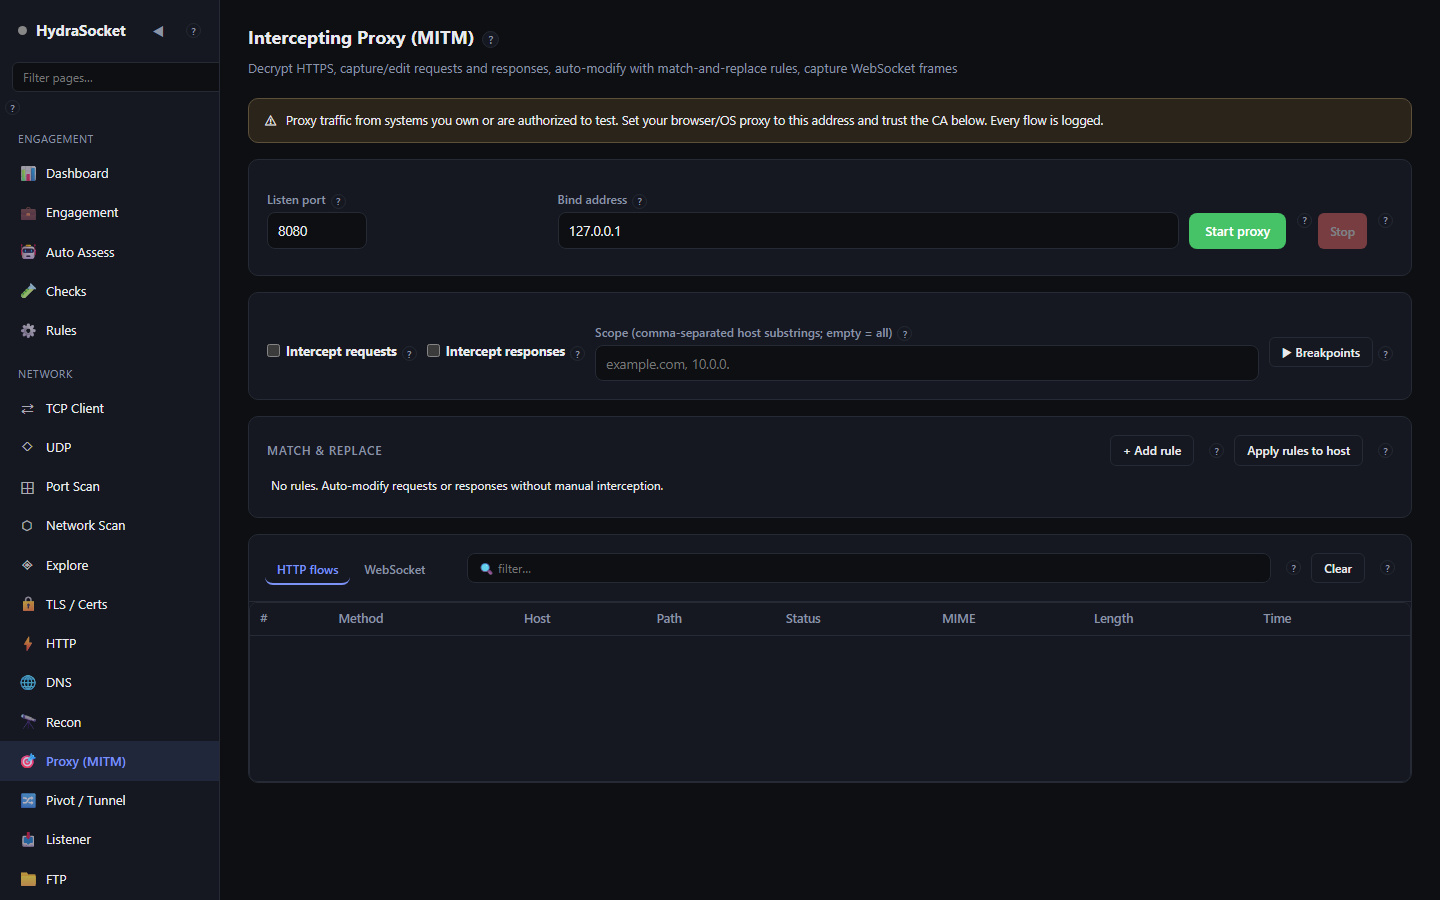
🎯Proxy (MITM)

Decrypt HTTPS, capture/edit requests and responses, auto-modify with match-and-replace rules, capture WebSocket frames

HydraSocket screen

The Intercepting Proxy is a man-in-the-middle for HTTP and HTTPS. Point a browser at it to capture, pause, edit and replay requests and responses, apply match-and-replace rules automatically, and capture WebSocket frames.

Getting started

  1. Set a Listen port and Bind address, then click Start proxy.
  2. Click Download CA certificate and install/trust it, so HTTPS can be decrypted without browser warnings.
  3. Configure your browser to use this host and port as its HTTP(S) proxy. Traffic now appears under HTTP flows.

Intercepting

  1. Set a Scope (comma-separated host substrings) to limit which traffic you act on.
  2. Tick Intercept (requests) and/or responses to pause matching traffic. Use the breakpoint fields to break only on certain methods, paths, statuses or content types.
  3. When a request is held, edit it and click Forward edited, send it unchanged with Forward, or Drop it.

Automation & replay

  • Match & Replace rules rewrite traffic on the fly β€” click Apply rules to host to activate them.
  • Select a captured flow to Repeat it, send it to the HTTP tab, or open the built-in Repeater.

Decrypting HTTPS requires installing a CA certificate on the test machine. Do this only on machines and traffic you are authorized to intercept, and remove the certificate afterwards.

Controls on this page 28
ControlWhat it does
Listen portPort the intercepting proxy listens on. Configure your browser to use this as its HTTP(S) proxy.
Bind addressAddress the proxy binds to.
Start proxyStart the proxy.
StopStop the proxy.
⬇ Download CA certificateDownload the proxy's CA certificate. Install and trust it so HTTPS can be decrypted without browser warnings.
Intercept requestsPause matching requests so you can inspect and edit them before they go out.
Intercept responsesPause matching responses so you can inspect and edit them before they reach the browser.
Scope (comma-separated host substrings; empty = all)Only act on hosts containing one of these substrings (comma-separated). Empty means all hosts.
β–Ά BreakpointsShow or hide the breakpoint conditions below.
Methods (comma-sep)Only break on these HTTP methods (comma-separated).
Path regexOnly break when the path matches this regular expression.
Response statusOnly break on these response statuses (e.g. 4xx,5xx,302).
Content-typeOnly break on these response content types (e.g. json,xml).
ApplyApply the breakpoint conditions.
+ Add ruleAdd a match-and-replace rule.
Apply rules to hostPush the match-and-replace rules to the running proxy.
ForwardSend the held request/response on unchanged.
Forward editedSend the held request/response with your edits applied.
DropDrop the held request/response so it never completes.
Content-typeThe paused request or response, editable before you forward it.
πŸ” filter…Filter the captured flows.
ClearClear all captured flows.
⟳ RepeatRe-send the selected flow as-is.
β†’ HTTP tabLoad the selected flow into the HTTP tab for editing.
βœ•Close the flow detail.
Content-typeAn editable copy of the selected request to resend.
SendSend the edited request.
Add a note to this flow…Attach a note to the selected flow.

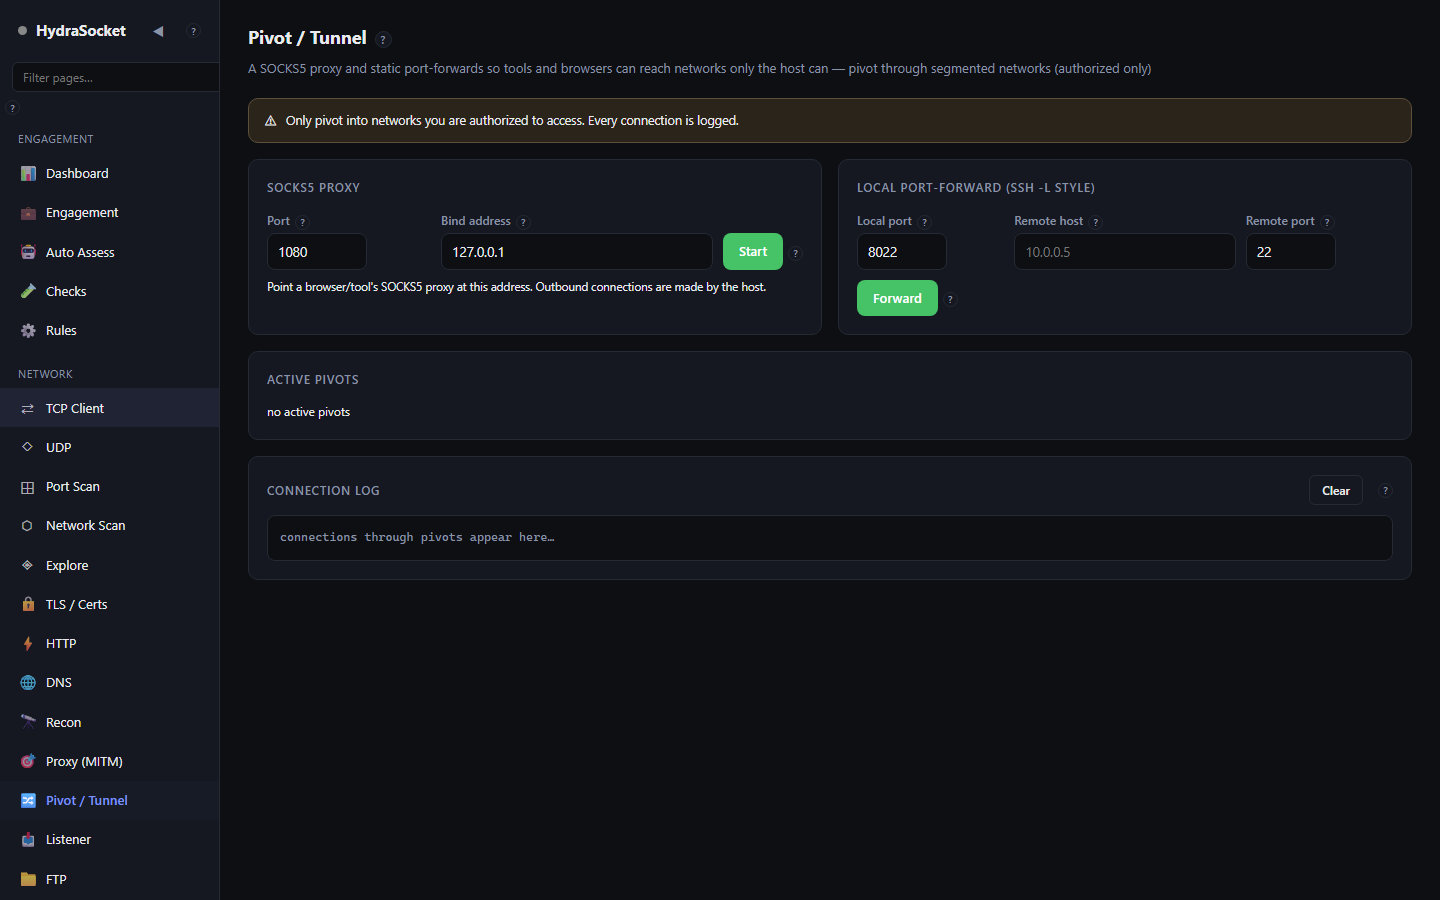
πŸ”€Pivot / Tunnel

A SOCKS5 proxy and static port-forwards so tools and browsers can reach networks only the host can β€” pivot through segmented networks (authorized only)

HydraSocket screen

Pivot / Tunnel lets tools and browsers reach networks that only the host machine can see. Run a SOCKS5 proxy for dynamic access, or set up static local port-forwards in the style of ssh -L.

SOCKS5 proxy

  1. Set a Port and Bind address, then click Start.
  2. Point a browser or tool at this host and port as a SOCKS5 proxy; its traffic now exits through the host machine.

Local port-forward

  1. Set a Local port to open on this machine.
  2. Enter the Remote host and Remote port the forward should reach.
  3. Click Forward. Connecting to the local port now tunnels to that remote destination.

Pivoting bridges network segments and is a high-impact capability. Use it only within the boundaries of an authorized engagement.

Controls on this page 8
ControlWhat it does
PortLocal port the SOCKS5 proxy listens on. Point your tools or browser at this.
Bind addressLocal address the SOCKS5 proxy binds to.
StartStart the SOCKS5 proxy.
Local portLocal port to open on this machine.
Remote hostRemote host that traffic to the local port is forwarded to.
Remote portRemote port to forward to.
ForwardStart the local port-forward.
ClearClear the connection log.

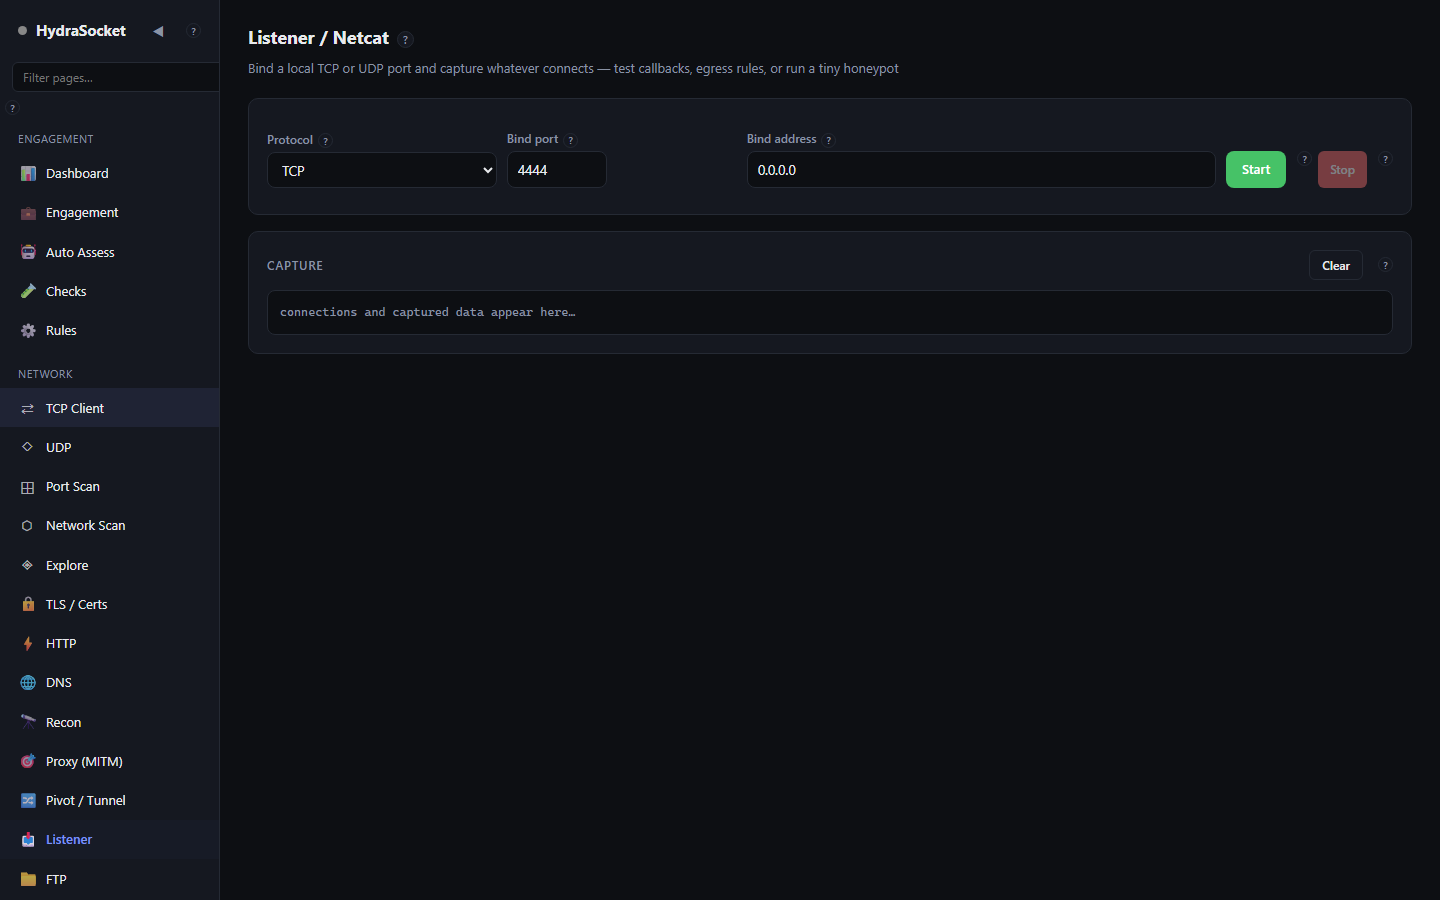
πŸ“₯Listener

Bind a local TCP or UDP port and capture whatever connects β€” test callbacks, egress rules, or run a tiny honeypot

HydraSocket screen

The Listener binds a local TCP or UDP port and captures whatever connects to it. Use it to test callbacks, verify egress/firewall rules, or run a tiny honeypot. It can send a canned reply to each connection.

How to use

  1. Choose a Protocol (TCP or UDP), a Bind port and a Bind address.
  2. Click Start. Anything that connects, and any data it sends, appears under Capture.
  3. Optionally set a Reply (use \r\n for CRLF), pick a Target connection, and click Send to respond.
  4. Click Stop when finished.

Good for

  • Confirming an out-of-band callback actually reaches you.
  • Checking which outbound ports a host is allowed to use.
Controls on this page 9
ControlWhat it does
ProtocolListen on TCP or UDP.
Bind portLocal port to bind and listen on.
Bind addressLocal address to bind to.
StartStart listening.
StopStop listening.
Reply (sent to connections; use \r\n for CRLF)Optional canned reply sent to anything that connects. Use \r\n for CRLF.
TargetWhich connected client to send to.
SendSend the reply to the selected connection.
ClearClear the capture log.

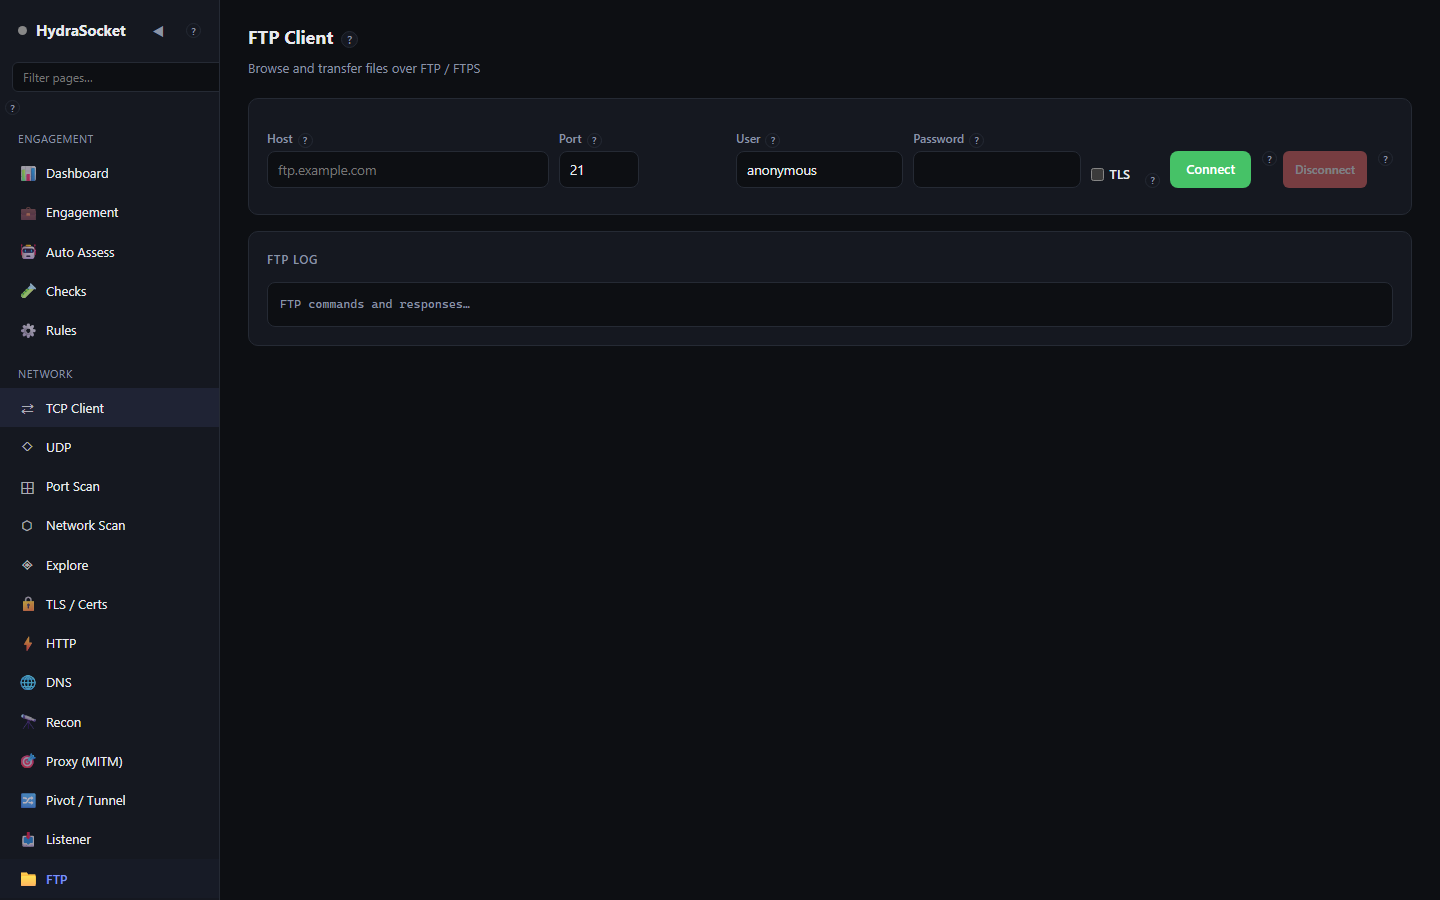
πŸ“FTP

Browse and transfer files over FTP / FTPS

HydraSocket screen

The FTP Client connects to an FTP or FTPS server, browses directories and downloads files.

How to use

  1. Enter the Host, Port (usually 21), User and Password. Use anonymous as the user for anonymous access.
  2. Tick TLS for FTPS, then click Connect.
  3. Navigate with the directory view: edit the path and press Enter, or use Up and Refresh.
  4. To fetch a file, enter its name in Remote filename and click Download.
Controls on this page 12
ControlWhat it does
HostFTP server host.
PortFTP control port (usually 21).
UserFTP username. Use anonymous for anonymous access.
PasswordFTP password.
TLSUse FTPS (FTP over TLS).
ConnectConnect and log in.
DisconnectDisconnect from the server.
PasswordCurrent remote directory. Edit and press Enter to change directory.
⬆ UpGo to the parent directory.
↻ RefreshReload the directory listing.
Remote filename to downloadRemote filename to download.
DownloadDownload the named remote file.

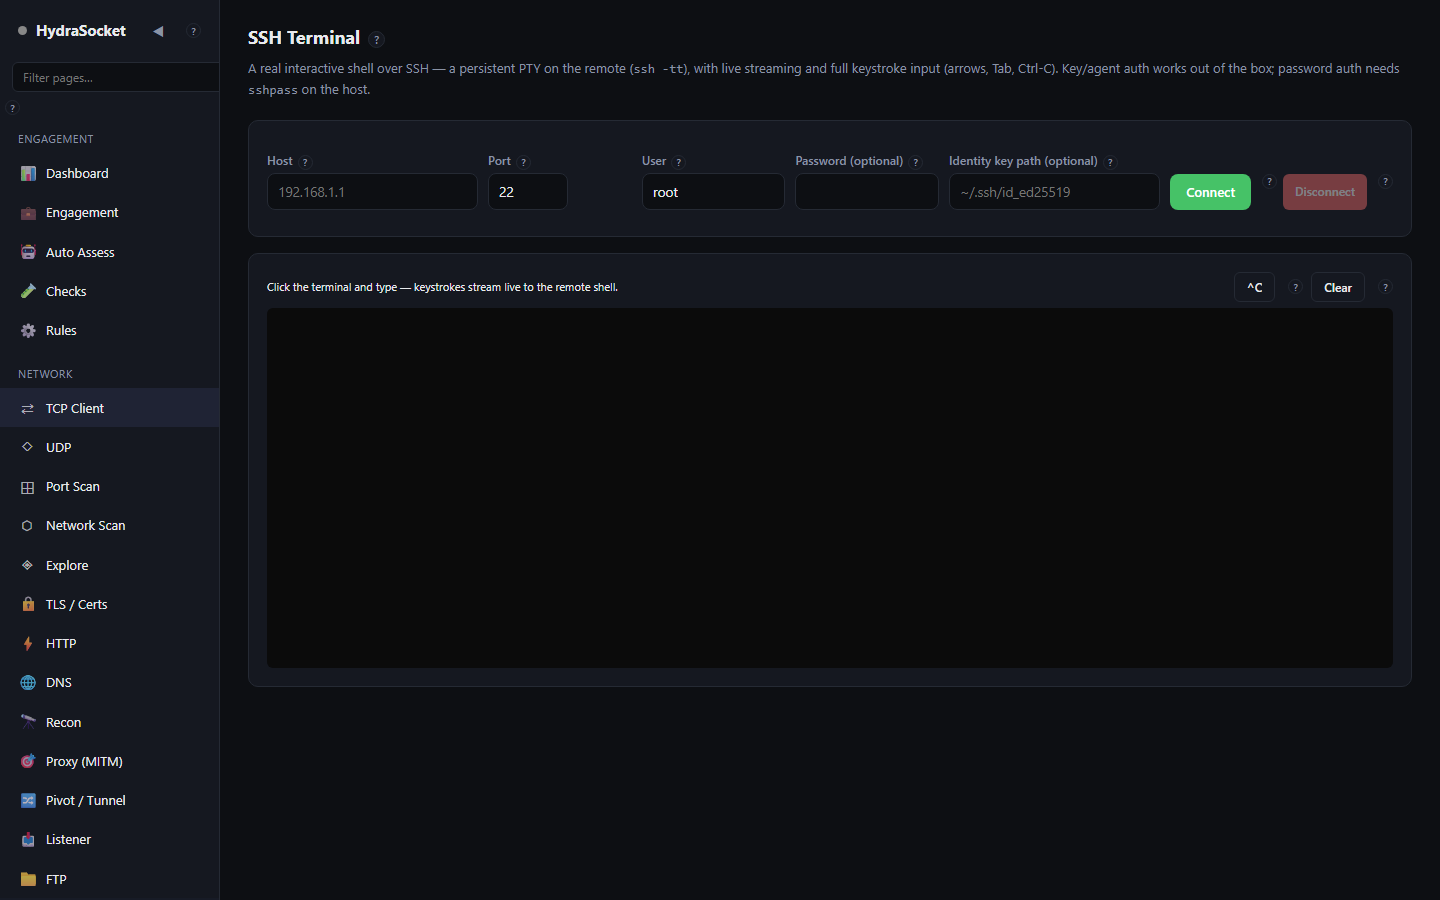
πŸ’»SSH Terminal

A real interactive shell over SSH β€” a persistent PTY on the remote (ssh -tt), with live streaming and full keystroke input (arrows, Tab, Ctrl-C). Key/agent auth works out of the box; password auth needs sshpass on the host.

HydraSocket screen

The SSH Terminal gives you a real interactive shell over SSH, backed by a persistent PTY on the remote host β€” not a one-shot command runner. Authenticate with a password or an identity key.

How to use

  1. Enter the Host, Port (usually 22) and User.
  2. Provide a Password, or leave it blank and set an Identity key path (for example ~/.ssh/id_ed25519).
  3. Click Connect, then type in the terminal as you would in any shell.
  4. Use ^C to interrupt a running command and Clear to clear the view.
Controls on this page 9
ControlWhat it does
HostSSH server host.
PortSSH port (usually 22).
UserSSH username.
Password (optional)Password. Leave blank if using a key.
Identity key path (optional)Path to a private identity key for key-based auth (e.g. ~/.ssh/id_ed25519).
ConnectOpen the SSH session and interactive shell.
DisconnectClose the SSH session.
^CSend Ctrl-C to interrupt the running remote command.
ClearClear the terminal view.

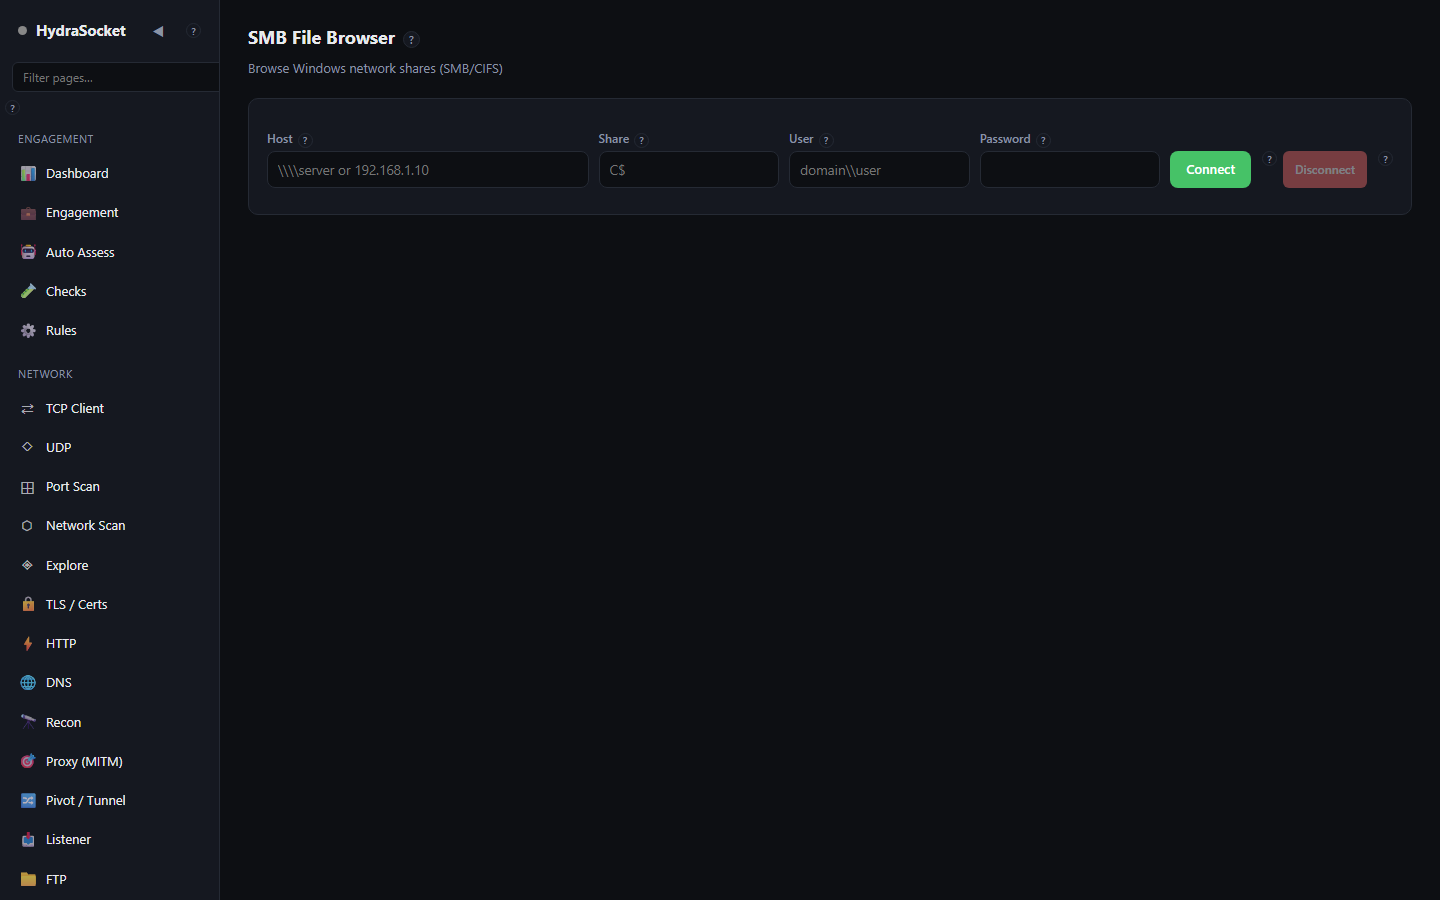
πŸ—‚SMB Browser

Browse Windows network shares (SMB/CIFS)

HydraSocket screen

The SMB File Browser connects to Windows network shares over SMB/CIFS and lets you walk their directories.

How to use

  1. Enter the Host (\\server or an IP) and the Share name (for example C$).
  2. Supply a User (optionally domain\user) and Password, then click Connect.
  3. Browse with the path bar: edit and press Enter, or use Up and Refresh.
Controls on this page 9
ControlWhat it does
HostSMB server β€” \\server or an IP.
ShareShare name to open (e.g. C$).
UserUsername, optionally with domain (domain\user).
PasswordPassword.
ConnectConnect to the share.
DisconnectDisconnect.
PasswordCurrent path inside the share. Edit and press Enter to navigate.
⬆ UpGo up one directory.
↻ RefreshReload the current directory.

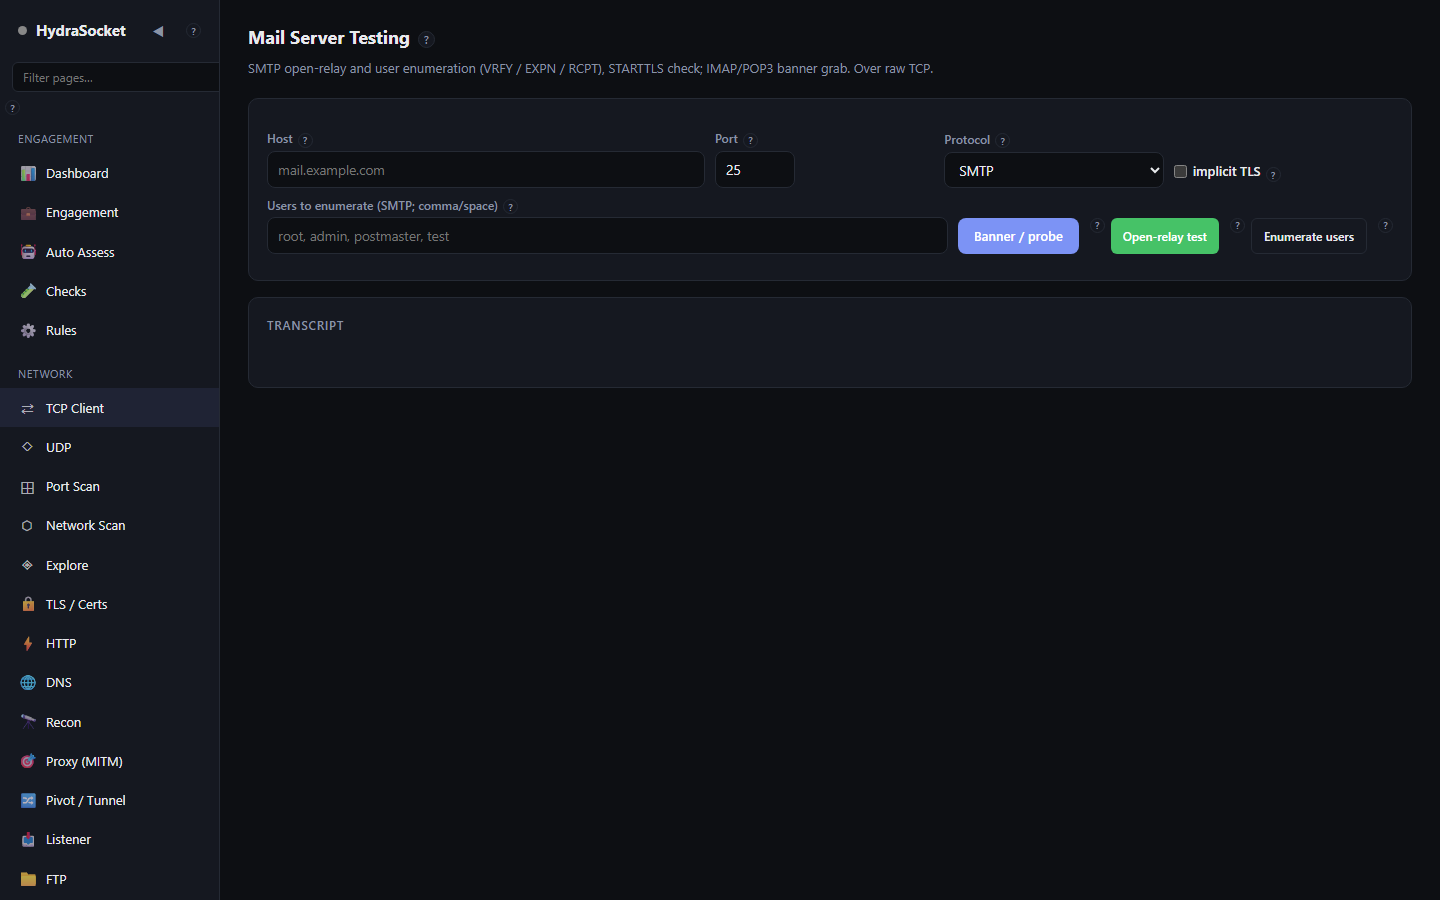
βœ‰Mail (SMTP/IMAP/POP3)

SMTP open-relay and user enumeration (VRFY / EXPN / RCPT), STARTTLS check; IMAP/POP3 banner grab. Over raw TCP.

HydraSocket screen

The Mail page tests mail servers over raw TCP: SMTP open-relay and user enumeration (VRFY / EXPN / RCPT), a STARTTLS check, and IMAP/POP3 banner grabs.

How to use

  1. Enter the Host and Port (25/465/587 SMTP, 143/993 IMAP, 110/995 POP3) and choose the Protocol. Tick TLS to connect securely or attempt STARTTLS.
  2. Banner / probe connects and reads the server's banner and capabilities.
  3. For SMTP, list candidate Users and click Enumerate users to see which exist, or Open-relay test to check whether the server relays mail for an outside sender.

Relay and enumeration tests interact with a live mail server. Only run them against servers you are authorized to test.

Controls on this page 8
ControlWhat it does
HostMail server host.
PortService port (25/465/587 SMTP, 143/993 IMAP, 110/995 POP3).
ProtocolWhich mail protocol to test.
implicit TLSConnect using TLS (or attempt STARTTLS).
Users to enumerate (SMTP; comma/space)Usernames to test for existence via SMTP (comma- or space-separated).
Banner / probeConnect and grab the banner / capabilities.
Open-relay testTest whether the server will relay mail for an outside sender (open relay).
Enumerate usersTry VRFY / EXPN / RCPT to see which of the listed users exist.

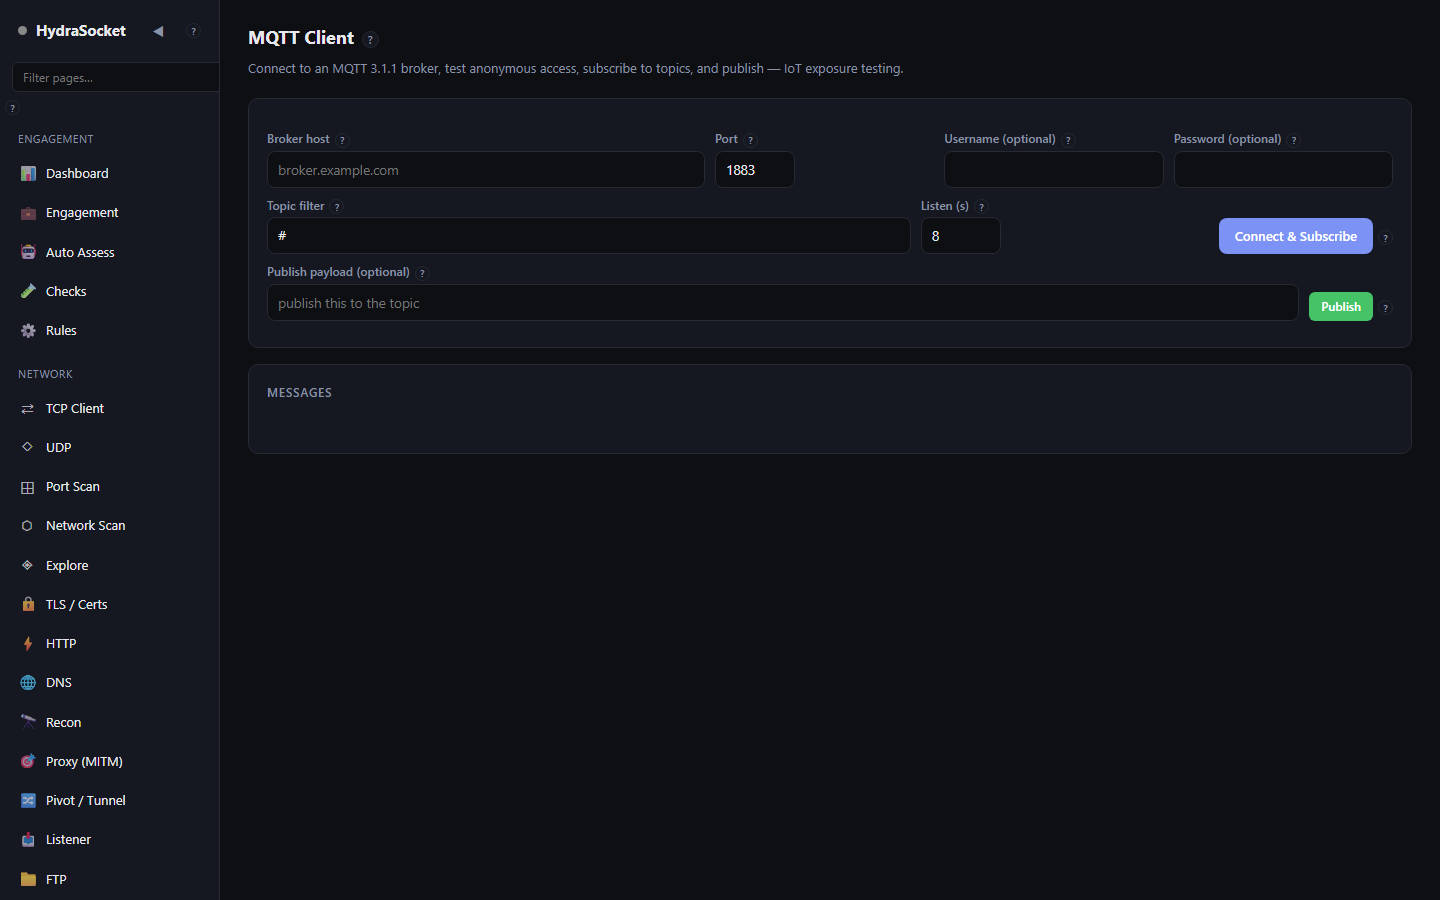
πŸ“ΆMQTT

Connect to an MQTT 3.1.1 broker, test anonymous access, subscribe to topics, and publish β€” IoT exposure testing.

HydraSocket screen

The MQTT Client connects to an MQTT 3.1.1 broker to test anonymous access, subscribe to topics and publish messages β€” useful for IoT exposure testing.

How to use

  1. Enter the Broker host and Port (1883 plain, 8883 TLS), and a Username/Password if required.
  2. Set a Topic filter (# matches everything) and how long to Listen, then click Connect & Subscribe.
  3. Incoming messages appear under Messages. To publish, enter a payload and click Publish.

Tip

  • If an anonymous subscribe to # succeeds, the broker is exposing all topics without authentication β€” a finding worth recording.
Controls on this page 9
ControlWhat it does
Broker hostMQTT broker host.
PortBroker port (1883 plain, 8883 TLS).
Username (optional)Username, if the broker requires one.
Password (optional)Password, if required.
Topic filterTopic filter to subscribe to. # subscribes to everything.
Listen (s)How many seconds to listen for messages.
Connect & SubscribeConnect and subscribe to the topic filter.
Publish payload (optional)Message body to publish.
PublishPublish the payload to the topic.

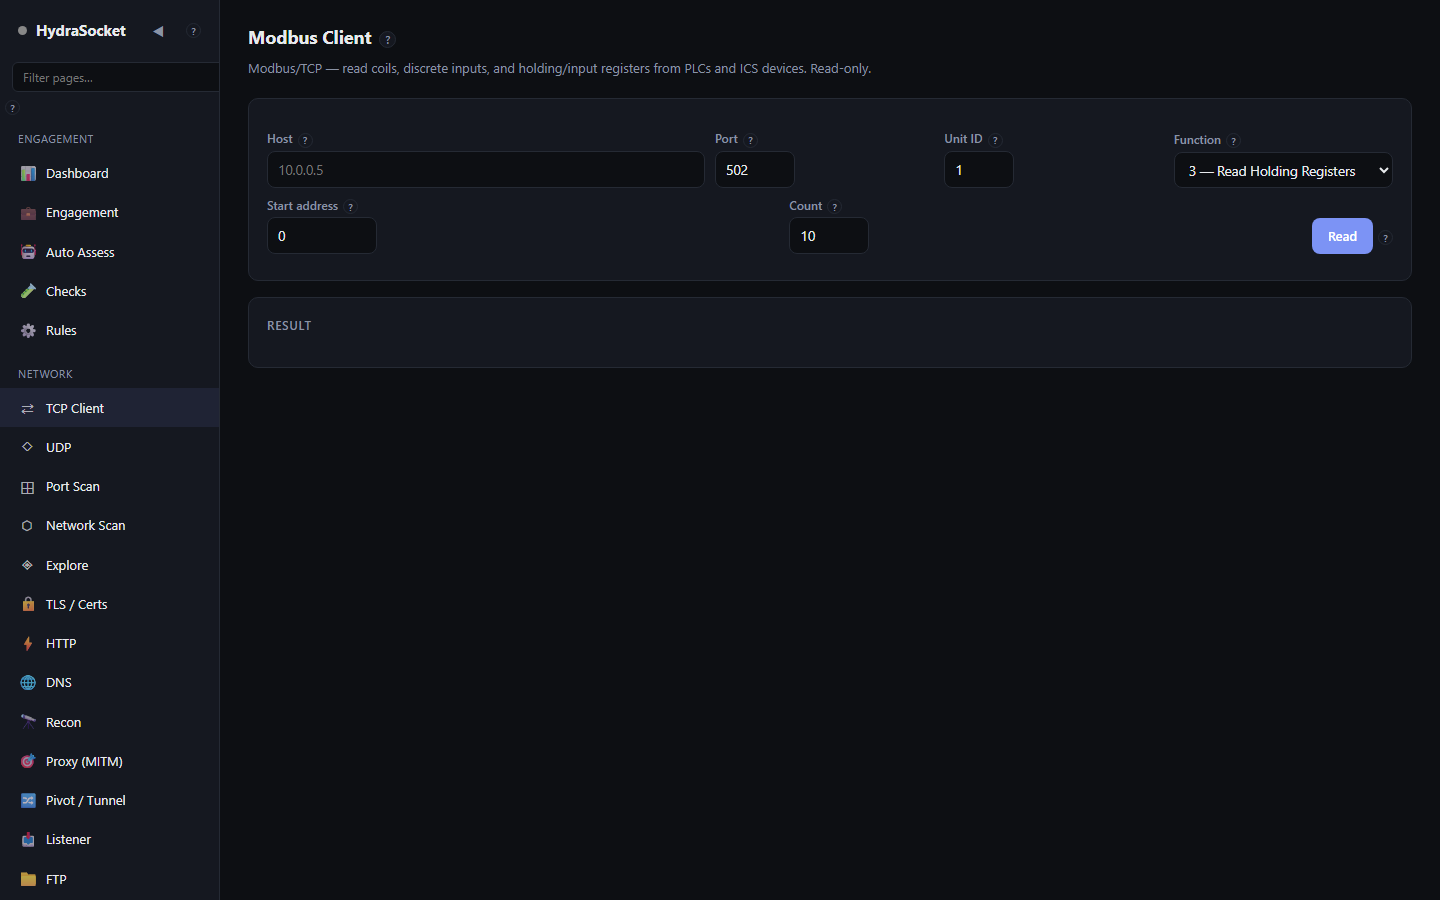
🏭Modbus

Modbus/TCP β€” read coils, discrete inputs, and holding/input registers from PLCs and ICS devices. Read-only.

HydraSocket screen

The Modbus Client reads data from PLCs and other industrial (ICS) devices over Modbus/TCP. It is read-only β€” it does not write to devices.

How to use

  1. Enter the Host and Port (usually 502) and the Unit ID (slave address).
  2. Choose a Function: coils, discrete inputs, holding registers or input registers.
  3. Set the Start address and Count, then click Read.

Industrial devices can be fragile. Even read requests should only go to equipment you are authorized to touch.

Controls on this page 7
ControlWhat it does
HostModbus/TCP device host.
PortModbus port (usually 502).
Unit IDUnit / slave ID to address.
FunctionWhich table to read: coils, discrete inputs, holding registers, or input registers.
Start addressFirst register/coil address to read.
CountHow many consecutive items to read.
ReadRead the requested registers/coils.

Directory

Query directory and management services.

πŸ“’LDAP

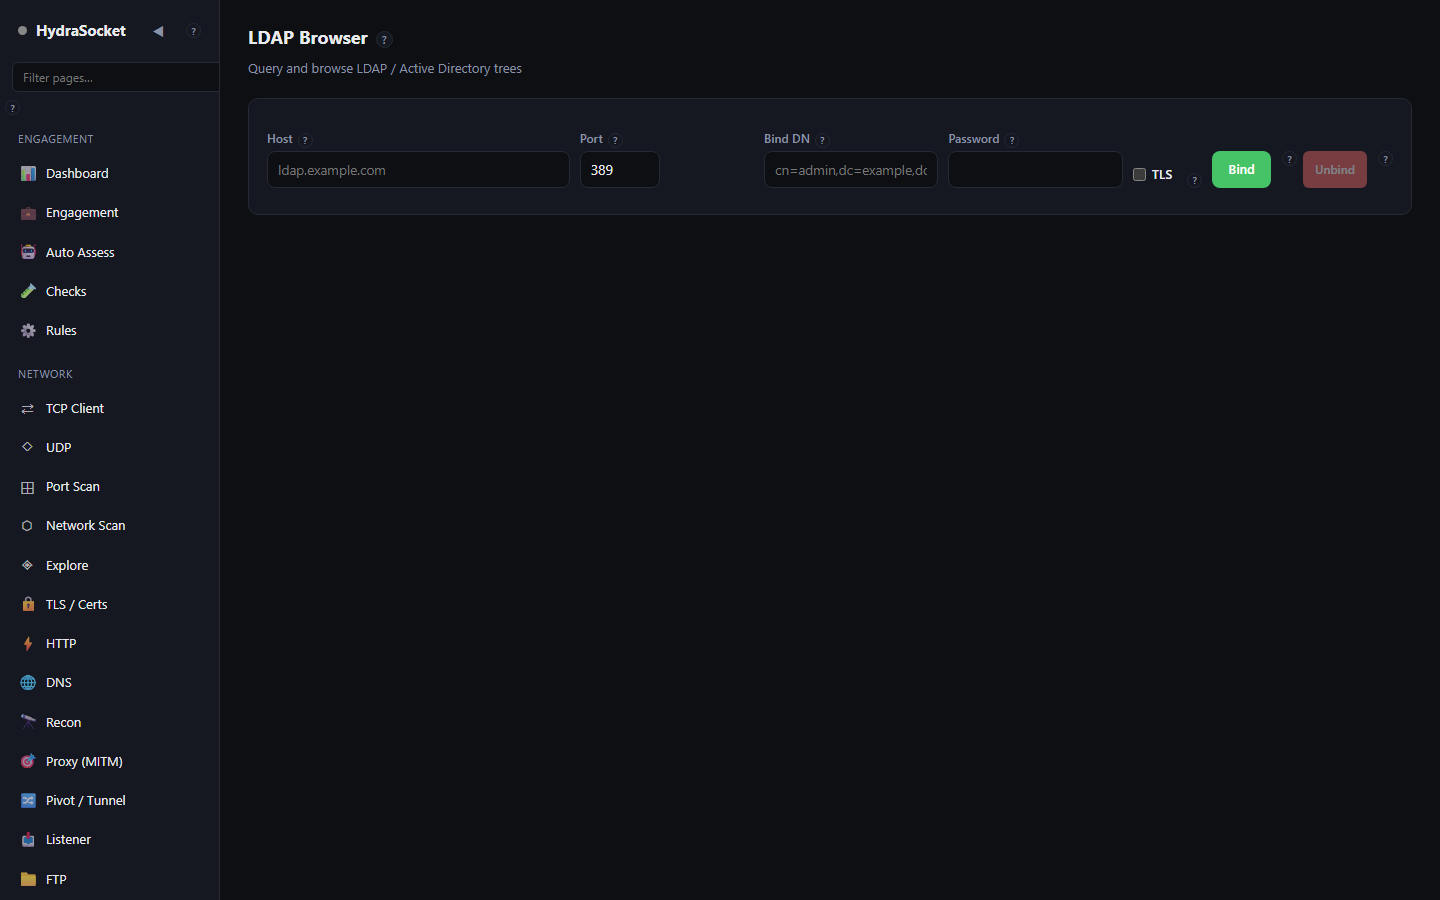
Query and browse LDAP / Active Directory trees

HydraSocket screen

The LDAP Browser binds to an LDAP or Active Directory server and searches the directory tree.

How to use

  1. Enter the Host and Port (389 for plain LDAP, 636 for LDAPS).
  2. Set the Bind DN (for example cn=admin,dc=example,dc=com) and its Password; tick TLS for LDAPS. Click Bind.
  3. Under Search, set a Base DN, an LDAP Filter (for example (objectClass=user)) and a Scope, then click Search.

Tip

  • Scope base reads a single entry, one level reads direct children, and subtree walks everything beneath the base DN.
Controls on this page 11
ControlWhat it does
HostLDAP / Active Directory server host.
PortLDAP port (389 plain, 636 for LDAPS).
Bind DNDistinguished name to bind (authenticate) as (e.g. cn=admin,dc=example,dc=com).
PasswordPassword for the bind DN.
TLSUse LDAPS (LDAP over TLS).
BindBind to the directory.
UnbindUnbind from the directory.
Base DNBase DN to search under (e.g. dc=example,dc=com).
FilterLDAP search filter (e.g. (objectClass=user)).
ScopeHow deep to search: base, one level, or the whole subtree.
SearchRun the search.

πŸ“‘SNMP

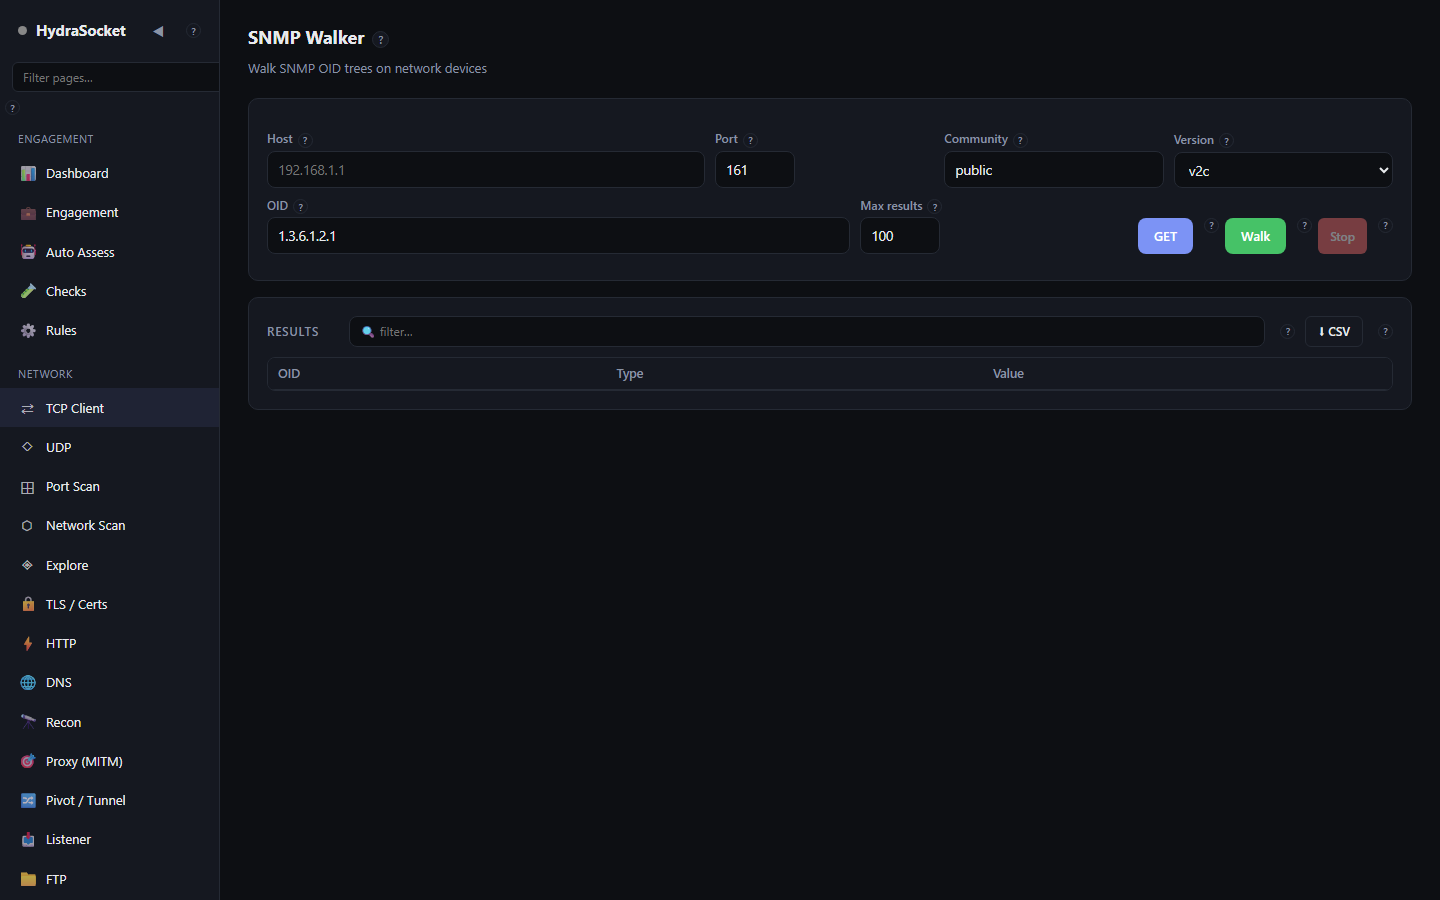
Walk SNMP OID trees on network devices

HydraSocket screen

The SNMP Walker reads management data from network devices by walking OID trees.

How to use

  1. Enter the Host and Port (usually 161), a Community string (for example public) and the Version.
  2. Set a starting OID (for example 1.3.6.1.2.1 for MIB-2) and a Max results cap.
  3. Click GET for a single OID or Walk to read the whole subtree. Use Stop to end a long walk.
  4. Filter the results and export them as CSV.
Controls on this page 11
ControlWhat it does
HostDevice to query.
PortSNMP port (usually 161).
CommunityCommunity string (e.g. public).
VersionSNMP version (v1, v2c).
OIDStarting OID (e.g. 1.3.6.1.2.1 for MIB-2).
Max resultsCap on the number of results returned from a walk.
GETFetch the single OID.
WalkWalk the subtree under the OID.
StopStop the walk.
πŸ” filter…Filter the OID results.
⬇ CSVExport the results as CSV.

Data

Connect to databases and object storage.

⊟Databases

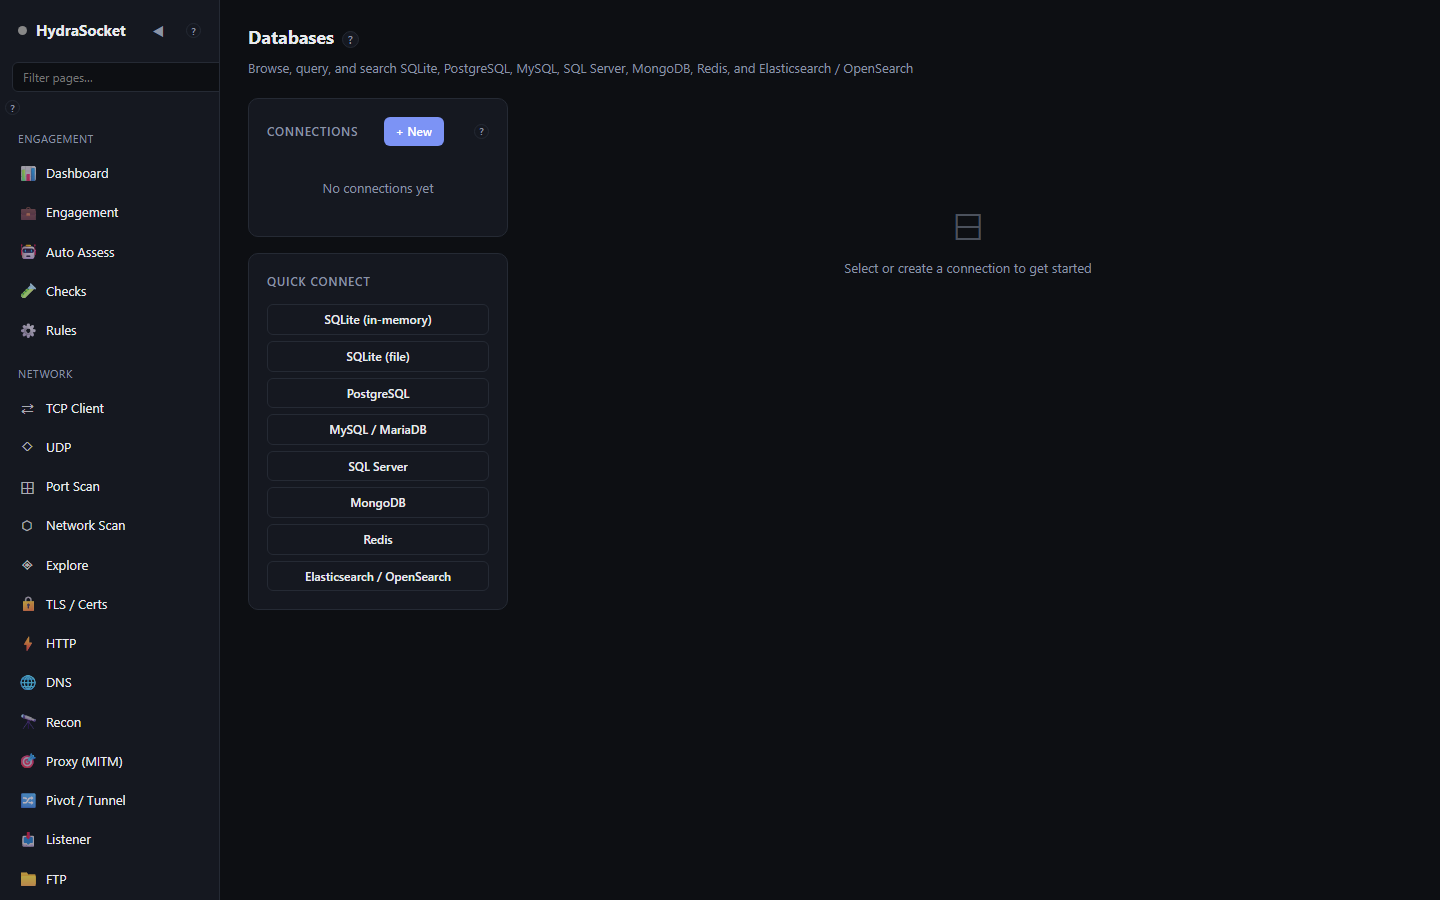
Browse, query, and search SQLite, PostgreSQL, MySQL, SQL Server, MongoDB, Redis, and Elasticsearch / OpenSearch

Connections & new connection

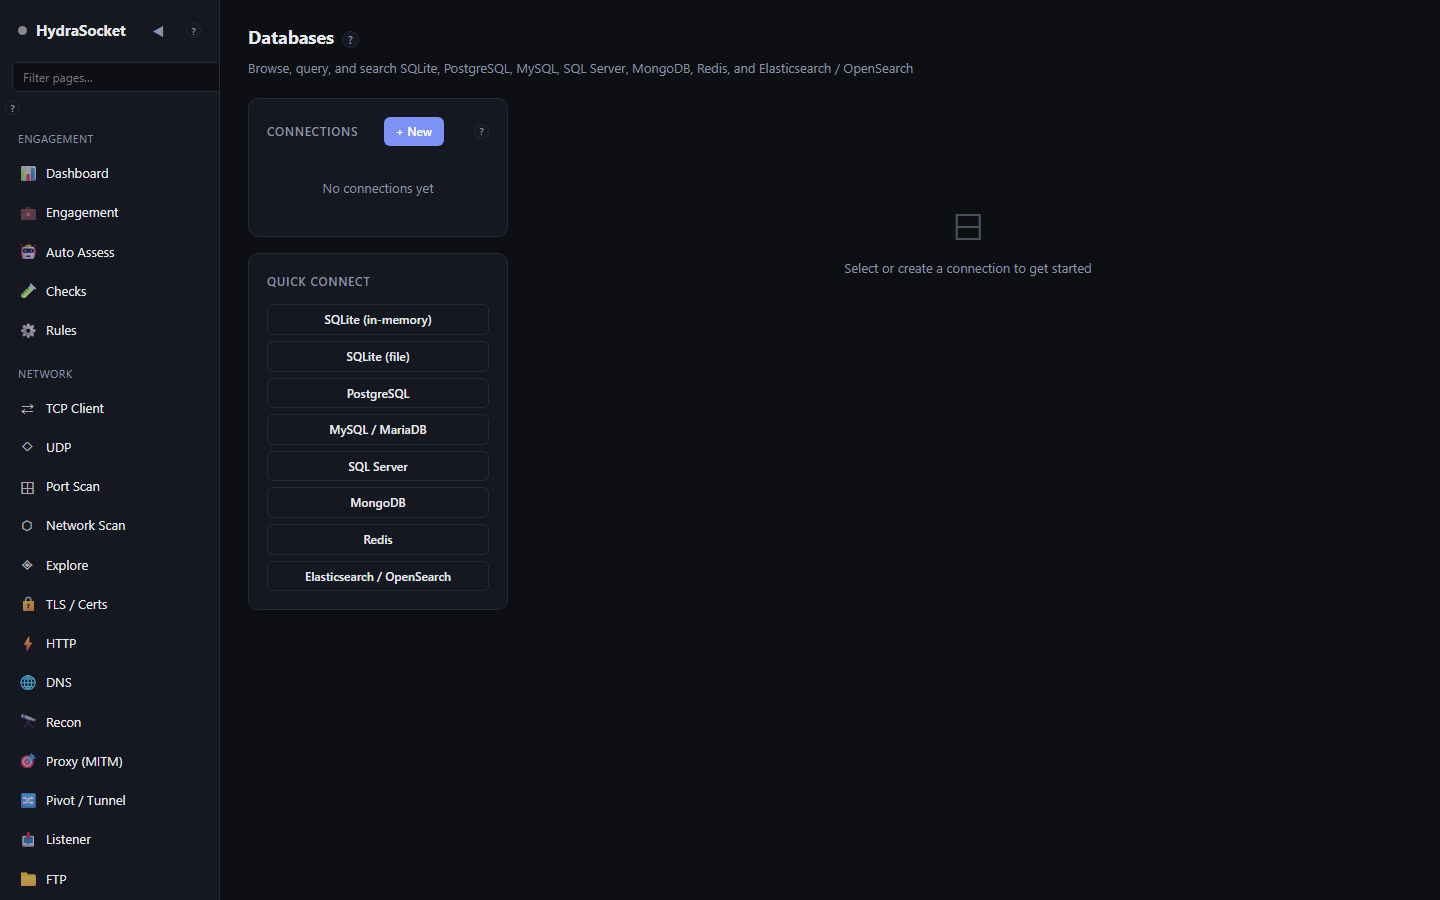
The Databases page connects to SQLite, PostgreSQL, MySQL/MariaDB, SQL Server, MongoDB, Redis and Elasticsearch/OpenSearch, then lets you browse objects, page through rows and run queries. Connections are saved locally for reuse.

How to use

  1. Click New, or use a Quick connect shortcut for a common engine.
  2. Pick a Driver; the form changes to match it. Fill in host, port, user, password and database β€” or paste a full Connection URL, which overrides the individual fields.
  3. For TLS, tick SSL, and Trust cert if the certificate is self-signed.
  4. Click Test connection to validate, then Save & connect.
  5. Use the object list to Browse tables/collections, or switch to Query, write SQL (or the engine's own command syntax for Mongo/Redis) in the editor, and click Run query.
  6. Page through results with Prev / Next, and filter rows with the row filter boxes.

Tips

  • SQLite accepts :memory: for a throwaway in-memory database.
  • Redis uses a numeric DB number; Elasticsearch can authenticate with an API key instead of user/password.

Every tab

Query
Query
Controls on this page 31
ControlWhat it does
+ NewStart a new database connection form.
βœ•Close the connection form without saving.
Connection nameA label for this saved connection.
DriverDatabase engine to connect with. The fields below change to match the driver.
File path (or :memory:)Path to the database file. Use :memory: for a throwaway in-memory SQLite database.
HostDatabase server hostname or IP.
PortDatabase server port.
UserUsername to authenticate with.
PasswordPassword to authenticate with.
DatabaseName of the database/schema to open on connect.
Use SSL/TLSConnect over TLS/SSL.
Trust server certificate (allow self-signed)Accept the server's certificate even if it can't be verified (self-signed or unknown CA).
Connection URL (overrides host/port if set)Full connection URL. If set, it overrides the host/port/user fields above.
DB numberRedis logical database number (0–15 by default).
API key (optional β€” used instead of user/password)API key for engines that use one (e.g. Elasticsearch) instead of a username and password.
Test connectionTry the connection without saving it, to check the settings.
Save & connectSave this connection and connect to it.
DeleteDelete this saved connection.
⟳ RefreshReload the list of tables, collections and other objects.
EditEdit the current connection's settings.
DisconnectClose the database connection.
filter objects…Filter the object list (tables, collections, keys) by name.
πŸ” filter rows…Filter the rows currently shown in the Browse view.
β€Ή PrevShow the previous page of rows.
Next β€ΊShow the next page of rows.
Rows 50100250500How many rows to load per page.
SQLQuery to run against the connected database. For SQL engines this is SQL; for Mongo/Redis it is the engine's own command syntax.
Run queryExecute the query.
πŸ” filter rows…Filter the query result rows shown.
CopyCopy the selected cell's full value to the clipboard.
βœ•Close the cell viewer.

☁Cloud (S3)

Explore S3 and S3-compatible object storage (AWS, MinIO, Wasabi, Cloudflare R2, DigitalOcean Spaces)

HydraSocket screen

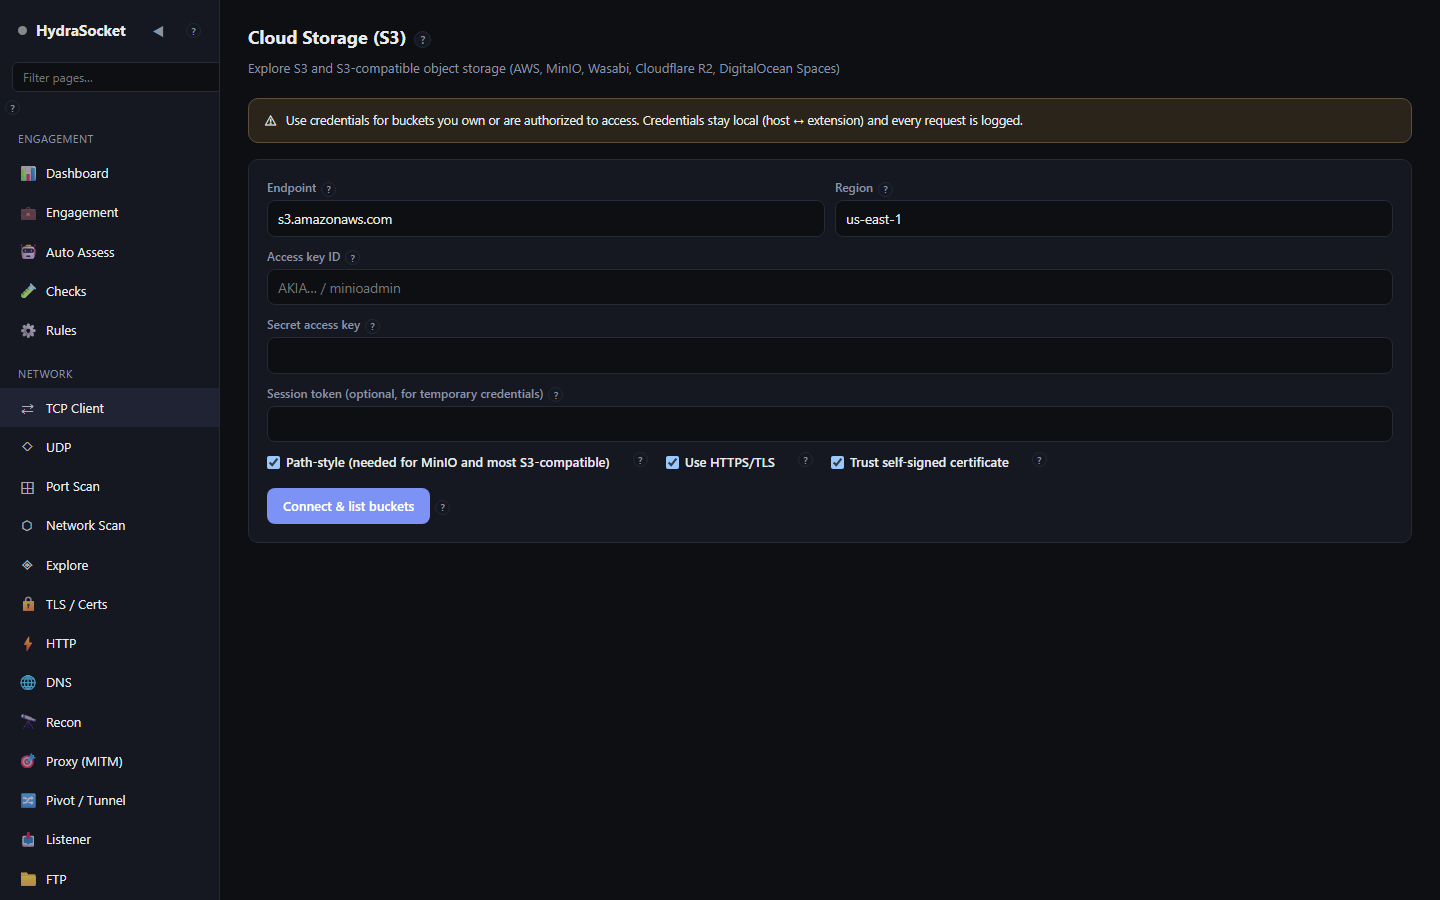
The Cloud (S3) page connects to Amazon S3 or any S3-compatible object store β€” MinIO, Wasabi, Cloudflare R2, DigitalOcean Spaces β€” and lets you list buckets and objects and preview or export their contents.

How to use

  1. Enter the Endpoint (s3.amazonaws.com for AWS, or host:port for a self-hosted store) and a Region.
  2. Provide the Access key ID and Secret access key. Add a Session token only for temporary STS credentials.
  3. Tick Path-style for stores like MinIO that require it, SSL for HTTPS, and Trust cert for self-signed endpoints.
  4. Click Connect & list buckets, then browse into a bucket. Use Load more to page through large listings.
  5. Preview an object's content inline, or use CSV to export the listing.

Tips

  • If a connection to AWS fails, check the region first β€” it is the most common mistake.
  • Path-style vs. virtual-hosted addressing is the usual culprit when a compatible store will not list.
Controls on this page 15
ControlWhat it does
EndpointS3 endpoint host. Use s3.amazonaws.com for AWS, or host:port for MinIO and other compatible stores.
RegionRegion to address the bucket in (e.g. us-east-1).
Access key IDAccess key ID.
Secret access keySecret access key.
Session token (optional, for temporary credentials)Session token, only for temporary (STS) credentials.
Path-style (needed for MinIO and most S3-compatible)Use path-style URLs (host/bucket) instead of virtual-hosted (bucket.host). Required by many S3-compatible stores like MinIO.
Use HTTPS/TLSConnect over HTTPS.
Trust self-signed certificateAccept the endpoint's certificate even if it can't be verified.
Connect & list bucketsConnect and list the buckets you can see.
⟳ RefreshReload the current bucket listing.
⬇ CSVExport the current object listing as CSV.
DisconnectClose the S3 session.
Load moreLoad the next page of objects.
CopyCopy the previewed object's content.
βœ•Close the object preview.

Analysis

Review, correlate and visualise what the other tools discovered.

πŸ“‹Findings

Aggregated view of all discoveries β€” open ports, vulnerabilities, secrets, headers issues

HydraSocket screen

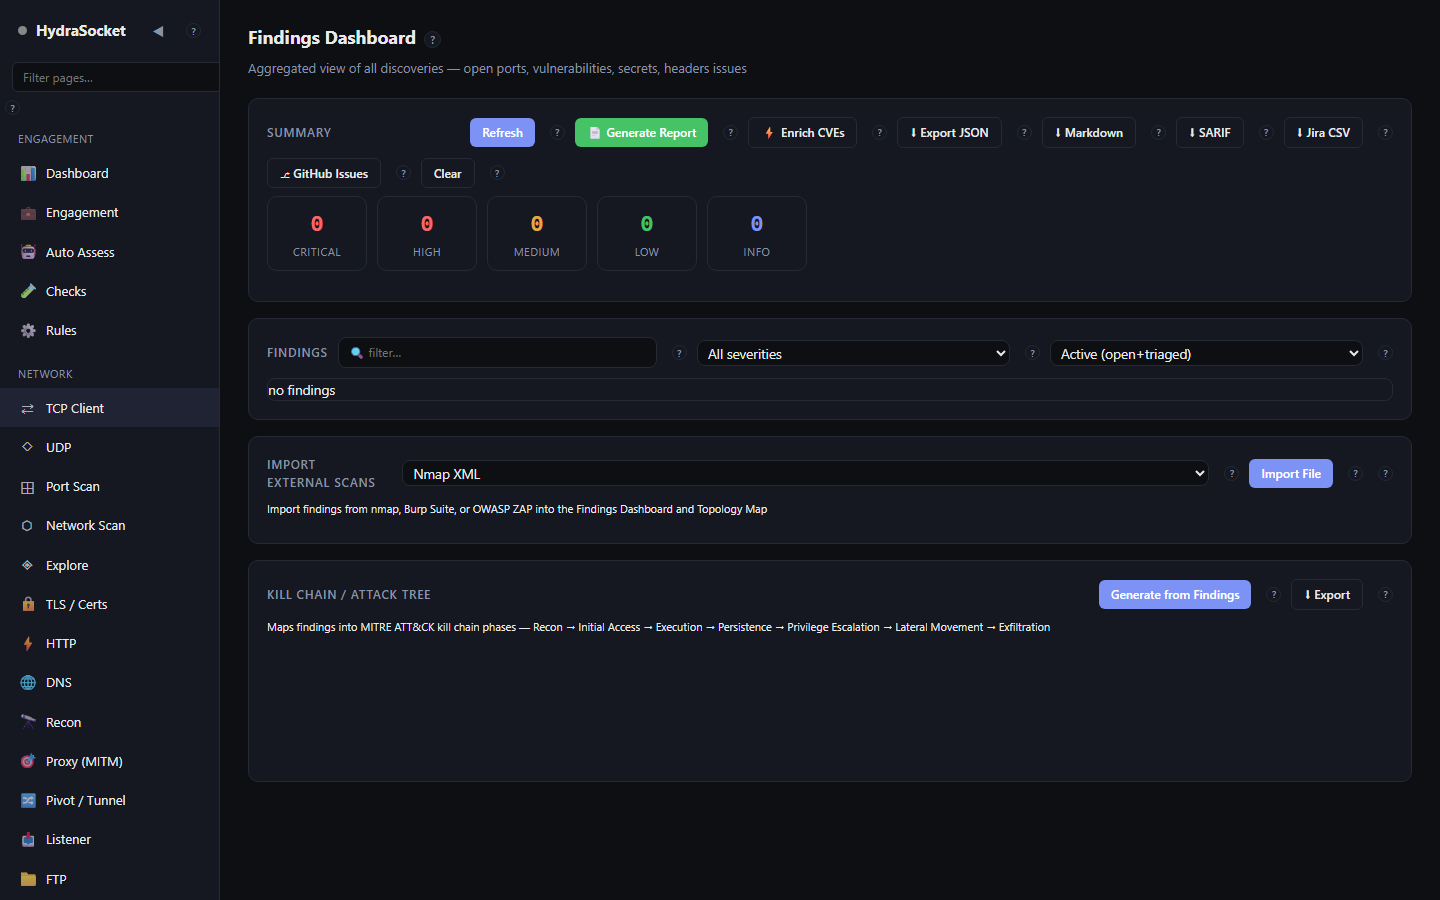
The Findings Dashboard is the central record of everything the toolkit has discovered β€” open ports, vulnerabilities, exposed secrets and header issues. From here you triage, enrich and export results.

How to use

  1. Use the filter box and the severity and status dropdowns to narrow the list.
  2. Enrich CVEs looks up detail for findings that reference a product and version.
  3. Generate Report produces a formatted deliverable; the Export buttons output JSON, Markdown, SARIF, Jira CSV or create GitHub Issues.
  4. Import External Scans pulls in results from other tools β€” choose the format and import the file.
  5. Kill Chain / Attack Tree builds a chained view from the current findings to show how they combine.

Tip

  • SARIF output drops straight into code-scanning dashboards; Jira CSV and GitHub Issues feed ticketing β€” pick whichever matches the client's workflow.
Controls on this page 17
ControlWhat it does
RefreshReload the findings list.
πŸ“„ Generate ReportGenerate a formatted report from the findings.
⚑ Enrich CVEsLook up CVE details for findings that reference products/versions.
⬇ Export JSONExport findings as JSON.
⬇ MarkdownExport findings as Markdown.
⬇ SARIFExport findings as SARIF (for code-scanning tools).
⬇ Jira CSVExport findings as a Jira-importable CSV.
βŽ‡ GitHub IssuesCreate GitHub issues from the findings.
ClearDelete all findings.
πŸ” filter…Filter findings by text.
Findings SevFilter findings by severity.
Findings StatusFilter findings by status.
Import FormatFormat of the external scan file you are importing.
Import FileImport the chosen scan file into findings.
Import FileChoose a scan file to import.
Generate from FindingsBuild a kill-chain / attack-tree view from the current findings.
⬇ ExportExport the kill-chain view.

πŸ—ΊTopology

Visual map of discovered hosts and their connections

HydraSocket screen

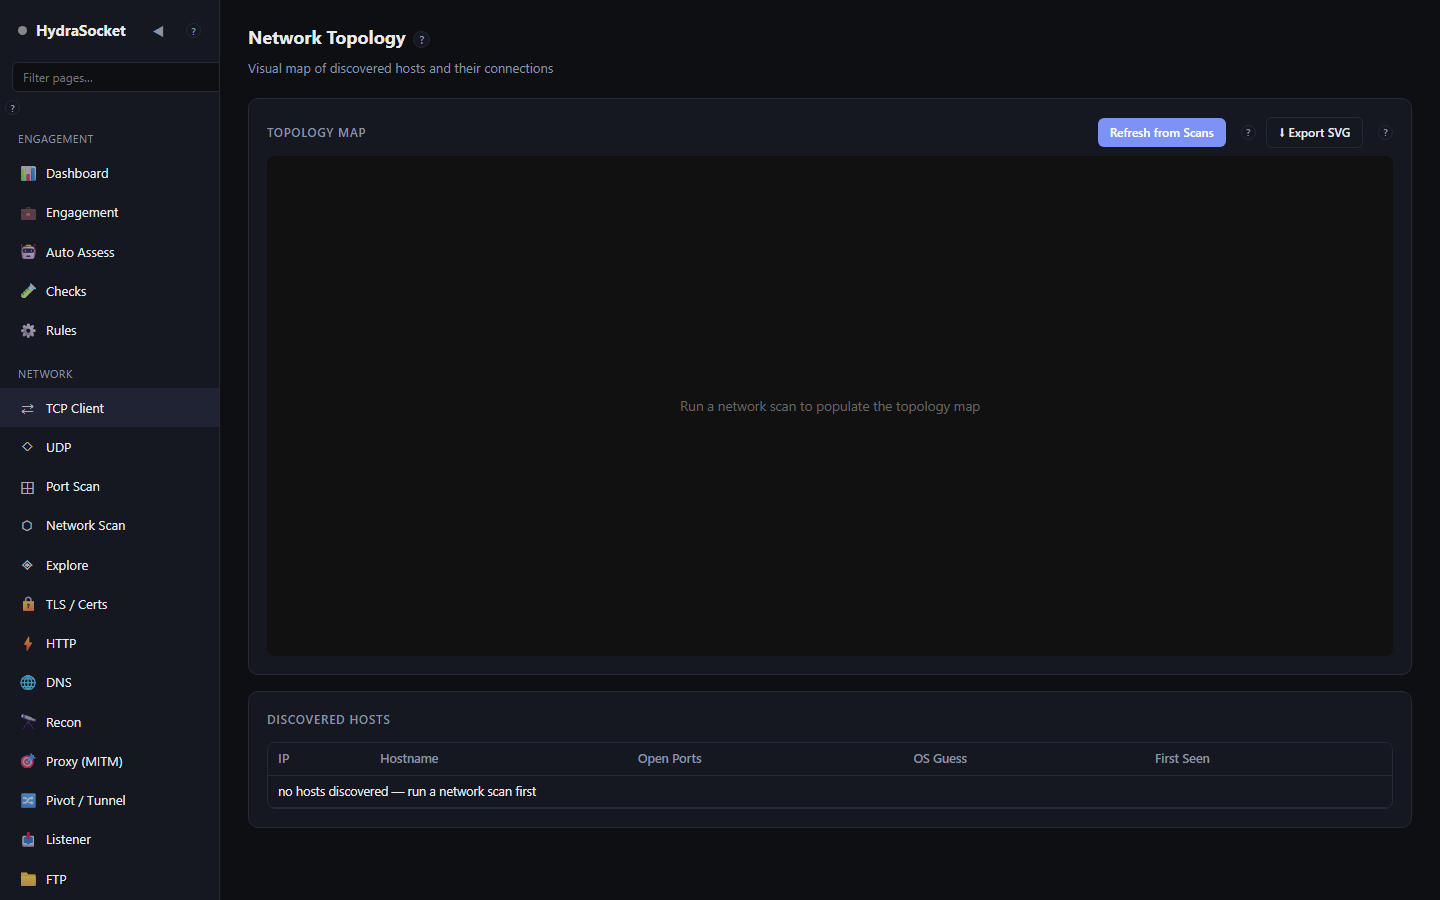
Network Topology draws a visual map of the hosts you have discovered and the connections between them, built from your scan data.

How to use

  1. Run scans so there is data to map.
  2. Click Refresh from Scans to (re)build the map.
  3. Use Export SVG to save the diagram for a report.

Tip

  • The Discovered Hosts list beside the map is a quick index into what the diagram shows.
Controls on this page 2
ControlWhat it does
Refresh from ScansRebuild the map from your latest scan data.
⬇ Export SVGExport the topology map as an SVG image.

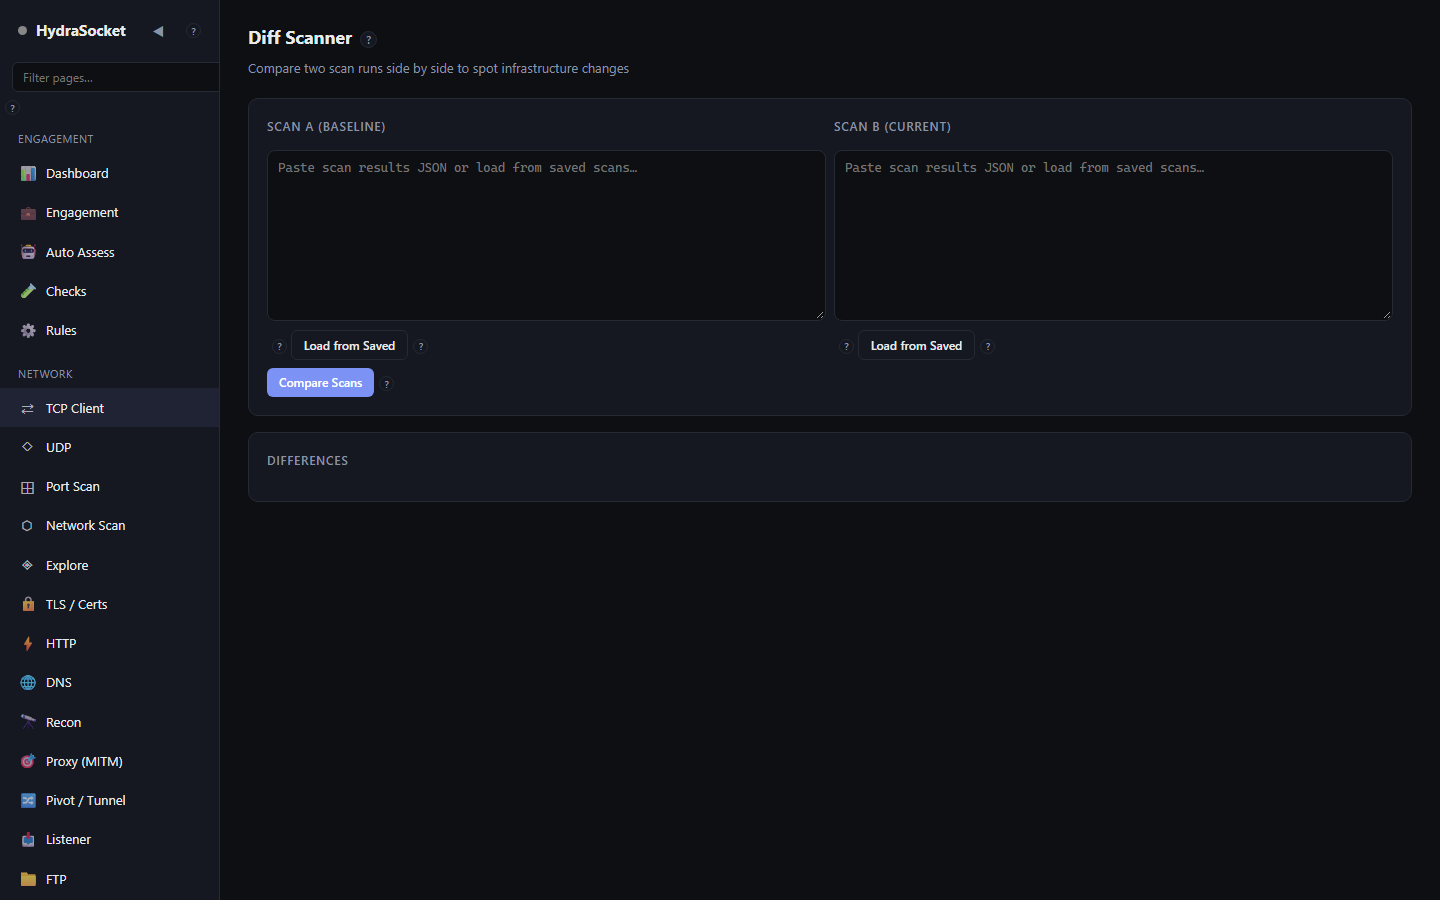
⇔Diff Scanner

Compare two scan runs side by side to spot infrastructure changes

HydraSocket screen

The Diff Scanner compares two scan runs side by side so you can spot infrastructure changes β€” new or closed ports, new hosts and changed services β€” between a baseline and a later scan.

How to use

  1. Put the earlier run in Scan A (Baseline) β€” paste results JSON or click Load from Saved.
  2. Put the later run in Scan B (Current) the same way.
  3. Click Compare Scans. The Differences panel highlights what changed.

Good for

  • Re-tests β€” showing exactly what moved since the last assessment.
  • Change monitoring β€” catching a newly exposed service.
Controls on this page 5
ControlWhat it does
Paste scan results JSON or load from saved scans…Baseline scan β€” paste results JSON or load a saved scan.
Load from SavedLoad a saved scan into the baseline.
Paste scan results JSON or load from saved scans…Current scan β€” paste results JSON or load a saved scan.
Load from SavedLoad a saved scan into the current side.
Compare ScansCompare the two scans and list the differences.

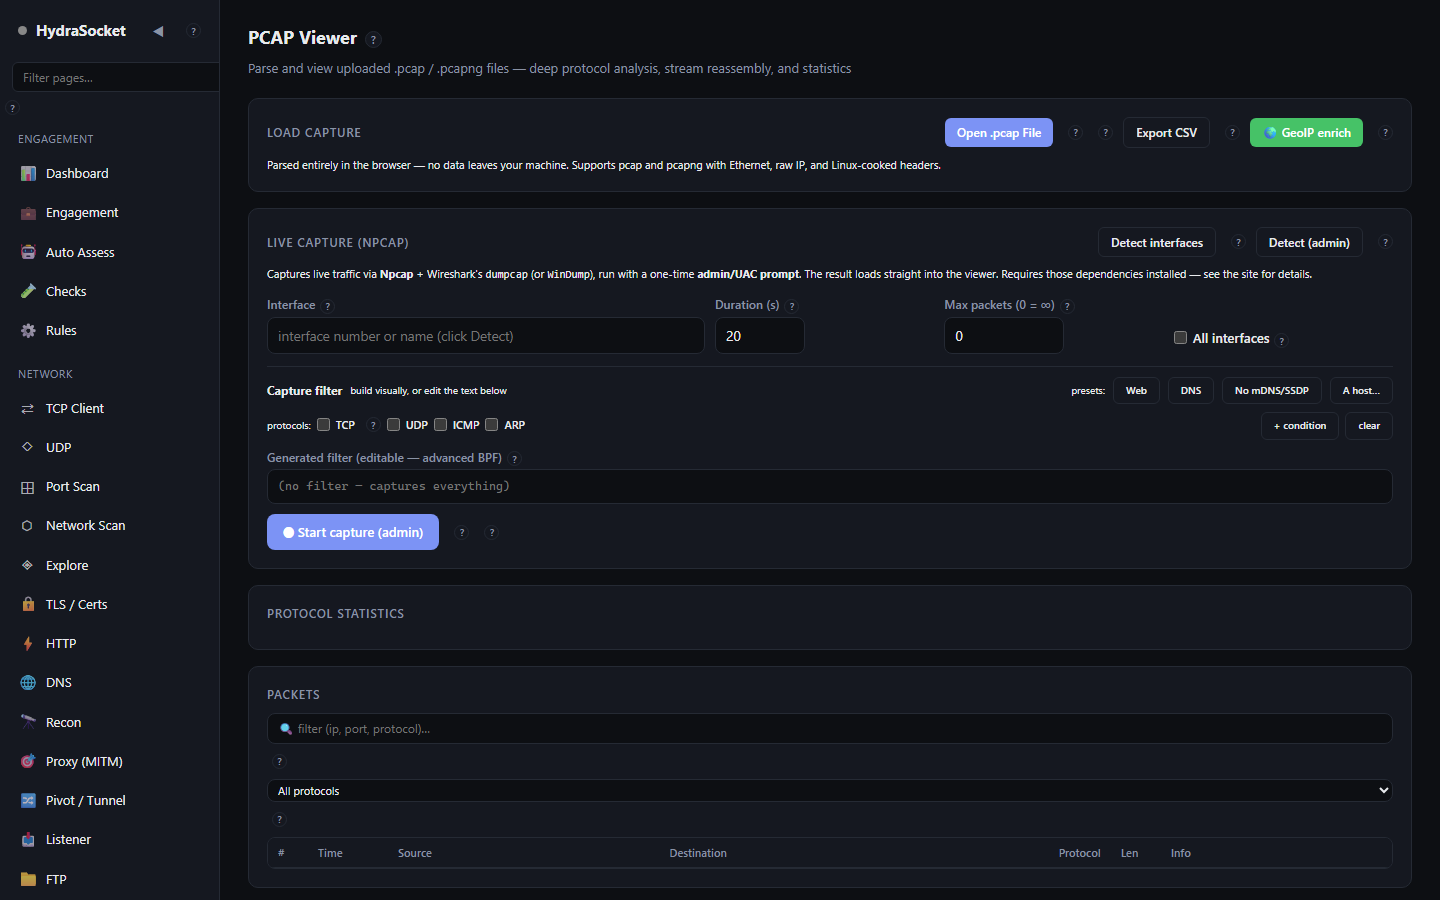
πŸ“¦PCAP Viewer

Parse and view uploaded .pcap / .pcapng files β€” deep protocol analysis, stream reassembly, and statistics

HydraSocket screen

The PCAP Viewer loads a capture file (or captures live with Npcap) and analyses it: per-protocol statistics, packet detail, hex, reassembled TCP streams, DNS and HTTP views, conversations and a geographic map of traffic.

Loading a capture

  1. Click Open .pcap File and choose a .pcap or .pcapng file.
  2. Explore with the panels: Protocol Statistics, Packets (filter by ip/port/protocol), Packet Detail, Hex Dump, Conversations, DNS Queries, HTTP Requests and TCP Streams.
  3. GeoIP enrich adds location data for the IPs; Export CSV saves the packet list.

Live capture (Npcap)

  1. Click Detect interfaces (use the admin variant to see them all) and set the Interface.
  2. Set a Duration and Max packets, build a filter with the condition buttons, or edit the Generated filter directly as BPF.
  3. Click Start capture (requires admin) and Save capture when done.

Live packet capture needs elevated privileges and records real traffic. Capture only on networks you are authorized to monitor.

Controls on this page 19
ControlWhat it does
Open .pcap FileOpen a .pcap / .pcapng file to analyse.
Pcap FileChoose a capture file.
Export CSVExport the packet list as CSV.
🌍 GeoIP enrichAdd geographic location data for the IPs in the capture.
Detect interfacesList the capture interfaces available.
Detect (admin)List interfaces with elevated privileges (needed to see all of them).
InterfaceInterface to capture on β€” its number or name from Detect.
Duration (s)How long to capture, in seconds.
Max packets (0 = ∞)Stop after this many packets. 0 means no limit.
All interfacesCapture everything, ignoring the generated filter.
+ conditionAdd a filter condition.
clearClear the filter conditions.
Generated filter (editable β€” advanced BPF)The capture filter in BPF syntax. Editable for advanced filters.
⬀ Start capture (admin)Start the live capture (requires admin privileges).
⬇ Save captureSave the live capture to a file.
πŸ” filter (ip, port, protocol)…Filter the packet list by ip, port or protocol.
Generated filter (editable β€” advanced BPF)Show only packets of the selected protocol.
Scan Selected IPPort-scan the IP selected in the conversations list.
Generated filter (editable β€” advanced BPF)Pick a reassembled TCP stream to view.

Tools

Standalone utilities for encoding, credentials, and targeted web tests.

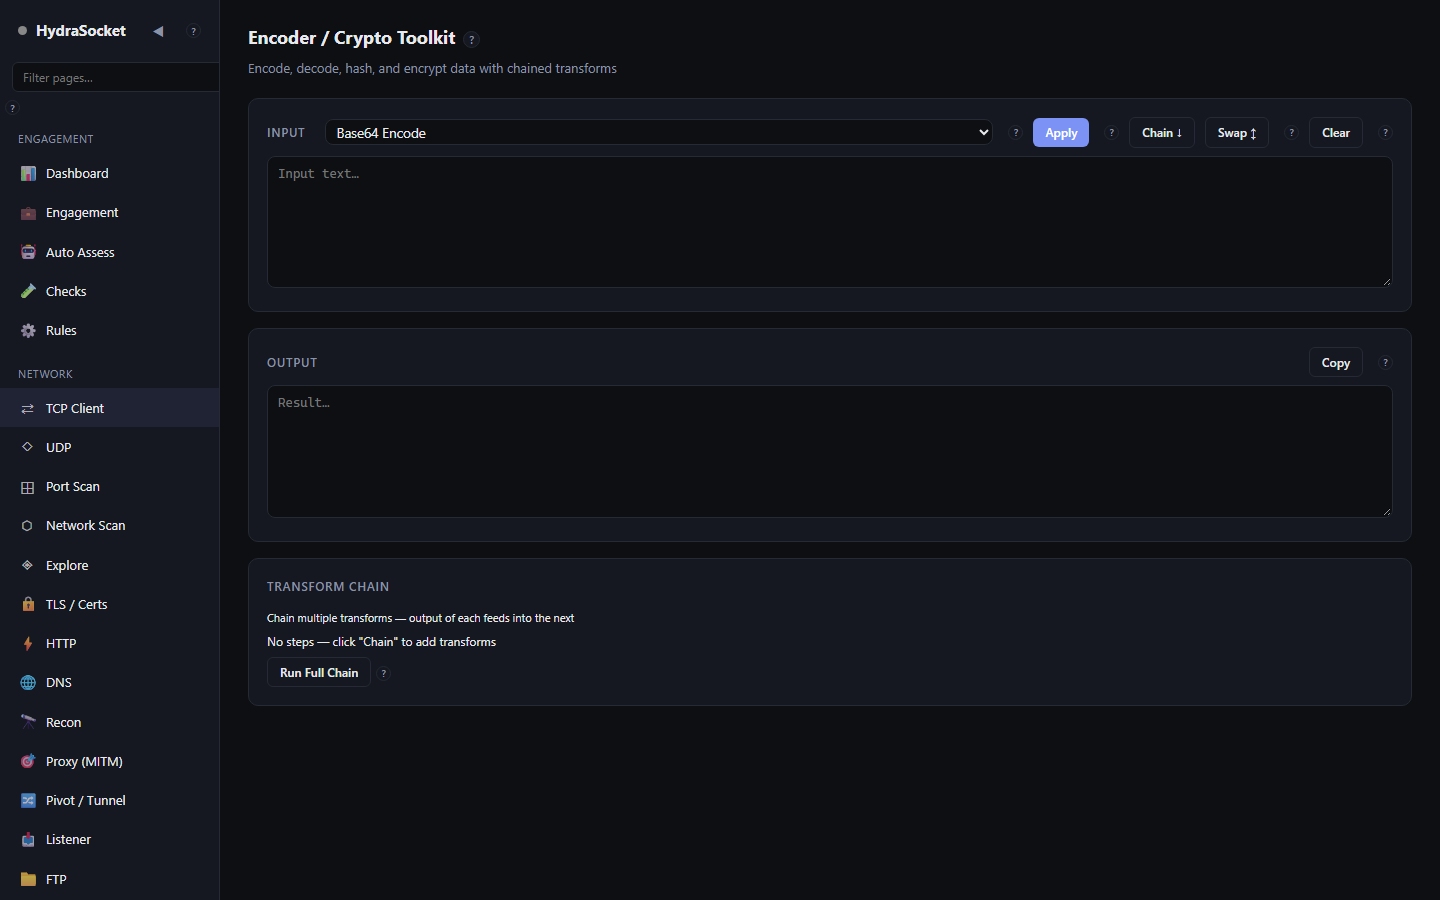
πŸ”£Encoder / Crypto

Encode, decode, hash, and encrypt data with chained transforms

HydraSocket screen

The Encoder / Crypto Toolkit encodes, decodes, hashes and encrypts data, and can chain several transforms so the output of one feeds the next.

How to use

  1. Type or paste into Input.
  2. Pick a Transform and click Apply to run it once, or Chain to add it as the next step in a pipeline.
  3. For transforms that need one, supply a Key / Passphrase.
  4. Build up the Transform Chain, then click Run Full Chain. Use Swap to move output back to input, and Copy to grab the result.

Tip

  • Chaining is ideal for layered encodings β€” for example URL-decode, then Base64-decode, then pretty-print.
Controls on this page 10
ControlWhat it does
Enc TransformTransform to apply (encode, decode, hash, encrypt, etc.).
ApplyApply the selected transform to the input.
Chain ↓Add the selected transform as the next step in the chain.
Swap ↕Swap the input and output.
ClearClear the input and output.
Key / Passphrase:Key or passphrase, for transforms that need one.
Input text…Text to transform.
CopyCopy the output.
Result…Transformed result.
Run Full ChainRun every step in the transform chain over the input.

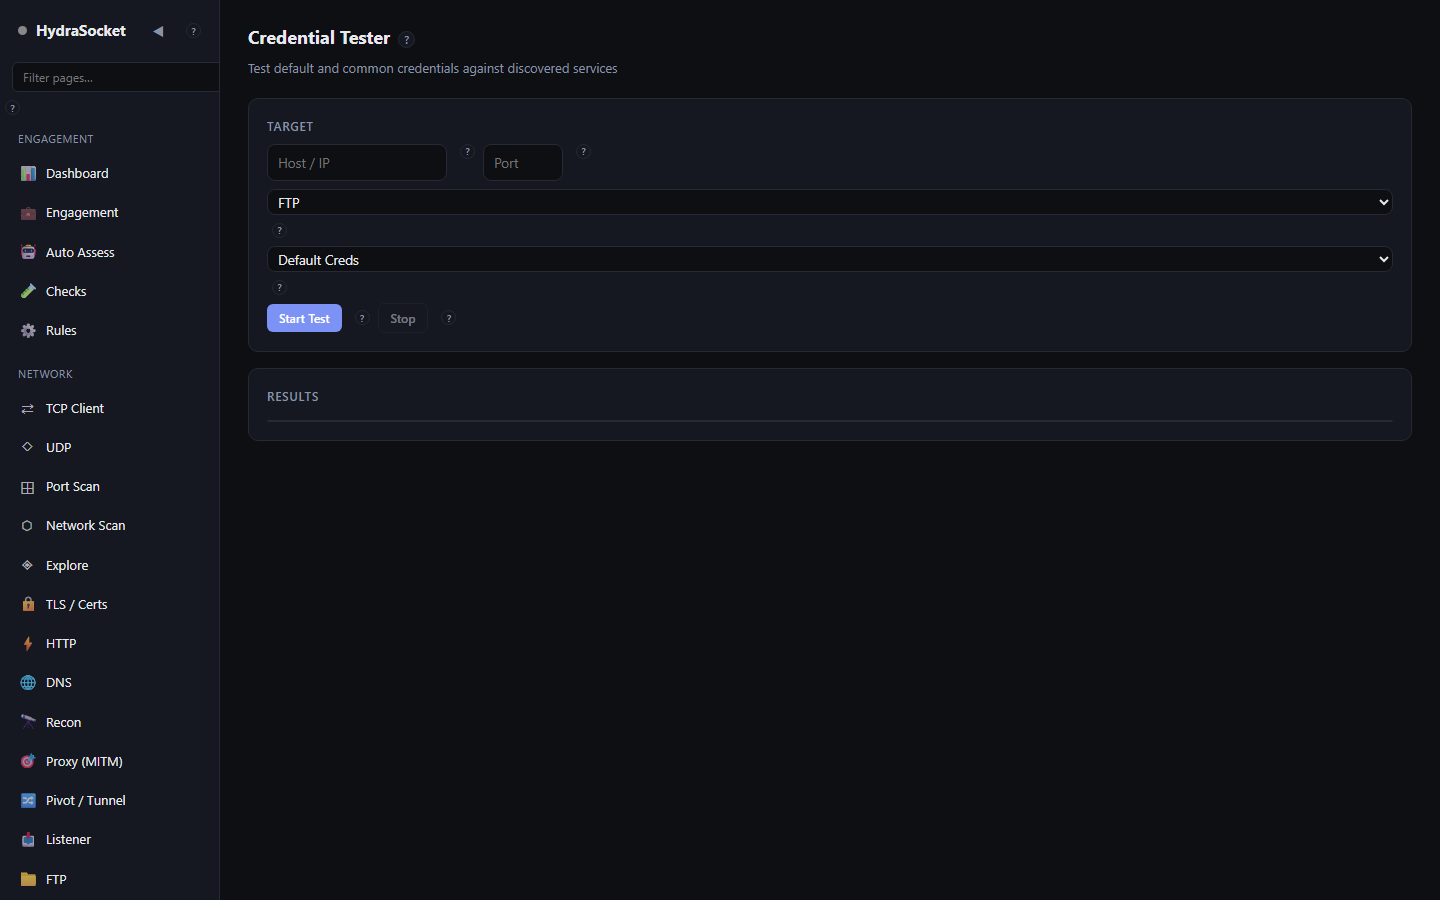
πŸ”‘Credential Tester

Test default and common credentials against discovered services

HydraSocket screen

The Credential Tester checks default and common credentials against a discovered service, to find accounts that were never changed from their shipped defaults.

How to use

  1. Enter the Host and Port and choose the Protocol / service.
  2. Pick a built-in Wordlist, or paste your own user:password pairs (one per line) into the custom list.
  3. Click Start Test. Successful logins appear under Results; use Stop to end early.

This tool actively attempts logins and can lock accounts out. Run it only against services you are authorized to test, and mind account-lockout policies.

Controls on this page 7
ControlWhat it does
Host / IPHost of the service to test credentials against.
PortService port.
Cred ProtoService/protocol to authenticate against.
Cred WordlistBuilt-in credential list to try.
user:password (one per line)Your own credentials, one user:password per line.
Start TestStart testing the credentials.
StopStop the test.

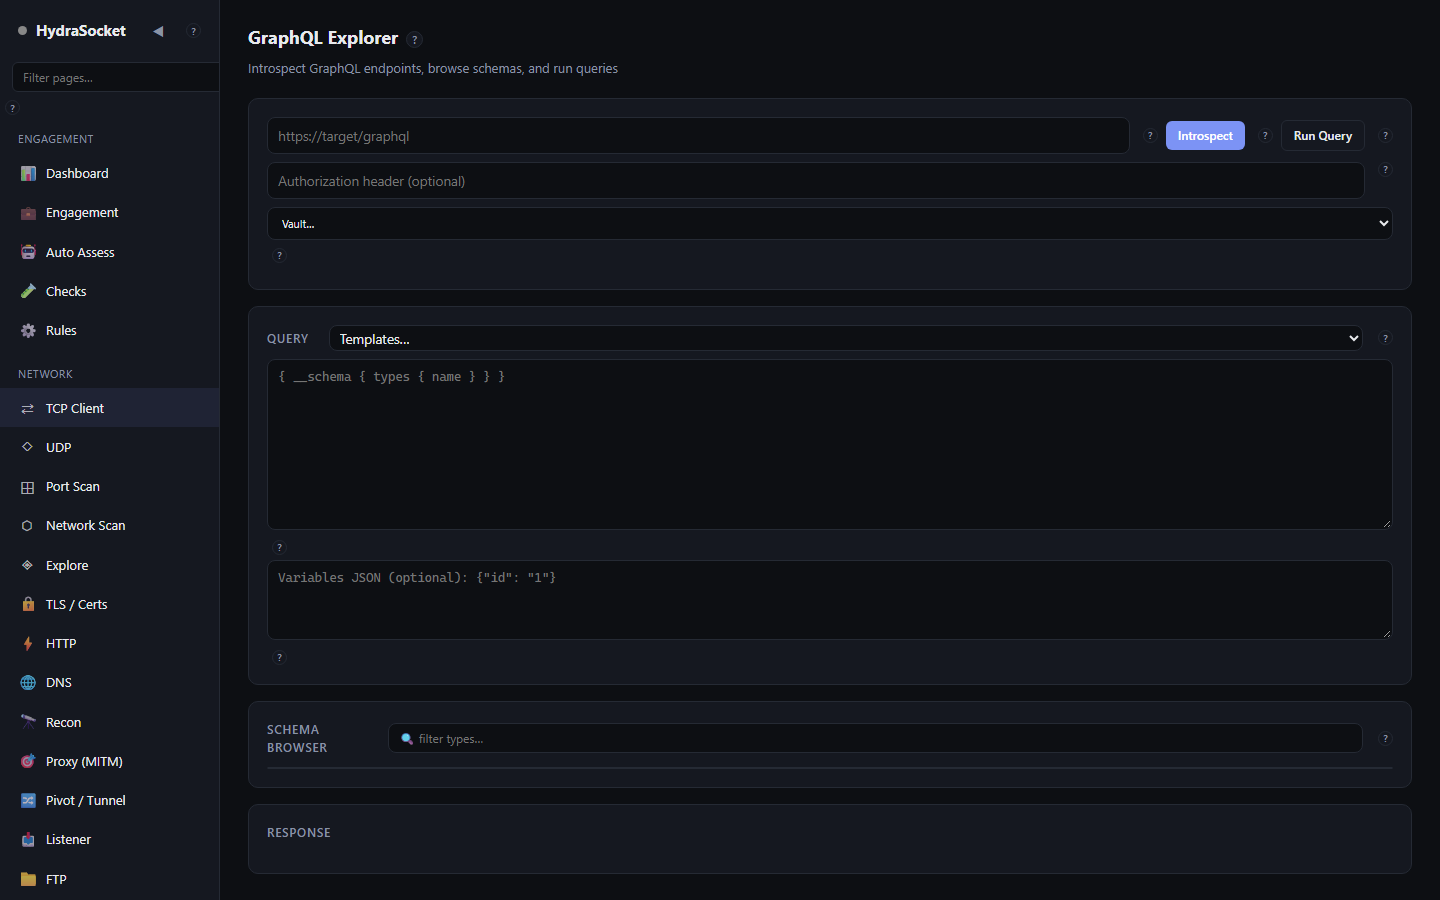
β—†GraphQL

Introspect GraphQL endpoints, browse schemas, and run queries

HydraSocket screen

The GraphQL Explorer introspects a GraphQL endpoint, browses its schema and runs queries with variables.

How to use

  1. Enter the endpoint URL and, if needed, an Authorization header (or fill it from the vault).
  2. Click Introspect to pull the schema; browse types in the Schema Browser and filter them.
  3. Write a query (or insert a Template) in the Query box, add Variables as JSON, and click Run Query.

Tip

  • If full introspection is disabled, the templates for listing types and fields can still tease out parts of the schema.
Controls on this page 9
ControlWhat it does
https://target/graphqlGraphQL endpoint URL.
IntrospectRun an introspection query to pull the schema.
Run QueryRun the query in the editor.
Authorization header (optional)Optional Authorization header to send with the query.
Gql VaultFill the auth header from the shared vault.
Gql TemplatesInsert a ready-made query.
{ __schema { types { name } } }The GraphQL query to run.
Gql VarsVariables for the query, as JSON.
πŸ” filter types…Filter the schema types.

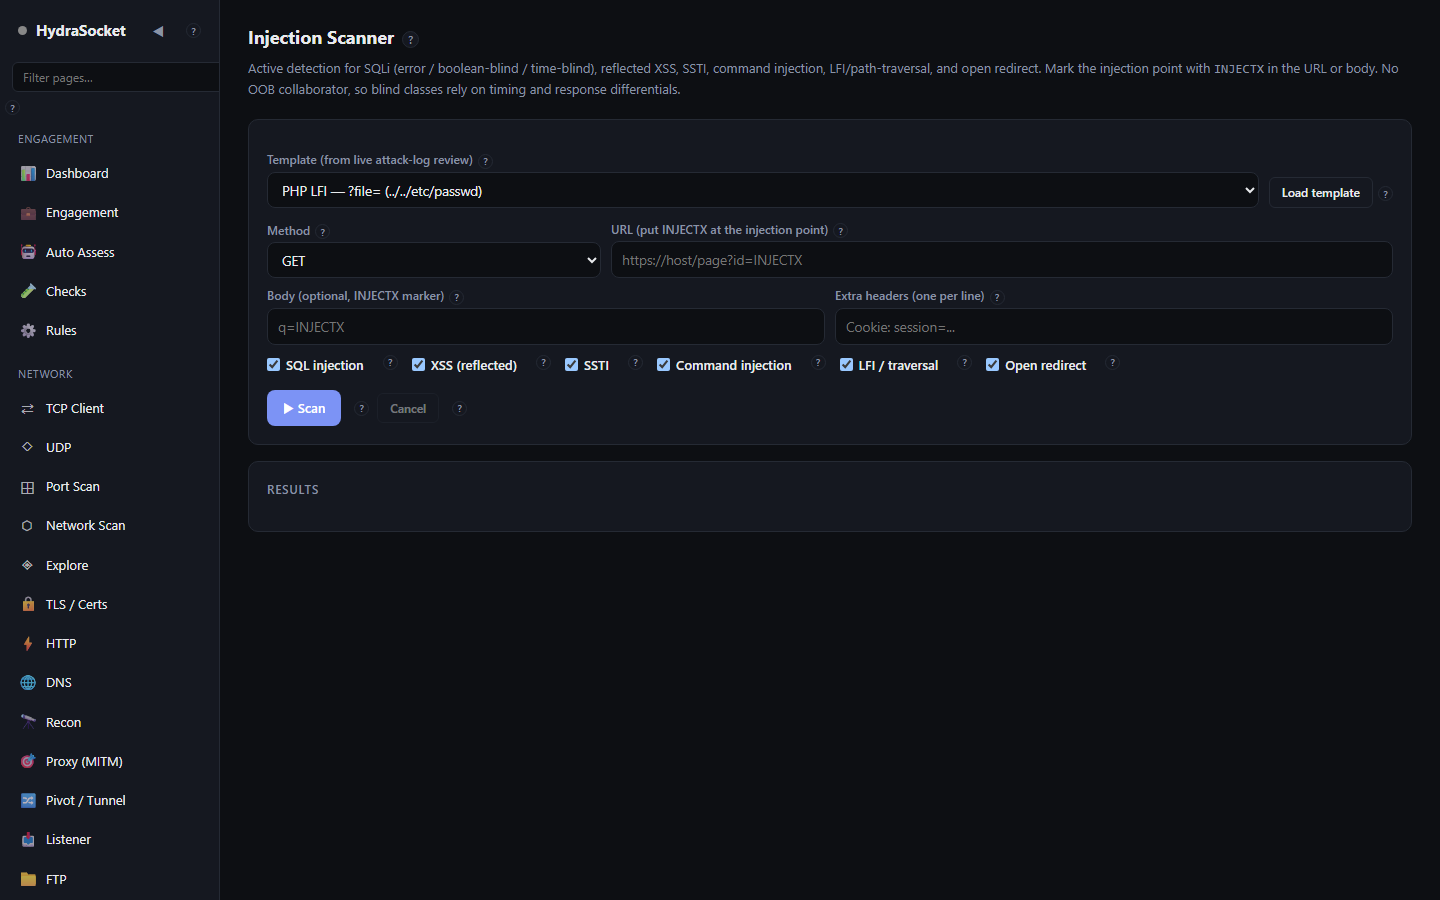
πŸ’‰Injection Scanner

Active detection for SQLi (error / boolean-blind / time-blind), reflected XSS, SSTI, command injection, LFI/path-traversal, and open redirect. Mark the injection point with INJECTX in the URL or body. No OOB collaborator, so blind classes rely on timing and response differentials.

HydraSocket screen

The Injection Scanner actively tests one request for injection flaws: SQL injection (error, boolean-blind and time-blind), reflected XSS, server-side template injection, OS command injection, local file inclusion / path traversal and open redirect. You mark where payloads go with the marker INJECTX.

How to use

  1. Choose a Method and enter a URL, placing INJECTX at the point to test, for example https://host/page?id=INJECTX.
  2. If testing a body or a header, put INJECTX there too, and add any extra headers (such as a session cookie) one per line.
  3. Tick the vulnerability classes to test: SQLi, XSS, SSTI, Cmd, LFI, Redirect.
  4. Click Scan. Confirmed issues appear under Results and flow into Findings.

Tip

  • You can load a request template captured during attack-log review, so the scan reuses a real, working request rather than one you build by hand.

This is an active scanner that sends real attack payloads. Only run it against applications you are explicitly authorized to test.

Controls on this page 14
ControlWhat it does
Template (from live attack-log review)Load a request template captured from earlier attack-log review.
Load templateLoad the selected template into the fields.
MethodHTTP method for the test request.
URL (put INJECTX at the injection point)Target URL. Put the marker INJECTX where the payload should be inserted (e.g. ?id=INJECTX).
Body (optional, INJECTX marker)Optional request body; mark the injection point with INJECTX.
Extra headers (one per line)Extra headers to send, one per line.
SQL injectionTest for SQL injection (error-based, boolean-blind and time-blind).
XSS (reflected)Test for reflected cross-site scripting.
SSTITest for server-side template injection.
Command injectionTest for OS command injection.
LFI / traversalTest for local file inclusion / path traversal.
Open redirectTest for open redirects.
β–Ά ScanRun the selected injection tests against the marked point.
CancelStop the scan.

πŸ•΅Secrets Scanner

Fetch a page, crawl its linked JavaScript, and flag exposed API keys, tokens, and credentials with pattern matching. Matches are redacted (first4***last4) and recorded as findings.

HydraSocket screen

The Secrets Scanner fetches a page, crawls the JavaScript it links to, and flags exposed API keys, tokens and credentials by pattern. Matches are redacted (shown as first4***last4) and recorded as findings.

How to use

  1. Enter a Target URL.
  2. Set Max JS files to cap how many linked scripts it crawls.
  3. Click Scan. Anything that looks like a secret appears under Exposed secrets.

Tip

  • Front-end bundles are a common place for keys to leak β€” raising the JS-file cap finds secrets buried in large apps.
Controls on this page 3
ControlWhat it does
Target URLPage URL to fetch and scan, including its linked JavaScript.
Max JS filesMaximum number of linked JS files to crawl.
β–Ά ScanFetch, crawl and scan for exposed secrets.

System

Inspect the local machine and the host process itself.

πŸ›‘Attack Surface

What's exposed and risky on this machine β€” listening ports with owning process, secret scan, file hashing, network config

HydraSocket screen

Local Attack Surface examines this machine β€” the one running the host β€” to show what is exposed and risky: listening ports with their owning process, a secret/sensitive-file scan, file hashing and network configuration.

How to use

  • Listening ports β€” click Scan to list open local ports and the process that owns each one.
  • Secret & sensitive-file scan β€” enter an absolute directory path and click Scan to flag secrets and sensitive files under it.
  • File hash β€” enter a file path and click Hash to compute its hashes.
  • Network config β€” click Load to read this machine's interfaces, routes and DNS.

Good for

  • Checking your own testing box before and after an engagement.
  • Confirming nothing unexpected is listening on the host.
Controls on this page 7
ControlWhat it does
πŸ” filter…Filter the listening-ports list.
ScanList the ports this machine is listening on, with the owning process.
Directory to scan (absolute path)Absolute path of a directory to scan for secrets and sensitive files.
ScanScan the directory.
File pathPath of a file to hash.
HashCompute the file's hashes.
LoadLoad this machine's network configuration.

β–€Host Log

Real-time log stream from the native host

HydraSocket screen

The Host Log is a live stream of what the native host process is doing. It is the place to watch operations happen and to diagnose errors.

How to use

  • Lines stream in as the host works. Tick Auto-scroll to stay pinned to the newest line.
  • Click Clear to empty the view.

Tip

  • If an operation on another page fails silently, check here first β€” the underlying error is usually logged.
Controls on this page 2
ControlWhat it does
Auto-scrollKeep the log scrolled to the newest line.
ClearClear the log view.

βš™Config

Current host configuration (read from the native host on connect)

HydraSocket screen

The Configuration page shows the host settings read when the extension connects, and is where you manage webhooks, stored credentials, updates and the audit log.

Sections

  • Paths β€” the file locations the host uses.
  • Webhooks β€” add endpoints that automation rules and notifications can call.
  • Auth Vault β€” store credentials once and reuse them across the HTTP and GraphQL tools.
  • Updates β€” check for and download a newer version of the host/extension.
  • Audit Log β€” export a record of operations the host has performed.

Tip

  • Export the audit log at the end of an engagement β€” it documents exactly what was run and when.
Controls on this page 5
ControlWhat it does
+ Add WebhookAdd a webhook endpoint for notifications.
+ Add credentialStore a credential in the shared auth vault.
Check for UpdatesCheck whether a newer version of the host/extension is available.
Download UpdateDownload the available update.
Export Audit LogExport the audit log of operations performed.